English
 中文简体
中文简体
 русский
 Español
[Auto Accessories][email protected]
 How Should You Adjust Your Side Mirrors: A Complete Situation Guide

Jun 22, 2026
Most drivers adjust their mirrors immediately after sitting down, before settling into their actual driving position. That single mistake undermines everything that follows. A mirror set while you are sitting upright at an unusual height, or before the seat is pushed forward to reach the pedals, will be misaligned the moment you start driving.
The correct sequence is always seat first, then mirrors. Adjust the seat so you can comfortably reach the pedals with a slight bend in the knee, the steering wheel is within easy reach without leaning forward, and your head is roughly centered between the headliner and the seat cushion. Only once you are in this position — the position you will hold for the entire drive — should you touch the mirrors.
This matters because mirror angles are relative to your eye position. A two-inch difference in seat height changes what you can see in either mirror by several feet at highway distance. The safety hazards that arise from improperly adjusted mirrors are not theoretical — misalignment is a primary contributor to the blind spots responsible for a significant share of lane-change collisions every year.
With your seat set, lean your head toward the driver-side window until it nearly touches the glass. From this position, adjust the mirror outward until you can just barely see a thin sliver of your own vehicle's rear quarter along the mirror's inner edge. This sliver — roughly the width of a door handle — acts as a reference point for spatial positioning without wasting mirror coverage on bodywork you already know is there.
For the vertical angle, aim to place the horizon line — where road surface meets sky — roughly in the center of the mirror. Too much sky means you are missing the critical zone behind and beside the vehicle. Too much road surface means you are losing sight of vehicles approaching from a distance. If you are driving in hilly terrain or on elevated roads, adjust slightly to favor road surface over sky.
Return to your normal seated position and check the view. You should see a continuous sweep of the lane beside you and the lane behind, with just that thin vehicle edge visible. If you can see a significant portion of your own car's side panel, the mirror is angled too far inward and your blind spot is larger than it needs to be.
The passenger-side mirror follows the same logic but requires a different head position to set correctly. Instead of leaning toward the window, lean toward the center of the vehicle — roughly toward the center console — until your head is approximately above the gearshift. From this position, adjust the mirror outward until you again see just a thin sliver of the vehicle's rear quarter panel along the mirror's inner edge.
Because you sit on the opposite side of the car, this outward lean shifts the mirror's coverage further to the right compared to what you will see from the driving seat. That offset is intentional — it extends the mirror's coverage into the passenger-side blind zone that would otherwise be invisible without a shoulder check.
Vertical alignment follows the same rule: horizon centered in the mirror frame. One additional consideration on the passenger side is parking visibility. When maneuvering into a parallel space or a tight curb, tilting the passenger mirror slightly downward allows you to see the curb line clearly. Some vehicles offer a dedicated "reverse tilt" function that does this automatically when reverse gear is selected, then returns to the standard position when drive is engaged.

There are two widely recognized approaches to side mirror adjustment, and they produce meaningfully different results. Understanding both lets you choose the one that suits your vehicle and driving habits.
The standard method — recommended by most national driving guides — places the mirror so you can see a small portion of the vehicle's side. This creates a slight overlap between the rearview mirror and each side mirror, giving you a consistent spatial reference. The trade-off is a larger blind spot on each side, which must be covered by shoulder checks before every lane change.
The SAE blind-zone technique, developed through research published by the Society of Automotive Engineers, angles the mirrors significantly further outward. The goal is to eliminate the blind spot entirely by ensuring that a vehicle exiting the rearview mirror's coverage immediately enters one of the side mirrors. In this configuration, you cannot see your own vehicle in the side mirrors from the normal driving position at all. The blind spot shrinks to near zero, but the spatial reference point disappears — some drivers find this disorienting initially, particularly when parking.
| Feature | Standard Method | SAE Blind-Zone Technique |
|---|---|---|
| Vehicle edge visible in mirror | Yes — small sliver | No |
| Blind spot size | Moderate | Minimal to none |
| Spatial parking reference | Good | Reduced |
| Shoulder check still needed | Yes | Recommended but less critical |
| Best suited for | Most drivers; vehicles with limited rearview visibility | Highway driving; experienced drivers |
NHTSA research on lane-change crashes and near-crashes consistently identifies blind spot failure as a leading contributing factor. Either method is an improvement over the common habit of angling mirrors primarily to see your own car — the default that maximizes blind spot coverage rather than minimizing it. For a broader view of how side mirrors contribute to overall driving safety, the key factor is not which method you use but how consistently and correctly you apply it.
Standard mirror settings are calibrated for moving traffic. Several common driving situations benefit from deliberate adjustments beyond the default position.
Parallel parking and tight reversing: Before reversing into a parallel space, tilt the passenger-side mirror downward approximately 15 degrees. This gives you a clear view of the curb and the rear corner of the vehicle — the two reference points most critical for avoiding wheel contact. Return the mirror to the standard position once parked. If your vehicle does not have automatic reverse tilt, develop the habit of manually adjusting before and after each parallel maneuver.
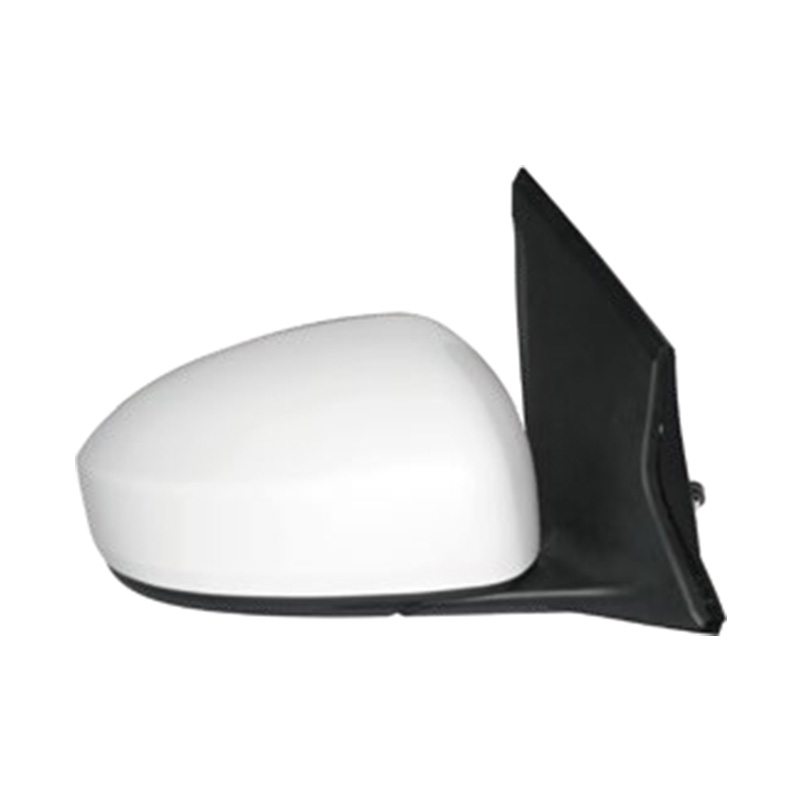
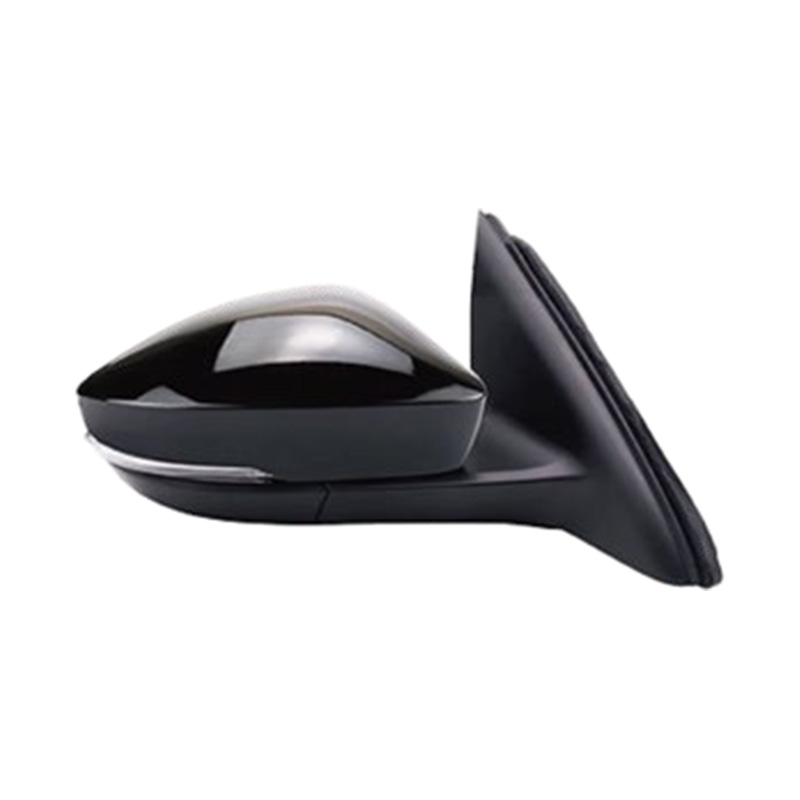
Towing a trailer: A standard side mirror provides almost no useful rearward visibility when a trailer is attached. For occasional towing, clip-on towing mirror extensions that attach to the existing mirror housing are a practical solution. For regular towing, replacing the side mirrors with larger tow mirrors — which extend further outward and offer a wider field of view — provides substantially better coverage. If you frequently tow with a specific vehicle, replacement auto side mirrors for Toyota models and Honda replacement side mirrors are available in tow-ready configurations that mount in the same position as the stock unit.
Night driving and headlight glare: Most rearview mirrors have a manual or automatic anti-glare mode; side mirrors generally do not. If headlights from a following vehicle create significant glare in your side mirrors, slightly tilting each mirror downward a few degrees reduces the reflected light while maintaining enough rearward visibility to monitor traffic. Auto-dimming side mirrors, available on many newer vehicles, handle this automatically.
Blind spot monitoring (BSM), lane change assist, and cross-traffic alert systems have become standard features on vehicles produced after the mid-2010s. These systems use radar or camera sensors to detect vehicles in zones that mirrors do not fully cover and alert the driver with a light in or near the side mirror housing. They are genuinely useful — but they are supplements to correct mirror adjustment, not substitutes for it.
A well-adjusted mirror still provides faster visual information than a warning light in most lane-change situations. BSM systems have detection thresholds — they typically activate when a vehicle is within a set distance alongside the car — and they can fail to detect motorcycles, cyclists, or objects at the edges of their sensor range. Correct mirror adjustment eliminates blind spots that BSM was never designed to cover, including the zone immediately alongside the vehicle that becomes visible only when mirrors are set using the SAE technique.
One practical consideration with modern vehicles: electric mirror adjustment with memory settings means your mirror positions can be saved to a driver profile. If multiple people drive the same vehicle, using this feature ensures your settings are restored the moment your seat position is recalled. Without it, checking and resetting mirrors every time someone else has driven the car is a necessary step. The complete range of OEM-style auto side mirrors available for most makes includes both manual and power-adjustable configurations, with heated and auto-folding variants suited to different climates and parking environments.
Finally, mirror position should be verified any time you notice a change in your driving posture — after carrying a heavy load that compresses the seat, after switching from winter boots to lighter footwear that changes pedal reach, or after any physical change that alters how you sit. Five seconds of verification before pulling out is a simpler habit than managing the consequences of a blind-spot collision.
 Can You Hang Air Freshener on Rearview Mirror? Laws & Safety
Jun 15, 2026
The small cardboard pine tree swinging from a rearview mirror has become one of the most recognizable images in automotive culture. For most drivers, it barely registers as a decision — you buy a car air freshener, you hang it from the mirror, done. What most drivers do not know is that in a significant number of U.S. states, that same dangling freshener can be the legal basis for a traffic stop, a citation, or both. The answer to whether you can hang an air freshener from your rearview mirror is not yes or no — it is a question of where you are driving and exactly how the freshener is positioned.
Hanging an air freshener inside your vehicle is not illegal. The legal issue arises specifically when that freshener is attached to the rearview mirror in a way that obstructs the driver's forward view through the windshield. That distinction — object versus obstructed view — is the line most state laws draw, and it is a line that a dangling mirror ornament crosses easily depending on its size, placement, and how much it swings during driving.
The core legal principle across virtually every regulated state is the same: drivers must maintain an unobstructed view of the road ahead. Air fresheners hanging from the rearview mirror are not singled out by name in most statutes, but they consistently fall within the category of "objects suspended between the driver and the windshield" that these laws are designed to address. The object does not have to fully block vision to trigger a violation — partial obstruction, particularly in the driver's primary forward sightline, is typically sufficient.
Because no federal law governs this specific issue, the rules vary by state. The table below summarizes the regulatory position in the states most commonly cited in traffic stop litigation and enforcement involving rearview mirror hangings.
| State | Legal Standard | Enforcement Note |
|---|---|---|
| California | Prohibited if object obstructs driver's clear view of road or intersecting highway | Fines up to $25 first offense, $50 subsequent; actively enforced |
| Minnesota | Broadly prohibits any object suspended between driver and windshield with limited exceptions | One of the strictest standards; has been basis for high-profile traffic stops |
| Pennsylvania | Prohibits any object or material hung from the inside rearview mirror | Specific language; upheld as probable cause for stops in court rulings |
| Texas | Prohibited if object obstructs driver's clear view | Enforcement varies by jurisdiction; officer discretion plays a role |
| Illinois | Prohibited if object materially obstructs driver's view | Enforced; "material" obstruction standard gives officers some discretion |
| Arizona | Prohibited if object obstructs or reduces driver's clear view | Similar enforcement pattern to California and Texas |
| Virginia | Illegal if view is obstructed, but no longer a primary stop offense | Police must have another reason to initiate a stop; secondary enforcement only |
| Florida | Prohibited if object materially obstructs driver's view | Enforcement discretionary; size and placement of object considered |
California's law is among the most precisely written. California Vehicle Code § 26708 prohibits drivers from attaching, placing, or installing objects that obstruct or reduce the driver's clear view through the windshield or side windows — language broad enough to cover any hanging item regardless of its stated purpose. Most other regulated states follow a similar obstruction-based framework rather than naming specific object types.

The legal restrictions exist because the safety risk is real, even if drivers rarely think about it in those terms. The rearview mirror sits almost exactly in the center of the driver's primary forward sightline — the visual path the eyes travel most frequently while scanning the road ahead. An object hanging directly below or in front of the mirror occupies a portion of that zone even when the driver's gaze is not consciously directed at it.
Two distinct hazard mechanisms are at work:
The combination of these two effects is why enforcement focuses on hanging items rather than, say, a sticker in the corner of the windshield. Movement amplifies the risk of a static object significantly.
The legal landscape around enforcement is not uniform, and understanding the difference between primary and secondary traffic offenses matters here. In states where a rearview mirror obstruction is a primary offense — California, Minnesota, Pennsylvania, Texas, and Illinois among them — a police officer can legally initiate a traffic stop based solely on the observation that an object is hanging from the mirror. No other violation needs to be present. The air freshener alone is sufficient legal justification for the stop.
In states where the obstruction is a secondary offense — Virginia being the most prominent recent example after legislative reform — officers must have an independent primary reason to stop the vehicle first. The hanging object can then be noted and cited as an additional violation, but it cannot be the sole trigger for the stop.
This distinction matters in practice. In primary-offense states, a hanging air freshener has been the documented initiating reason for traffic stops that subsequently revealed other offenses, leading to arrests and legal challenges. The small size of a typical air freshener does not immunize it from this enforcement dynamic — officers in these states have legal authority to stop a vehicle for any object they can articulate as obstructing the driver's view, and courts have generally upheld that authority when challenged.
Keeping a car smelling fresh does not require hanging anything from the mirror. Several product formats deliver the same scent effect without creating a legal or safety issue:
For drivers who prefer traditional hanging fresheners, removing the item from the mirror before driving and replacing it when parked keeps the scent effect while eliminating the legal exposure entirely. A freshener on the mirror while the car sits in a parking spot is not a violation in any state reviewed above. Pairing scent solutions with quality auto accessories for a cleaner and safer vehicle interior — including floor mats and organizers that reduce interior clutter — addresses the overall cabin environment more comprehensively than a single hanging item can.
The legal discussion around rearview mirror hangings ultimately connects to a broader principle: mirrors exist to give drivers visibility, and anything that compromises that visibility compromises safety. The same logic applies to the condition of all the mirrors on a vehicle, not just what is hanging from the interior one.
A cracked, misaligned, or damaged side mirror creates a blind spot that no amount of careful driving technique fully compensates for. Side mirrors provide the lateral field of view that the rearview mirror cannot — coverage of the areas beside and slightly behind the vehicle where lane-change conflicts and intersection hazards originate. A vehicle with its interior mirror clear of obstructions but with a damaged or poorly adjusted side mirror has traded one visibility problem for another.
Maintaining complete mirror coverage means keeping all three mirrors — interior rearview, driver-side exterior, and passenger-side exterior — in functional condition and correctly adjusted at all times. Replacing a damaged side mirror with a properly fitted unit restores the full visibility geometry the vehicle was designed to provide. Options including auto side mirror replacement for unobstructed road visibility cover a wide range of vehicle makes, with model-specific fitments such as Toyota-compatible side mirrors for clear driving sight lines and Honda replacement side mirrors for full lateral visibility ensuring the replacement unit integrates correctly with the vehicle's existing adjustment and signal systems.
The question of whether to hang an air freshener from the rearview mirror turns out to be a small but useful prompt to think about vehicle visibility more broadly. Clear mirrors, properly adjusted, with nothing interrupting the sightlines they are designed to provide — that is the standard to maintain, and it applies to every piece of glass and every reflective surface on the vehicle.
 How to Position Side Mirrors: The BGE Method That Eliminates Blind Spots
Jun 09, 2026
840,000 Crashes a Year Trace Back to One Mistake
The National Highway Traffic Safety Administration estimates that approximately 840,000 side-to-side blind spot vehicle collisions occur annually in the United States, resulting in around 300 fatalities and tens of thousands of injuries. The majority of these crashes happen during lane changes and merges—maneuvers that drivers perform dozens of times every day and typically consider routine. What makes them dangerous is not inattention or inexperience alone. It is the way most drivers have been taught to position their side mirrors.
The conventional mirror setting—angled inward so the driver can see a significant portion of their own vehicle's side in both mirrors—creates blind spots rather than eliminating them. It is a positioning habit so widespread that most drivers have never questioned it, and so consequential that correcting it costs nothing and takes under two minutes. Understanding how auto side mirror range for OEM-compatible vehicle fitments works begins with understanding how those mirrors should actually be aimed—and why the method almost every driver was taught is the wrong one.
The instinct to angle side mirrors inward—so that a strip of the vehicle's own flank is visible along the inner edge of each mirror—comes from a reasonable-sounding premise: using your own car as a reference point helps with depth perception. This logic made some sense when side mirrors were small and mounted forward on fenders, providing a genuinely wide field of view regardless of angle. On modern vehicles, where mirrors are larger but mounted closer to the driver's eye line, the same inward angle produces a very different result.
With mirrors angled inward, the driver's field of view from all three mirrors—rearview, driver-side, passenger-side—overlaps heavily in the area directly behind the vehicle. The center rearview mirror already covers that zone. Having both side mirrors repeat approximately the same view adds no new visual information while leaving a substantial area uncovered: the zones directly beside and slightly behind the vehicle's rear quarters, on both sides. These are the classic blind spots. A vehicle traveling in an adjacent lane at highway speed will disappear from the center rearview mirror before it appears in an inward-angled side mirror—creating a window of complete invisibility that can last one to two seconds, enough time for the vehicle to move fully alongside before the driver is aware of its presence.
The fix—rotating the side mirrors outward—was formalized in 1995 by George Platzer of the Society of Automotive Engineers and subsequently endorsed by the National Safety Council and published by NHTSA as the Blindzone Glare Elimination method. the full NHTSA Blindzone Glare Elimination mirror positioning method is publicly available and documents the research behind the technique. Research indicates the outward BGE setting reduces blind spot coverage by up to 90% compared to the traditional inward-angled position. The adjustment requires no tools, no modifications, and no technology—only a changed understanding of what the mirrors are actually for. Understanding how auto side mirrors improve driving safety and safety hazards from improperly adjusted or installed side mirrors provides essential context for why the BGE technique represents a meaningful improvement over convention.

The driver-side mirror adjustment uses a specific body position to set a reference point that differs from the driver's normal seated position. This is the step that most guides explain but most drivers skip—adjusting the mirror from the normal driving position rather than from the reference position produces the traditional inward-angled setting, not the BGE setting.
Step 1: Move your head to the reference position. Lean your head to the left until it is close to or lightly touching the driver's side window glass. Your eyes should be at approximately the same height as when you are seated normally—do not tilt your head, just move it laterally toward the window.
Step 2: Adjust the mirror from this position. Using the mirror adjustment control—electric joystick, manual adjustment lever, or direct physical pressure on the mirror glass—rotate the driver-side mirror outward until you can just barely see a sliver of your vehicle's rear quarter panel along the inner edge of the mirror. The vast majority of the mirror's reflection should show the adjacent lane and the vehicles in it, not your own car.
Step 3: Return to normal driving position and verify. Sit back to your standard upright driving position. From here, you should no longer be able to see your own vehicle in the driver-side mirror at all—or see only the absolute edge of the rear corner as a faint reference. If you can see a comfortable strip of your own car's side, the mirror is still angled too far inward. Rotate it further outward and repeat.
This adjustment feels wrong to most drivers on first attempt. The instinct is to keep rotating the mirror back inward to recover the familiar view of your car's side. Resist that instinct. The reference point for the BGE setting is specifically designed to be different from your normal seated eye position, which is what produces the wider outward angle when you return to the driving position. Most vehicles with Toyota side mirror replacement options and similar Japanese-market vehicles use electric adjustment controls that make fine-tuning from the reference position straightforward—small incremental adjustments hold precisely without the mirror returning to a previous position.
The passenger-side mirror uses a different reference position because the mirror is further from the driver's normal eye line. Adjusting it from the driver's normal seated position—or from the same head-against-the-window position used for the driver-side mirror—will result in an angle that is too far inward for the passenger side.
Step 1: Move your head to the center reference position. Lean your body and head to the right until your head is approximately above the center console, at your normal seated height. You should be positioned roughly midway between the driver's seat and the passenger's seat, looking forward and to the right toward the passenger-side mirror.
Step 2: Adjust the mirror from this position. Rotate the passenger-side mirror outward until you can just barely see a sliver of your vehicle's passenger-side rear quarter panel along the inner edge of the mirror. As with the driver-side adjustment, the majority of the mirror's field of view should show the adjacent right lane, not your own vehicle.
Step 3: Return to normal position and verify. Sit back to your normal driving position. From the driver's seat, the passenger-side mirror should show the adjacent right lane with little or none of your own vehicle visible. Because the passenger-side mirror is further away and covers a wider angle by design—many vehicles fit a slightly convex mirror on the passenger side precisely for this reason—the transition from the reference position back to the driving position will typically show more of the adjacent lane and less of your car than the driver-side mirror does.
Vehicles with electric mirror adjustment make this process straightforward: lean to the center console position, select the passenger-side mirror on the adjustment control, and use the joystick to rotate outward until only the vehicle's edge is visible. On vehicles with manual mirrors—common on base-trim models across many brands—physically reaching across to push the mirror glass requires more care to hold the reference position while adjusting. Having a second person assist with the adjustment, or making incremental small adjustments and checking from the driving position between each, produces a more accurate result. Honda side mirror replacement options across most model lines include electric adjustment as standard equipment from mid-trim levels upward, making the BGE adjustment process considerably more precise than physical manipulation of manual mirrors.
Once both side mirrors have been adjusted using the BGE reference positions, the result can be verified dynamically—ideally on a road with moderate traffic where vehicles are regularly passing or being passed. The test is simple: watch a single vehicle as it approaches from behind and overtakes your vehicle.
With correctly positioned mirrors, the vehicle's path should be continuously visible as it moves forward. It will appear in the center rearview mirror as it approaches from a distance. As it moves closer and into the adjacent lane to pass, it should transition into the driver-side or passenger-side mirror before it disappears from the rearview mirror—there should be no gap, no window of invisibility where the vehicle is not visible in any mirror. As it continues to move forward alongside your vehicle, it should remain visible in the side mirror until it enters your peripheral vision directly. There should be no moment at any point in this sequence where the other vehicle is undetectable without turning your head.
If the overtaking vehicle disappears from the rearview mirror before appearing in the side mirror, the side mirror is still angled too far inward. Rotate it slightly further outward and repeat the test. If the vehicle appears in both the rearview mirror and the side mirror simultaneously for an extended distance—significant overlap rather than a seamless transition—the side mirror may be slightly too far outward; a minor inward adjustment and retest will calibrate the transition point. the correct way to adjust auto side mirrors for optimal visibility describes the visual benchmarks for this seamless transition in additional detail.
The rearview mirror should be centered on the rear window at all times, providing a clear view directly behind the vehicle. It should not be tilted up or down to reduce glare from following headlights—the BGE outward positioning of the side mirrors significantly reduces glare from following vehicles' headlights entering the side mirrors, which is the second benefit the "Glare Elimination" part of the BGE name refers to. With all three mirrors correctly set, the visual field around the vehicle is comprehensive: the rearview mirror covers directly behind, the side mirrors extend that coverage into the adjacent lanes, and the driver's peripheral vision handles the forward quarters.
The BGE positioning method applies universally across vehicle types, but several mirror configurations and driving scenarios introduce variations worth understanding.
Flat vs. convex mirrors. Many vehicles fit a flat mirror on the driver's side and a slightly convex mirror on the passenger's side. Convex mirrors provide a wider field of view but make objects appear smaller and further away than they are—which is why passenger-side mirrors in North America carry the standard warning text about objects being closer than they appear. The BGE outward positioning works on both flat and convex mirrors, but the wider inherent field of view of a convex mirror means the outward rotation needed to achieve the correct BGE angle is typically smaller than on the flat driver-side mirror. Over-rotating a convex passenger mirror produces a very wide angle that distorts following vehicle size and speed; the calibration test using an overtaking vehicle is particularly useful for setting the passenger-side convex mirror precisely.
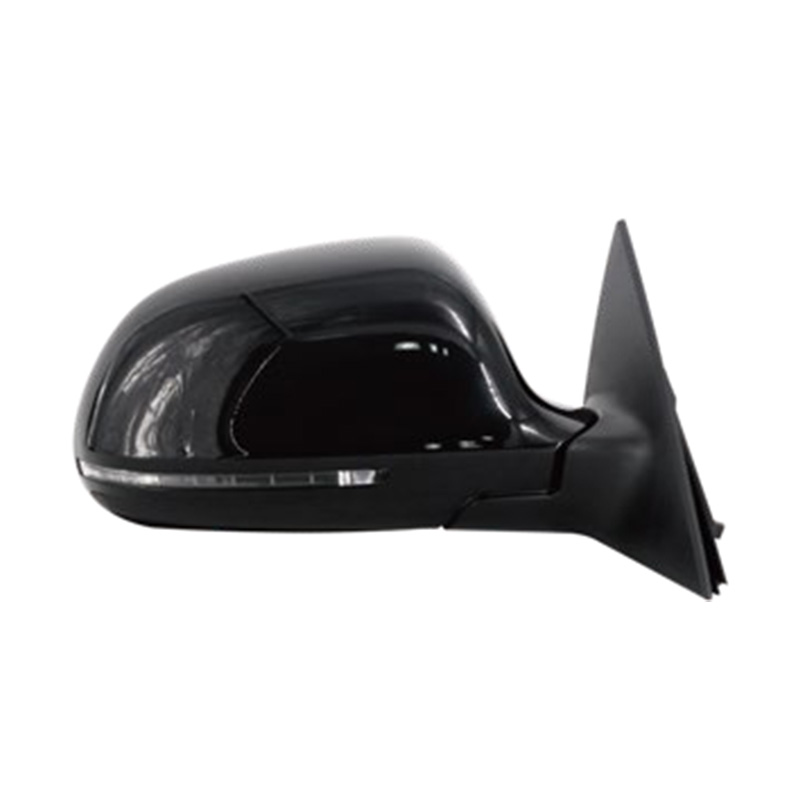
Trucks, SUVs, and vehicles with large blind zones. Pickup trucks and body-on-frame SUVs have substantially larger physical blind spots than sedans and crossovers due to their higher ride height, longer hood, and wider body. The BGE outward positioning remains the correct technique, but the side mirrors on these vehicles are typically larger and set further outward from the body than on passenger cars—which means the outward rotation needed to achieve the BGE setting may be less than drivers accustomed to sedans expect. Ford side mirror options for truck and SUV fitments often include tow mirrors with extended reach and wider glass area, which provide additional coverage for the zones beside a trailer. Vehicles using Volkswagen and Skoda side mirror replacement range or Hyundai side mirror options for sedan and crossover models typically use integrated electric folding and adjustment systems that hold BGE-calibrated positions precisely without drift over time—an advantage over older cable-actuated manual mirrors that can shift slightly with vibration.
Towing adjustments. When towing a trailer, the side mirrors must be repositioned to provide visibility alongside the trailer rather than alongside the towing vehicle alone. Extended tow mirrors or clip-on mirror extensions are required for trailers wider than the towing vehicle. The BGE principle still applies—the mirrors should show the sides of the trailer's rear, not the sides of the towing vehicle—but the reference positions for adjustment will be different because the visual target has changed. Recalibrate mirrors every time a trailer is connected or disconnected, since the correct settings for towing are not the correct settings for unloaded driving.
After seat position changes. Mirror adjustment is seat-position-dependent. If multiple drivers share a vehicle and adjust the seat position between uses, the mirrors must be readjusted every time the seat is moved significantly. A mirror set correctly for one driver's seated eye position will not be correct for another driver sitting higher, lower, further forward, or further back. Developing the habit of spending thirty seconds readjusting both side mirrors whenever the seat is repositioned maintains the blind spot elimination benefit of the BGE setting and keeps the visual calibration accurate to the actual driver in the seat.
 Mirror Fix Kit Guide: Repair or Replace Your Car Side Mirror
Jun 01, 2026
A side mirror takes a hit from a parking garage pillar, or the mounting button on your rearview mirror lets go on a hot afternoon — and suddenly you're driving with a blind spot or a mirror dangling from its wire. Before you call a shop, understand what you're actually dealing with. The right mirror fix kit can have you back on the road in under an hour. The wrong one wastes your money and leaves the problem unsolved.
The first decision isn't which kit to buy — it's whether a kit is the right answer at all. Mirror damage falls into three distinct categories, and each one calls for a different approach.
Mounting failure is the most common and the most fixable. This is when the mirror glass and housing are intact, but the bracket or button has separated from the windshield or door panel. An adhesive fix kit handles this cleanly, costs under $15, and takes about 30 minutes including cure time.
Glass-only damage — a cracked or shattered mirror face while the housing and motor remain functional — is also repairable. Replacement mirror glass for most makes and models is available as a standalone part, often with the same heating element and auto-dimming film already laminated in. If the housing clicks, folds, and adjusts normally, replacing just the glass is the smart move.
Housing or structural damage changes the calculation. A cracked plastic shell, a broken pivot assembly, or a motor that no longer responds means the internal components are compromised. At that point, a fix kit addresses the symptom but not the underlying failure, and the repair rarely holds up through a season of temperature swings and car washes.
Check the housing for cracks before buying anything. Press the mirror against its mount and test the adjustment mechanism. If both pass, you're in kit territory. If either fails, scroll to the replacement section first.
Mirror fix kits aren't interchangeable. The packaging may look similar, but the chemistry and application method are designed for specific failure types.
Adhesive mounting kits are two-part systems: a surface activator (usually a cleaner-primer towelette) and a specialized adhesive, often cyanoacrylate-based or a two-component epoxy formulated for glass-to-metal bonding. These are used to re-bond a metal mounting button to a windshield, or to reattach a mirror bracket to a painted door surface. They achieve handling strength in seconds and full mounting strength within 20–30 minutes. Temperature matters with these — most manufacturers specify application between 50°F and 75°F (10°C to 24°C). Too cold and the adhesive won't cure properly; too hot and it sets before you've positioned the part correctly.
Glass replacement kits bundle the mirror glass itself with the installation hardware — typically a set of plastic pry tools, adhesive pads or mounting clips, and sometimes a heat gun or instructions to use a hair dryer to soften the factory adhesive holding the old glass in place. For heated mirrors, the kit should also include a wiring harness adapter or a set of contact pins that reconnect the heating element. Kits without these connectors for heated mirrors are a common source of buyer frustration.
Housing repair compounds are plastic-bonding adhesives or two-part epoxy putties designed to fill cracks in ABS or polypropylene mirror shells. These work for cosmetic repairs on non-structural areas of the housing — a crack along the edge that doesn't affect the mirror pivot, for example. They're limited, though. Structural cracks near the pivot point or the motor mount will flex under load and re-crack within weeks.
Adhesive kits follow the same sequence regardless of brand. The variables are cure time and whether the kit includes a replacement metal tab or asks you to reuse the original. Here's the process that works consistently:

Replacing side mirror glass is more involved than an adhesive repair, but still well within DIY range if the kit is complete. Before buying, confirm the kit includes or you have access to the following:
Most mirror fix kit failures come down to a few repeatable errors. Knowing them in advance saves a second trip to the parts store.
Skipping surface prep. Adhesive bond strength is almost entirely dependent on surface cleanliness. Oil from fingerprints, residue from old adhesive, or dust left on the bonding surface drops bond strength dramatically. Use the included activator towelette and don't touch the surface afterward.
Wrong temperature. Applying adhesive outside the recommended temperature window — below 50°F or above 80°F surface temperature — causes either incomplete cure or unpredictable set times. This is the most common reason repairs fail within days. Check surface temperature, not just ambient air temperature. A windshield sitting in summer sun can reach 140°F even when air temperature is only 85°F.
Reusing a corroded or contaminated mounting tab. If the original metal tab has rust, paint contamination, or residue that won't sand off cleanly, replace it. Many kits include a new tab for exactly this reason. A fresh tab with a clean surface outperforms a compromised original every time.
Loading the mirror too soon. Attaching the mirror to the bracket before the adhesive has reached full cure strength transfers shear load before the bond is ready. The mount may seem solid but will separate within days. Wait the full cure window even when handling strength appears immediate.
Using the wrong kit for the substrate. Adhesive kits designed for metal-to-glass bonding do not perform the same way on plastic-to-plastic or plastic-to-paint surfaces. Check the kit's intended substrates before applying.
A fix kit is the right answer for isolated, contained damage. Several scenarios tip the decision firmly toward full assembly replacement.
Integrated electronics. Modern side mirrors often carry blind-spot monitoring sensors, turn signal repeaters, auto-dimming glass, and memory-position motors. When the housing is cracked or the pivot is damaged, these systems are almost certainly affected. Attempting a housing repair while these components remain in place risks damaging sensors that require dealer recalibration to restore function — a cost that easily exceeds a replacement assembly.
Structural pivot damage. The pivot point in a power-folding mirror is a precision mechanism. A fractured pivot doesn't just look bad — it allows the mirror to vibrate at highway speed, making accurate adjustment impossible and creating a safety problem.
Repeated repair failures. If the same adhesive repair has failed twice, the underlying surface — whether windshield glass, door sheet metal, or primer coat — has a contamination or porosity issue that surface prep alone won't resolve. Replacement bypasses the problem entirely.
It's worth noting that under Federal Motor Vehicle Safety Standard No. 111 governing rearview mirror performance, exterior mirrors must provide specific field-of-view coverage and stable mounting. A compromised housing that allows mirror vibration or misalignment isn't just inconvenient — it may affect compliance with these federal visibility standards.
When replacement is the right call, matching the assembly to your specific vehicle is non-negotiable. Mirror housings are engineered for each platform — the mounting points, wiring connectors, and fold geometry differ between models even within the same brand family. Vehicle-specific Toyota side mirror replacement assemblies, Honda side mirror assemblies, and Nissan side mirror options ensure correct fitment without adapter modifications. For a full range of makes and models, the complete auto side mirror catalog covers OEM-matched assemblies across Asian, European, and domestic vehicle lines.
 Remove a Rear View Mirror Mount Without Cracking the Glass | Safety Guide
May 25, 2026
Windshields crack during rear view mirror mount removal more often than most people expect — and almost always for the same reasons: wrong tools, wrong temperature, or too much force applied in the wrong direction. The removal itself isn't technically difficult. The challenge is doing it without turning a 20-minute job into a windshield replacement.
The adhesive that bonds a mirror mount button to a windshield is engineered to be extremely strong — strong enough to hold a mirror steady at highway speeds through vibration, heat, and cold cycling. That same bond, applied to tempered or laminated glass, means that any removal attempt applying concentrated force in the wrong spot creates a stress point. And glass, unlike metal, doesn't bend before it breaks.
Beyond the glass itself, modern mirrors often carry wiring for auto-dimming, compass sensors, or integrated cameras. Pulling the assembly without disconnecting power first risks damaging the electronics or triggering fault codes that require a dealer reset. Two minutes of prep prevents both outcomes.
Start with the electrical system. Disconnect the vehicle's negative battery terminal, or at minimum unplug the mirror's wiring harness connector before applying any force to the assembly. The connector is usually accessible by gently pulling back the headliner fabric near the top of the windshield — it snaps out with finger pressure on the release tab.
Next, check the ambient temperature. Adhesive bonds become significantly more brittle below 50°F (10°C). If you're working in a cold garage or outdoors in winter, bring the vehicle inside and let it warm to room temperature for at least an hour before starting. Attempting removal on a cold windshield dramatically increases the risk of cracking — the glass itself contracts, and the adhesive loses its flexibility entirely.
Finally, select your tools deliberately. Plastic trim tools are the default choice for anything that touches the windshield. If you only have metal putty knives, wrap the blade edge with several layers of masking tape. A scratched windshield is a minor problem; a chipped edge near the mount is a crack waiting to propagate.
Before attempting to remove the mount itself from the glass, separate the mirror head from its bracket. Working with just the bracket — rather than the full mirror assembly — removes the weight and leverage that can transmit force unpredictably to the glass below.
On clip-on style mounts, the mirror slides upward or rotates a quarter-turn to release from the button. Look for a small set screw on the underside or back of the housing near the base — loosen it with an Allen wrench before attempting to slide the mirror off. On screw-fixed brackets, back out all fasteners fully while supporting the mirror with your free hand.
Once the mirror head is free, set it somewhere safe. You're now working with a much smaller, lighter bracket or button, which gives you far more control over the force and direction of removal.

This is where technique matters most. The goal is to break the adhesive bond progressively — never all at once with a single hard pull.
Apply heat first, always. Hold a heat gun or hair dryer 2 to 3 inches from the button and move it in small circles for 60 to 90 seconds. You're targeting the adhesive layer behind the glass, not the button itself. The glass should feel warm but not uncomfortable to touch. If it's too hot to hold your hand near, you've overheated it — stop and let it cool for two minutes before continuing.
Insert your plastic trim tool between the button base and the glass at the edge — not the center. Apply slow, steady inward pressure while rocking the tool gently from side to side. The adhesive will begin to release incrementally around the perimeter. Work your way around all four sides of the button before attempting to lift it.
When the bond feels uniformly loose, apply a gentle twisting motion to the button while pulling it straight away from the glass — perpendicular to the windshield surface. Pulling at an angle concentrates stress at a single point, which is exactly what you're trying to avoid. If the button still feels firmly attached after working all sides, apply another 30 seconds of heat and repeat — do not increase force.
For screw-fixed base plates, the same heat-and-patience approach applies once the screws are out. The base plate is usually larger than a button and may require working a longer tool edge across the bottom before it releases.
After the mount is off, the glass surface needs to be completely clean and chemically neutral before any new adhesive goes on. Skipping this step is the leading cause of mirror mounts falling off again within weeks of reinstallation.
While the glass is still warm from the heat gun, use a fresh single-edge razor blade held nearly flat — at roughly 10 to 15 degrees — to scrape off the bulk of the adhesive residue. Short, controlled strokes work better than long sweeping ones. Replace the blade if it starts dragging rather than gliding; a dull blade requires more pressure and increases scratch risk.
Once the visible residue is gone, wipe the area thoroughly with a microfiber cloth saturated with isopropyl alcohol at 90% concentration or higher. Use circular motions and replace the cloth section as it picks up adhesive. Repeat until a clean cloth comes away with no discoloration. Mark the button position on the outside of the windshield with a grease pencil before final cleaning — it's easy to lose the exact location once the old button is gone.
Let the cleaned area air-dry for a minimum of 15 minutes at room temperature before applying any new mirror adhesive. Residual alcohol that hasn't fully evaporated will compromise the new bond.
Most windshield damage and mount failures trace back to a short list of repeatable errors:
Once the mount is cleanly removed and the glass is prepped, the next decision is whether to reinstall the existing mirror or replace the assembly entirely. If the reason for removal was a damaged housing, failed motor, or broken glass element, replacement is the practical choice.
Matching the replacement to your vehicle requires more than just the model name — trim level matters because features like heating elements, integrated turn signal repeaters, blind spot indicators, and power folding mechanisms vary within the same model year. An assembly without the right connector type won't plug in, and one missing the heating element won't clear frost.
For Ford vehicles, Ford side mirror replacements are available matched by model and feature set. Nissan owners can browse Nissan side mirror assemblies with OE-compatible specifications. If you drive a Hyundai or Kia, Hyundai and Kia replacement side mirrors cover the current and recent model lineup. The complete auto side mirror catalog lists all available makes for straightforward cross-referencing by vehicle.
 How to Remove a Rear View Mirror Mount — Step-by-Step Guide
May 19, 2026
A rear view mirror mount that's fallen off, cracked, or simply in the way of a new installation doesn't require a trip to the shop. Removing it yourself takes under 30 minutes — but only if you know which type of mount you're dealing with and approach it the right way. Rushing the process is how windshields crack.
There are a handful of situations where pulling the mount is the right call. The most common: the adhesive button has separated from the glass and the mirror is dangling by its wiring, or the mount itself has broken and the mirror no longer holds a position. Both require a clean removal before anything can be reinstalled correctly.
Other common triggers include upgrading to a dash cam or smart mirror that requires a different bracket, replacing a damaged mirror assembly after a collision, or preparing the windshield for professional repair where the glass technician needs a clear work area. In each case, the removal process is the same — what changes is how carefully you need to preserve the button or bracket for reuse.
Gather everything before you start. Stopping mid-process to hunt for a tool is how mistakes happen.
One thing worth skipping: WD-40 or general-purpose lubricants. They leave an oily film on the glass that interferes with any new adhesive you apply later.
Rear view mirror mounts fall into three main categories, and the removal method differs for each. Misidentifying the type and applying the wrong technique is a fast way to crack the glass or strip a fitting.
Clip-on or slide-on mounts attach to a metal or plastic button that's permanently glued to the windshield. The mirror housing clips or slides onto this button and is held by spring tension or a small set screw. These are the most common type on modern vehicles. The mirror separates from the button easily; the button itself stays on the glass.
Screw-fixed mounts use one or more screws — often Allen-head — to lock the mirror bracket to a base plate bonded to the windshield. Common on older vehicles and some commercial models. The screws must be fully removed before the bracket will release.
Fully glued mounts bond the entire bracket base directly to the glass with rearview mirror adhesive. Less common, but found on some imports and aftermarket installations. These require heat and careful prying to remove without stressing the glass.
To identify your type: look for a visible screw or hex bolt near the base of the mirror where it meets the windshield. If there's none, try gently sliding the mirror upward — clip-on types release with a short upward push or a twist. If the base doesn't move at all and there are no fasteners visible, you likely have a fully glued mount.
At this point the mirror assembly is free. The adhesive button bonded to the windshield glass typically stays in place and doesn't need to be disturbed unless it's damaged or you're replacing it.
This is the more involved process, and patience matters more than strength here.
Once the button or bracket is off, you'll almost always have adhesive residue left on the glass. Left in place, it prevents a clean rebond and creates a haze that catches light at exactly the wrong moment while driving.
Start by re-applying gentle heat to soften any remaining material. Then use a fresh single-edge razor blade held at a very shallow angle — nearly flat against the glass — to scrape off the bulk of the residue. Work slowly and let the blade glide; pressing hard or using a steep angle risks scratching.
Once the bulk is gone, saturate a microfiber cloth with isopropyl alcohol (90% or higher) and rub the area in circular motions until the glass is completely clear. A clean, grease-free surface is non-negotiable if you plan to reattach a button — the new adhesive won't bond to contaminated glass.
For particularly stubborn residue, a small amount of acetone on a cotton pad works well, but follow immediately with an isopropyl wipe-down to neutralize it before any new adhesive goes on.
If you're reinstalling the same mount, let the cleaned glass surface sit for at least 15 minutes after the final alcohol wipe before applying new adhesive. Most rearview mirror adhesive kits require the glass to be at room temperature and fully dry — bonding in cold weather or direct sunlight significantly reduces adhesion strength.
If the removal was prompted by mirror damage — a cracked housing, broken adjustment mechanism, or failed power folding motor — this is the right moment to source a replacement assembly matched to your vehicle. Getting the right mirror means matching both the vehicle model and the specific trim level, since features like heating elements, turn signal repeaters, and blind spot sensors vary within the same model line.
For Toyota owners, a wide selection of model-matched replacement auto side mirrors for Toyota models covers everything from compact sedans to full-size trucks. If you drive a Honda, browse Honda replacement side mirrors sorted by model and year. For all other makes, the full range of auto side mirror replacements by vehicle make covers the major brands with OE-compatible assemblies.
 How to Fix a Rear View Mirror: Interior & Side Mirror Guide
May 14, 2026
A rear view mirror problem rarely announces itself at a convenient time. The interior mirror drops off the windshield on a cold morning. The side mirror gets clipped in a parking lot. The ball joint slowly gives up and the mirror sags no matter how many times you push it back into position. Each of these is a different problem with a different fix — and knowing which one you're dealing with is the first step to solving it correctly.
Before reaching for any tools or adhesives, take a minute to identify exactly what failed. The repair approach changes significantly depending on the fault.
Interior mirror fell off the windshield. The metal mounting button has separated from the glass. The mirror assembly itself is intact — it just has nothing to attach to. This is an adhesive failure, and it's the most common rear view mirror problem.
Interior mirror droops or won't hold position. The mirror is still mounted to the windshield, but it sags downward or can't be adjusted without immediately falling back. This is a ball-and-socket joint failure — the socket has worn down and can no longer grip the ball tightly.
Mirror glass is cracked or reflective coating is failing. The mounting is fine but the mirror itself is compromised. Depending on whether the mirror has integrated electronics, this may be a simple glass swap or a full assembly replacement.
Side mirror is damaged. The exterior wing mirror has been struck, the housing is cracked, the glass is shattered, or the power adjustment motor has failed. Side mirror repairs range from glass-only replacements to full assembly swaps, depending on what broke and what features the mirror contains.
This repair requires a rear view mirror adhesive kit, which is available at most auto parts stores for a few dollars. Do not use standard super glue or epoxy — automotive mirror adhesive is specifically formulated to bond metal to glass and withstand the thermal cycling inside a car cabin, which can swing from below freezing to over 70°C (160°F) in direct sunlight.
Work in temperatures between 10°C and 25°C (50°F–75°F) for the best bond. Extreme cold or heat during application reduces adhesive effectiveness.
Start by marking the position of the mounting button on the outside of the windshield with a small piece of masking tape. This gives you a precise reference point when repositioning, since the correct location is critical — too high or low and the mirror won't sit at the right angle. Use an allen wrench to detach the mirror from the metal mounting button if they're still connected. Then use a razor blade held at a low angle to scrape away all old adhesive residue from both the button and the windshield. Follow with a thorough wipe using the alcohol pad included in the kit, or isopropyl alcohol on a clean cloth.
Apply the activator that comes with the kit to the windshield spot, let it dry per the instructions (usually 60–90 seconds), then apply the adhesive to the metal button only — not directly to the glass. Press the button firmly against the windshield, aligned with your tape marker, and hold it with steady pressure for the time specified in the kit instructions, typically one to two minutes. Tape the button in place and leave it undisturbed for the full cure time — usually at least one hour, sometimes up to 24 hours for full strength — before reattaching the mirror.
Do not drive until the adhesive has fully cured. A partially bonded mirror will fail again under vibration within a few kilometres.

When the mirror is still attached to the windshield but won't hold its adjusted position, the problem is usually a worn socket. The plastic teeth inside the socket that grip the mounting ball have broken or worn smooth, and there's no longer enough clamping force to hold the mirror in place against its own weight.
A commonly suggested fix — stretching a latex glove fingertip over the ball — rarely holds up in practice. The glove material breaks down quickly under the friction of mirror adjustment and offers no lasting improvement.
A more reliable approach is to build up the ball slightly using super glue. With the mirror detached from the ball, apply a thin, even coat of super glue over the entire surface of the ball joint. Let it cure completely, then test the fit by snapping the mirror socket back onto the ball. If it's still too loose, apply a second thin layer and repeat. The goal is to increase the ball's diameter just enough to restore a snug fit inside the socket — not to glue the joint permanently shut. The mirror should still pivot smoothly after the fix, just with noticeably more resistance than a worn joint.
If the socket itself is cracked or multiple layers of super glue don't restore adequate grip, the mirror assembly will need to be replaced rather than repaired.
A cracked interior mirror glass compromises your rear visibility and, depending on jurisdiction, may make a vehicle non-roadworthy for inspection. Whether the glass alone can be replaced or the full assembly must be swapped depends on what features the mirror contains.
A basic manual-dimming interior mirror with no electronics is straightforward to replace as a full unit. Remove the old mirror from the mounting button (usually by sliding or unclipping it), and clip the replacement onto the same button. No adhesive work is needed if the button is already secure.
Mirrors with auto-dimming (electrochromic) glass, integrated HomeLink garage door controls, compass displays, or cameras require more care. Mirrors that are part of an Advanced Driver Assistance System (ADAS) — such as forward collision cameras or lane departure sensors — must be replaced and recalibrated by a professional. Incorrect installation or skipped calibration can cause the system to misread distances and angles, compromising safety features that many drivers rely on without knowing it. If your car was made in the last five to seven years, check whether the interior mirror contains a camera before assuming it's a simple DIY swap.
Side mirrors take far more physical abuse than interior mirrors — parking lot scrapes, wing strikes on narrow roads, and storm damage are common. The repair scope depends on what exactly broke.
Glass only. If the housing and motor are undamaged but the glass itself is cracked or shattered, replacement glass inserts are available for many common vehicles. These are held in place by clips or adhesive backing and can be swapped in without removing the full mirror assembly. This is the cheapest and fastest option when the damage is limited to the reflective surface.
Housing cracked but glass intact. Replacement housings (mirror covers) are available separately from the full assembly for most popular models. They clip or screw onto the existing mirror base without disturbing the wiring or motor. This is a good option when an impact has cracked the plastic shell but left the mechanical and electrical components working.
Full assembly replacement. When the power adjustment motor has failed, the mirror has been sheared off at the base, or the heating element is dead, replacing the complete mirror assembly is the right call. Plug-and-play replacement mirrors are available for most major makes and models, and installation typically requires only basic hand tools — removing a door panel trim piece, disconnecting the wiring harness, and unbolting the mirror from the door frame.
For brand-specific replacement side mirror assemblies, browse options by make: Toyota side mirror replacements, Honda side mirror assemblies, and Ford side mirror replacements cover three of the most common platforms. The full range of auto side mirrors by make and model also covers Nissan, Mazda, Hyundai, Kia, Subaru, Audi, Volkswagen, and other major brands for a direct-fit replacement without modification.
Most rear view mirror repairs are genuinely DIY-friendly, but a few situations call for professional involvement. ADAS-integrated mirrors are the clearest example: any mirror that contains a camera, radar sensor, or other safety system component needs dealer or specialist recalibration after replacement. Skipping this step doesn't just mean a slightly off image — it can disable collision warnings, lane departure alerts, and automatic emergency braking, often without triggering a warning light.
Side mirrors with built-in blind spot monitoring sensors also require care. While the mirror glass itself may be replaceable at home, the sensor calibration embedded in these systems is not. If replacing the housing or assembly of a mirror that has a blind spot warning indicator, verify with the vehicle manufacturer whether recalibration is required for your specific model.
For straightforward cases — a fallen interior mirror, a worn ball joint, or a non-electronic side mirror replacement — the tools required are minimal, the parts are inexpensive, and the repair can be done in under an hour. Getting the diagnosis right before buying parts is the single step that makes the difference between a repair that holds and one that needs to be redone a week later.
 How to Get Scratches Out of an Auto Side Mirror: Glass & Housing Repair Guide
May 06, 2026
Before reaching for any repair product, it is essential to understand exactly what part of your auto side mirror has been scratched and how deep the damage goes. Treating the wrong surface with the wrong method can make the problem worse — or permanently cloud a mirror that could have been polished back to clarity.
A side mirror has two distinct surfaces that can be scratched: the reflective glass face and the plastic housing that surrounds it. Glass and plastic respond very differently to abrasives and polishing compounds. Glass is harder and requires specific products like cerium oxide to cut effectively, while plastic is softer and can be scratched further by compounds designed for glass. Knowing what auto side mirrors are made of helps you choose the right repair approach from the start.
Once you have identified the surface, assess the scratch depth using the fingernail test. Run your fingernail lightly across the scratch at a perpendicular angle. If your nail glides over the mark without catching, it is a surface-level scratch that sits within the outermost coating and can almost certainly be polished out at home. If your nail catches or drops into the groove, the scratch penetrates deeper into the glass or plastic body and will require more aggressive treatment — or professional help.
Also check the scratch under direct light at a low angle. If the surrounding area appears hazy, discolored, or shows rainbow-like distortion, the reflective backing behind the glass may be compromised. Damage to the silvering or mirror coating cannot be repaired by surface polishing and typically means the mirror glass needs replacement.
Having the right supplies prepared before you start prevents mid-project trips to the store and reduces the risk of making the scratch worse with an improvised substitute. The materials you need depend on the severity of the damage.
For light surface scratches on glass, gather: a microfiber cloth or felt polishing pad, white non-gel toothpaste or a baking soda paste, and optionally a cerium oxide glass polishing compound mixed with water. A clean spray bottle with water and a second dry microfiber cloth for buffing are also useful.
For moderate scratches on plastic housing, you will need: 1500-grit and 2000-grit wet-dry sandpaper, an automotive plastic polishing compound, a foam applicator pad, and a finishing wax or plastic sealant. Masking tape is helpful to protect adjacent painted surfaces during sanding.
For deep scratches on either surface, add: a automotive scratch filler or spot putty, a plastic spreader or putty knife, 1000-grit sandpaper for initial leveling, and a two-stage polishing system (cutting compound followed by finishing polish). Protective gloves and eye protection are recommended when using chemical compounds.
In all cases, start with a clean surface. Washing the mirror with mild soap and water, then drying it completely with a microfiber cloth, removes grit that could deepen the scratch during the repair process.
Light scratches on mirror glass — those that pass the fingernail test — respond well to mild abrasive polishing. Work in a shaded area or indoors if possible, as direct sunlight causes compounds to dry too quickly and streak.
Apply a small pea-sized amount of plain white toothpaste (not gel) to a damp microfiber cloth or felt pad. Using gentle circular motions, rub the toothpaste over the scratched area for 20 to 30 seconds. The mild abrasive in toothpaste is enough to level very fine surface marks. Wipe the residue away with a clean damp cloth and inspect the result under light. Repeat up to three times if the scratch is still visible, but stop if there is no improvement after the third pass — additional rubbing will not help and risks hazing the surrounding glass.
Mix equal parts baking soda and water to form a thick paste. Apply it to the scratch with a soft cloth using the same circular motion technique. Baking soda is slightly more abrasive than toothpaste and works well on scratches that are just visible enough to catch the light but not deep enough to catch a fingernail. Rinse thoroughly and dry with a clean cloth after each pass.
For scratches that resist toothpaste or baking soda, cerium oxide glass polish is the most effective DIY solution. Mix the powder with water to form a slurry roughly the consistency of thick cream. Apply a generous amount to a felt polishing pad and work it over the scratch using firm, overlapping circular strokes for two to three minutes. Keep the surface damp throughout — cerium oxide works through a chemical-mechanical action that requires moisture. Wipe away the residue with a clean damp cloth and inspect. This method can remove scratches that most other products cannot touch, but it requires patience and some physical effort to achieve results on harder glass surfaces.
The plastic housing surrounding the mirror glass is far more susceptible to scratching than the glass itself — and more forgiving to repair, since plastic is softer and responds quickly to abrasive polishing. However, it requires a different approach than glass.
Deep scratches — those where your fingernail catches clearly in the groove — require more material removal to level the surface, which increases the risk of over-sanding or permanently distorting the mirror if done without experience.
For deep scratches on the plastic housing, a spot putty or automotive scratch filler can bridge the gap before sanding and polishing. Apply the filler sparingly with a plastic spreader, drawing it across the scratch at a 45-degree angle to fill the groove without building up excess material. Allow it to cure fully according to the product instructions — usually 20 to 30 minutes. Once cured, sand starting with 1000-grit paper, progressing through 1500- and 2000-grit, then polish as described in the previous section.
For deep scratches on mirror glass, the honest answer is that most DIY methods are ineffective. Glass is extremely hard, and cutting deep enough to level a significant scratch requires either a rotary polisher with a felt pad running at sustained speed or professional glass polishing equipment. Attempting this with hand pressure alone typically produces uneven results and risks creating localized flat spots that distort the reflection. If the scratch on the glass face is deep enough to catch a fingernail and affects your visibility, replacing the mirror glass is usually faster, cheaper, and more reliable than attempting a prolonged polishing campaign.
Clear nail polish can serve as a temporary cosmetic fix for deep glass scratches that you plan to address later: clean and dry the area, apply one thin coat directly into the scratch groove, allow it to cure for one hour, then gently wipe the excess from the surrounding surface with a cloth barely dampened with nail polish remover. This does not repair the scratch but reduces the visual contrast until a proper solution is arranged.
Once the repair is complete, protecting the surface prevents new scratches from forming and keeps the mirror looking clean between maintenance sessions. Referring to proper habits outlined in our guide on how to clean the auto side mirror is a good starting point for an ongoing care routine.
Apply a protective wax or sealant to both the glass face and the plastic housing after every repair and every few months as part of routine care. On glass, a thin coat of carnauba wax or a dedicated glass sealant creates a hydrophobic barrier that causes water to bead and roll off, reducing the abrasive effect of water droplets carrying road grit. On plastic housings, a UV-resistant plastic protectant prevents the material from oxidizing and becoming brittle — oxidized plastic is significantly more prone to scratching than well-maintained surfaces.
Self-adhesive protective film (paint protection film or PPF cut to mirror size) is the most durable long-term solution for vehicles that frequently park in tight spaces, wooded areas, or environments where mirror contact with branches or other vehicles is common. The film absorbs minor impacts and surface abrasion without transferring damage to the mirror itself and can be replaced when worn without any risk to the underlying surface.
When washing your vehicle, always use a dedicated microfiber mitt rather than a sponge or cloth that may trap grit from a previous pass over a dirtier panel. Wash the mirrors last, or with a separate mitt, to avoid dragging accumulated particles across the glass surface.
Not every scratched mirror is worth repairing. Knowing when to stop investing time and materials in a DIY fix — and simply order a replacement — saves frustration and ensures your mirrors are performing their primary safety function correctly.
Replace the mirror glass (or the complete mirror assembly) when any of the following conditions apply. First, if the reflective backing shows dark spots, silver hazing, or delamination around the scratched area, the mirror coating has been compromised. No surface polishing will restore reflectivity once the metallic layer is damaged. Second, if the glass has developed a visible crack or chip — even a small one — the structural integrity of the glass is at risk. Cracks propagate over time from vibration and temperature changes. Third, if repeated polishing attempts have produced a visible flat spot or distortion in the reflection, the glass surface geometry has been altered and the mirror is no longer providing accurate spatial information about the traffic behind you.
From a practical standpoint, a replacement mirror glass for most common vehicle makes costs between $15 and $60 for the glass element alone, making replacement a financially sensible choice whenever the repair effort starts to feel disproportionate to the result. For guidance on selecting a compatible replacement and understanding your options across mirror types, our auto side mirror types and maintenance guide provides a detailed overview of what to look for when sourcing a new unit.
Maintaining clear, undistorted side mirrors is not just a cosmetic concern — it is a direct safety requirement. A scratched mirror that reduces visibility at a critical moment during a lane change or reverse maneuver eliminates the protection the mirror was designed to provide. When in doubt, replace.
 Auto Side Mirror Guide: Types, Features & Replacement Tips
Apr 30, 2026
An auto side mirror is a critical safety component that provides drivers with essential visibility of the vehicle's rear and lateral surroundings. Unlike the rearview mirror, which offers a direct line of sight through the back window, side mirrors are positioned to eliminate blind spots and assist in lane changes, parking, and maneuvering in tight spaces. Modern side mirrors have evolved from simple reflective glass into complex assemblies integrating heating elements, turn signals, blind-spot monitoring systems, and power-adjustment motors. Understanding the functionality and maintenance of these units is vital for ensuring road safety and compliance with traffic regulations.
The primary purpose of an auto side mirror is to expand the driver’s field of view beyond the natural range of human vision. Properly adjusted side mirrors can reduce blind spots by up to 90%, significantly lowering the risk of side-impact collisions. For vehicle owners, knowing the differences between mirror types, glass coatings, and electronic features allows for informed decisions when replacing damaged units or upgrading for better visibility.
The glass used in an auto side mirror determines the field of view and the perception of distance. There are two main types of curvature used in side mirrors: flat and convex. Each has distinct advantages and limitations regarding depth perception and coverage.
Flat mirrors provide a true representation of distance and speed, making it easier for drivers to judge how far away other vehicles are. However, they offer a narrower field of view, resulting in larger blind spots. In many countries, flat mirrors are mandatory for the driver’s side (left side in left-hand drive vehicles) to ensure accurate distance judgment during overtaking maneuvers.
Convex mirrors curve outward, providing a wider field of view and significantly reducing blind spots. The trade-off is that objects appear smaller and farther away than they actually are. This is why passenger-side mirrors often carry the warning: "Objects in mirror are closer than they appear." Convex mirrors are standard on the passenger side in most regions and are increasingly used on the driver’s side in Europe and other markets, often with a dual-curvature design to balance view width and distance accuracy.
| Feature | Flat Mirror | Convex Mirror |
|---|---|---|
| Field of View | Narrow | Wide |
| Distance Accuracy | High (True Distance) | Low (Distorted) |
| Blind Spot Coverage | Poor | Excellent |
| Common Position | Driver’s Side (US/Canada) | Passenger Side / Both (EU) |
Modern auto side mirrors are equipped with various technologies designed to enhance visibility, safety, and convenience. These features have become standard in mid-to-high-end vehicles and are increasingly available as aftermarket upgrades.
Heated mirrors contain embedded electrical heating elements behind the glass. They are essential for clearing fog, ice, and snow in adverse weather conditions. Activated via a dashboard switch, often linked to the rear defroster, these elements warm the glass surface to evaporate moisture and melt ice, ensuring clear visibility in winter climates. Without this feature, drivers may need to manually scrape ice, which can damage the mirror housing or glass.
Blind Spot Monitoring systems use radar or cameras housed within the side mirror assembly to detect vehicles in the driver’s blind spots. When a vehicle is detected, an LED indicator lights up on the mirror glass or housing. If the driver activates the turn signal while a vehicle is present, the light may flash or an audible alert may sound. This technology has been shown to reduce lane-change accidents by up to 14%, making it one of the most valuable safety additions in modern automotive design.
While auto-dimming is more common in rearview mirrors, some high-end side mirrors feature electrochromic glass to reduce glare from headlights of vehicles behind. Additionally, integrated LED turn signals on the outer housing improve visibility to other drivers, especially during the day or in bright sunlight, enhancing communication of intent during lane changes.
Proper adjustment of an auto side mirror is crucial for maximizing visibility and minimizing blind spots. Many drivers incorrectly adjust their side mirrors to see the side of their own vehicle, which creates large blind spots and overlaps significantly with the rearview mirror’s field of view.
To eliminate blind spots, follow the SAE recommended adjustment method:
This setup ensures that as a vehicle leaves your rearview mirror, it immediately enters your side mirror’s field of view, effectively eliminating traditional blind spots.
Damaged side mirrors compromise safety and may result in traffic fines. Whether replacing broken glass or the entire assembly, understanding the process helps save costs and ensure proper functionality.
If the mirror housing and motor are intact, replacing only the glass is a cost-effective solution. Most modern mirror glasses are clipped onto a backing plate. Carefully prying the old glass off and snapping the new one into place can be done at home. Ensure the new glass matches the original specifications, including heating elements and blind-spot indicators, if applicable.
If the housing is cracked, the motor is faulty, or the mounting bracket is broken, the entire assembly must be replaced. This typically involves removing the interior door panel to access the wiring harness and mounting bolts. When purchasing a replacement, verify the part number and features (e.g., heated, power-fold, memory) to ensure compatibility. After installation, test all functions, including adjustment, heating, and signal lights, before reassembling the door panel.
 What Can You Hang from Your Rearview Mirror? Safety, Laws & Tips
Apr 23, 2026
Walk through any parking lot and you will spot them immediately — dangling air fresheners, swinging graduation tassels, beaded rosaries catching the light, and the timeless pair of fuzzy dice. Hanging things from the rearview mirror is one of the most universal forms of personal expression inside a vehicle. It turns a functional piece of glass and metal into a small gallery of memories, beliefs, and personality.
The habit has deep roots. During World War II, fighter pilots began attaching small trinkets and lucky charms to their aircraft as protective talismans. When those pilots returned home and started driving cars, the tradition came with them. Fuzzy dice, the most iconic of all rearview mirror ornaments, made the leap from cockpit to dashboard in the late 1940s and have never really left. Decades later, the motivations remain the same: drivers want their car to feel like their own space, and a charm swinging gently from the mirror is one of the simplest ways to achieve that.
The market has responded in kind. Car charms are now a thriving segment of the auto accessories industry, spanning mass-market air fresheners to handcrafted macramé hangings sold on artisan platforms. Understanding why this habit endures — and how to do it safely and legally — matters for both consumers and the professionals who manufacture and supply vehicle components.
The variety of objects drivers suspend from their rearview mirror reflects a wide spectrum of personal taste, culture, and practicality. Some of the most common include:
Each category sits on a different point of the risk spectrum — a slim cardboard freshener poses very different concerns than a large, heavy crystal ornament — a distinction that regulators and safety experts increasingly emphasize.
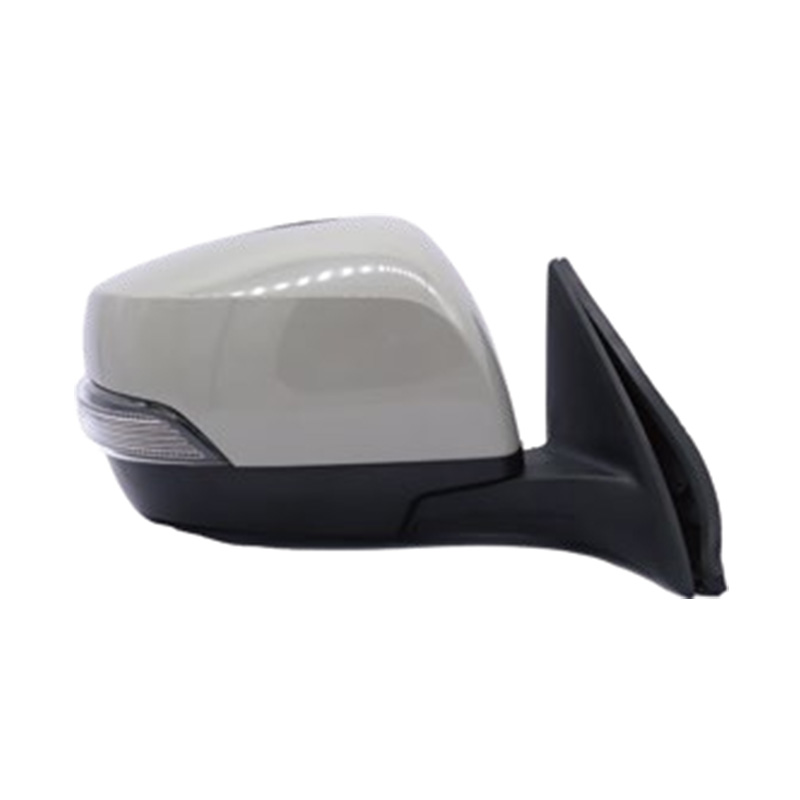
The appeal of rearview mirror décor is easy to understand, but the risks deserve equal attention. Three distinct hazards arise when objects are hung from this location.
The most immediate is obstructed visibility. The rearview mirror sits at the driver's eye level, squarely within the central field of vision used to monitor traffic ahead. Even a small object swinging directly behind it can mask a pedestrian, cyclist, or vehicle at a critical moment. The problem compounds when multiple items are layered together or when a single item is large and bulky enough to block a meaningful portion of the windshield's viewing area.
The second hazard is driver distraction. Motion naturally attracts the human eye. An ornament swinging during acceleration, braking, or cornering creates a repetitive visual stimulus that competes with the road for the driver's attention. At highway speeds, a fraction of a second of diverted attention translates into significant distance traveled without full situational awareness.
Third is structural failure of the mirror mount. Most rearview mirrors are bonded to the windshield with a specialized adhesive button rated for the weight of the mirror assembly alone. Adding continuous extra weight — especially heavy items — gradually stresses this bond. A sudden detachment while driving creates a startle response that can cause the driver to lose vehicle control, in addition to leaving the car without a functioning rearview mirror. For guidance on how auto side mirror safety features integrate with overall vehicle visibility systems, it is worth understanding how manufacturers design mirrors as a coordinated safety network rather than isolated components.
Legislation across the United States does not uniformly ban hanging items from the rearview mirror, but it does consistently prohibit anything that obstructs the driver's forward view — and the line between decoration and obstruction is drawn differently from state to state.
California is among the most specific. Vehicle Code 26708(a)(2) prohibits any object placed or affixed to the vehicle that obstructs or reduces the driver's clear view through the windshield or side windows. Officers have discretion to determine whether a given item crosses that threshold, which means even a small charm can technically trigger a citation if an officer judges it to be obstructing.
Colorado takes a similar approach through Title 42 of its statutes, requiring that driver vision through required glass equipment remain normal and unobstructed. An air freshener alone is not an automatic violation, but the moment it meaningfully reduces the field of view, it becomes one.
Florida prohibits signs or other material affixed to the front windshield and bars drivers from hanging material that obstructs view from the rearview mirror, rear, or side mirrors. Drivers cited for obstructed view face a traffic offense that, in accident situations, can shift fault determination against them.
Texas currently has no statute that specifically names hanging items from the mirror, but its general obstruction-of-view provisions apply equally. South Dakota, by contrast, has interpreted its laws to make even small decorative items technically non-compliant when the vehicle is in motion.
The practical takeaway across all jurisdictions is consistent: if an item can be argued to obstruct the driver's view, it creates legal exposure. Keeping hangings small, lightweight, and positioned toward the top of the mirror rather than dangling at eye level is the safest approach under virtually any state framework.
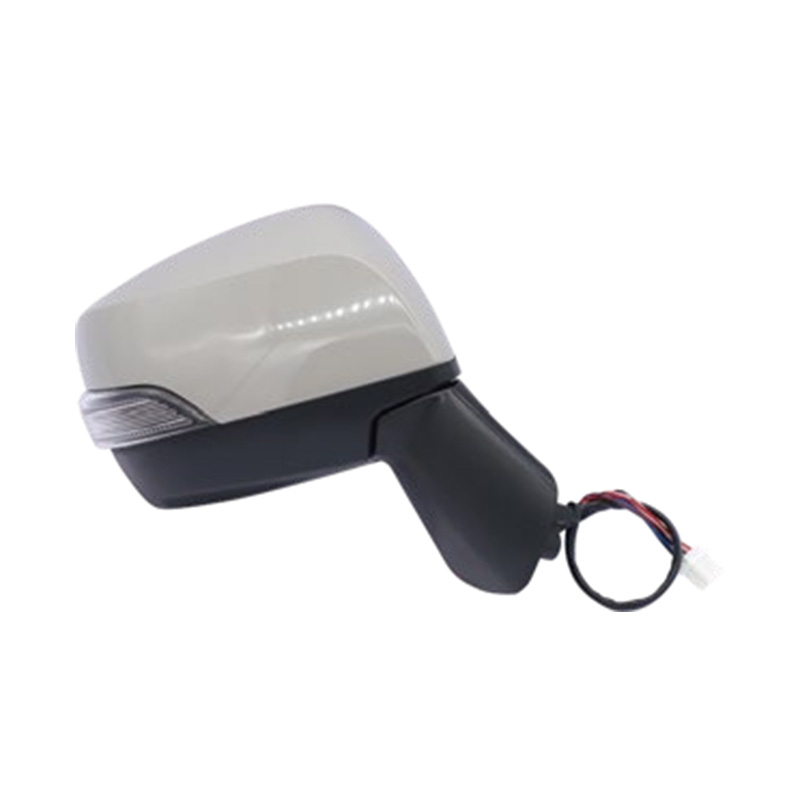
Understanding the engineering behind rearview mirror attachment helps explain why weight is such a meaningful concern. The mirror is typically secured to the windshield via a metal or plastic button bonded with a high-strength, temperature-resistant adhesive. This system is engineered to hold the mirror assembly through vibration, temperature cycles ranging from extreme cold to intense summer heat, and the occasional minor impact — but it is calibrated for the mirror's own mass, not for additional hanging loads.
The adhesive bond is particularly vulnerable to cumulative stress from weight combined with vibration. Every road imperfection transmits a small shock through the windshield to the bond point. A heavier hanging amplifies the effective force at that point with each vibration cycle. Over time, the bond fatigues and the likelihood of sudden detachment increases — a failure mode that manufacturers warn against but that is rarely visible to the driver before it happens.
The materials used in mirror construction also inform this risk. As detailed research into auto side mirror materials shows, automotive mirror systems are precision-engineered assemblies where every element — glass thickness, housing polymer, mounting bracket — is specified to tight tolerances. Rearview mirrors follow the same principle: they are designed to perform within a defined load envelope, and decorative additions fall entirely outside that envelope.
Completely avoiding rearview mirror decoration is the safest course, but for drivers who prefer to personalize their cabin, several practical guidelines significantly reduce both safety risk and legal exposure.
The rearview mirror is, first and foremost, a safety device. Its purpose is to give the driver a clear, unobstructed view of what is behind and beside the vehicle. Decoration that enhances the driving experience without compromising that function is entirely reasonable — decoration that compromises it, even slightly, represents a risk that no charm or keepsake is worth taking.
 How Should You Adjust Your Side Mirrors? The Right Way to Do It
Apr 15, 2026
Most drivers believe they are adjusting their side mirrors correctly — but research suggests the opposite. The traditional method taught in many driving schools actually duplicates what your rearview mirror already shows, leaving a significant blind spot on each side of the vehicle. According to NHTSA data, approximately 840,000 blind spot-related accidents occur annually in the United States alone. Properly set auto side mirrors are one of the simplest and most effective ways to reduce that risk. This guide walks you through two evidence-backed adjustment methods, highlights the most common mistakes, and shows you how to verify that your setup is actually working.
Mirror adjustment only makes sense relative to your seated driving position. If you adjust your mirrors and then move your seat, the entire setup shifts — and the coverage you thought you had disappears. The correct sequence is always: seat first, mirrors second.
Before touching the mirrors, sit in your normal driving posture with your back against the seat back. Set the seat height, fore-aft position, and backrest angle as you would for a real drive. Your arms should be slightly bent when gripping the steering wheel at the nine o'clock and three o'clock positions. Your feet should reach the pedals without lifting your hips from the seat. Only once you are settled in this position should you begin adjusting the mirrors.
This step is especially important in households where multiple people share a vehicle. Even a modest difference in height or preferred seat position between drivers is enough to invalidate the previous mirror setup entirely.
The SAE (Society of Automotive Engineers) method — which is now widely regarded as the more effective approach — requires you to shift your head position before adjusting, rather than adjusting from your normal driving posture.
The mirror will now appear to show mostly the adjacent lane rather than the side of your car. This is intentional. The goal is to have the mirror cover the area that your rearview mirror cannot — not to repeat what it already shows. You do not need to see a large portion of your own vehicle in the side mirror. Your car is not going anywhere; the lane beside you is where the risk lives.
For vertical positioning, set the mirror so that the horizon line — where the road surface meets the background — falls approximately in the middle of the mirror. The upper half should capture traffic height; the lower half should show the road surface beside the vehicle.
The passenger side mirror follows the same logic, but the head movement is in the opposite direction.
The passenger mirror should now primarily show the right adjacent lane and the road surface beside the vehicle. For the right mirror specifically, many drivers angle it slightly lower than the left mirror — enough to see the curb or lane marking when reversing or parking. Some vehicles automatically tilt the right mirror downward when reverse gear is engaged; if your car has this feature, you can set the normal driving position at the standard horizon-centered height without compromise.
There are two commonly recommended mirror adjustment methods. Understanding the difference helps you choose the right one for your vehicle and driving style.
| Feature | Traditional Method | SAE Method |
|---|---|---|
| How you position your head | Normal driving position | Leaned toward window / center |
| How much of your car you see | Roughly one-quarter of the car's flank | A sliver or none at all |
| Blind spot coverage | Moderate — side blind spots remain | Up to 90% reduction in blind spot area |
| Overlap with rearview mirror | Significant overlap | Minimal overlap by design |
| Best suited for | Low-speed driving, reversing, no rear window (e.g. towing) | Highway and multi-lane road driving |
| Initial feeling | Familiar, comfortable | Disorienting at first, but effective |
For a deeper look at the SAE-backed positioning principles, see our guide on side view mirror position for safe driving.
Even drivers who take the time to adjust their mirrors often fall into one of three predictable errors.
Mistake 1: Pointing mirrors too far inward. This is the single most widespread error. When both side mirrors show a large portion of your car's flank, you are duplicating the rearview mirror's field of view while leaving the adjacent lanes underrepresented. The lane next to you is where overtaking and merging vehicles travel — that is exactly where the coverage gap should not be.
Mistake 2: Only looking at your own car for reference. Many drivers set the mirror by making sure they can see their own door handle or rear bumper corner. While this gives a comfortable visual anchor, it is an unreliable reference point. The goal of a side mirror is not to show you your own car; it is to show you the road around your car. Use the SAE head-lean method instead of relying on your vehicle as a reference.
Mistake 3: Setting mirrors once and never adjusting again. Mirror position is relative to the driver's head position. Whenever a different driver uses the vehicle, whenever you change your seat adjustment, or whenever a mirror is accidentally nudged, the setup needs to be checked. Building a 30-second mirror check into your pre-drive routine — just as you would check your seat and seatbelt — eliminates this error entirely.
The best test for mirror adjustment is not done in a parking lot — it requires a multi-lane road. Once you are driving, watch what happens as a vehicle passes you from behind.
In a correctly adjusted system, the vehicle should first appear in your rearview mirror, then smoothly transition into your driver's side mirror as it draws closer, and then pass from the side mirror directly into your peripheral vision as it moves alongside you. At no point should the vehicle disappear from all mirrors before appearing beside you. If there is a visibility gap — a moment where the car is nowhere to be seen — that is a blind spot, and your mirrors need fine-tuning.
Repeat the test on the passenger side by watching vehicles pass on the right. The goal is a seamless handoff: rearview → side mirror → peripheral vision, with no gaps.
Mirror adjustment is not a one-time task. There are several situations that reliably require a reset.
Even if you have blind spot monitoring sensors, these are supplements to mirrors — not replacements. Sensors can miss fast-approaching motorcycles or fail under certain conditions. Correct mirror adjustment combined with a shoulder check before lane changes remains the most reliable system available. For guidance on maintaining and replacing your mirrors over time, see our auto side mirror types, maintenance, and replacement guide.
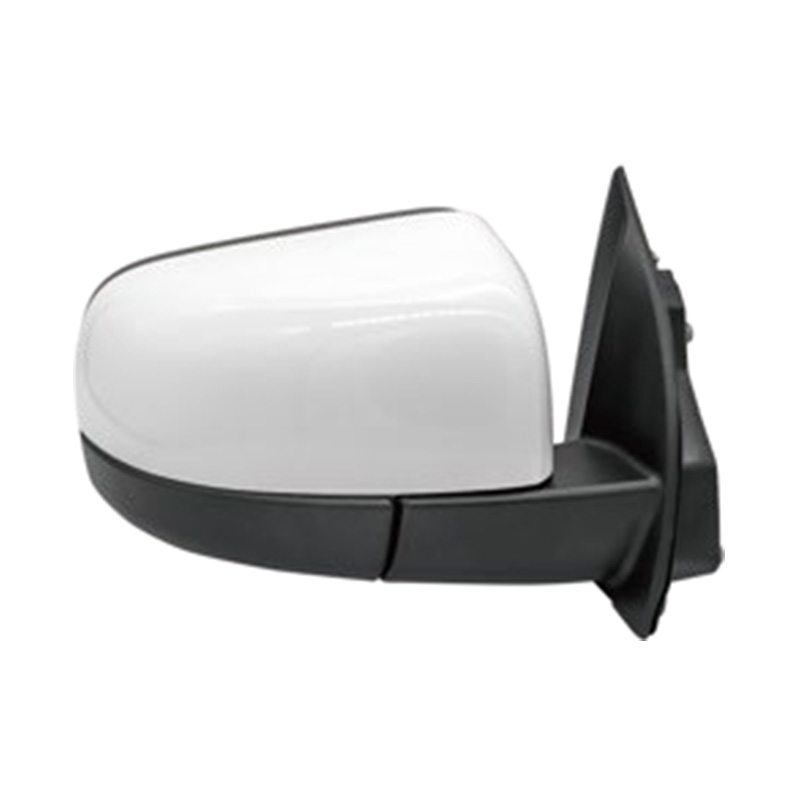 What Materials Are Car Mirrors Made Of? Glass, Coatings & Housing Explained
Apr 09, 2026
A modern automotive mirror is not a single material — it is a precisely engineered assembly of multiple layers, each serving a distinct function. From the outermost housing to the innermost reflective surface, every component contributes to the clarity, durability, and safety of what drivers rely on every time they change lanes or reverse. Understanding this layered structure helps explain why material quality directly determines mirror performance on the road.
At its most basic, a car mirror consists of four functional layers: a glass substrate that provides the optical foundation, a metallic reflective coating that creates the image, a protective layer that shields the coating from moisture and corrosion, and an exterior housing that holds everything in place under real-world driving conditions. Each layer involves specific material choices that manufacturers balance against cost, safety standards, and performance targets. For a deeper overview of how these components come together in different configurations, see our guide on auto side mirror types.
The glass substrate is the starting point of every automotive mirror. It must be flat, uniform, and optically clear — any imperfection in the base will be magnified by the reflective coating and distort the driver's view. Three types of glass are used across the automotive industry, each with different performance characteristics.
Soda-lime glass is the most widely used, accounting for roughly 90% of automotive mirror glass. Its composition — approximately 70% silica (silicon dioxide), 15% sodium oxide, and 10% calcium oxide — delivers a reliable balance of clarity, workability, and cost. Standard soda-lime glass is typically used in rear-view and interior mirrors where the risk of high-speed impact is lower.
Tempered glass is produced by heating standard glass to around 620°C and then rapidly cooling it. This process compresses the surface layers, increasing impact resistance by 400–500% compared to untreated annealed glass. Tempered glass is standard for exterior side mirrors, which must survive road debris, minor collisions, and pressure washing without shattering into dangerous shards. When tempered glass does break, it fractures into small, blunt-edged pieces — a critical safety characteristic for a component mounted at door height.
Borosilicate glass is used in premium and performance vehicles, particularly for heated mirrors. Its superior thermal shock resistance — withstanding temperature differentials up to 330°F without cracking, compared to 200°F for soda-lime — makes it well-suited to heated mirror elements that rapidly warm in cold conditions. The added cost limits its use to higher-specification vehicles.
Regardless of glass type, thickness matters. Automotive mirror glass is typically 2–4 mm thick. Thinner glass reduces weight but increases the risk of flexing under vibration, which degrades image quality. Precision flatness across the full surface — measured in fractions of a wavelength of light — is essential: even a slight warp produces the kind of distortion that makes objects appear closer or farther than they are.
Glass alone reflects only about 4% of incoming light — far too little to function as a mirror. The reflective coating is what transforms optical-grade glass into a functional mirror surface. Three metals dominate automotive applications, each with distinct trade-offs.
| Coating Material | Reflectivity | Corrosion Resistance | Typical Application |
|---|---|---|---|
| Silver | 95–98% | Moderate (requires copper barrier) | Premium OEM mirrors, low-light performance |
| Aluminum | 85–90% | Good (oxidizes to stable layer) | Standard OEM and aftermarket mirrors |
| Chromium | 60–70% | Excellent | Specialty and decorative mirrors |
Silver has historically been the preferred coating material because of its exceptionally high reflectivity across the visible spectrum. It provides notably better image brightness in low-light conditions, making it the choice for premium vehicles where nighttime visibility is prioritized. The drawback is cost and susceptibility to oxidation: silver reacts with sulfur compounds in air to form dark silver sulfide, which is why a thin copper barrier layer is typically applied between the silver and the backing paint to seal the coating from moisture and contaminants.
Aluminum is the most common coating in modern automotive mirrors because it offers strong reflectivity at significantly lower cost. Applied through physical vapor deposition — a process that evaporates aluminum in a vacuum chamber and deposits it onto the glass at thicknesses of 50–100 nanometers — aluminum coatings are uniform, fast to apply, and relatively resistant to oxidation. When aluminum oxidizes, it forms a thin, stable aluminum oxide layer that actually protects the metal beneath rather than degrading it. This makes aluminum-coated mirrors well-suited to the humid and variable conditions cars encounter daily.
Chromium offers excellent corrosion resistance but lower reflectivity, making it a less common choice for primary reflective surfaces. It is more frequently found in decorative trim elements or used as an additional protective layer over aluminum or silver coatings in high-moisture environments. For a detailed technical comparison of silver and aluminum mirror coatings, see our article on what auto side mirrors are made of.

A reflective metal coating applied directly to glass — with no further protection — would degrade within months under normal driving conditions. Moisture, temperature cycling, road chemicals, and cleaning agents would all attack the metal surface, causing tarnishing, delamination, and the dark edge blotches that appear on poorly sealed mirrors. The protective layer system solves this problem through two distinct components: a chemical barrier and a mechanical backing.
For silver-coated mirrors, a thin layer of copper is electrochemically deposited over the silver before the backing paint is applied. Copper acts as a moisture barrier, preventing water from reaching the silver and triggering the oxidative reaction that produces dark, non-reflective silver sulfide. This copper-free silver mirror design — now widely adopted in OEM production — eliminates the copper barrier entirely by using advanced paint formulations that are sufficiently impermeable on their own, reducing environmental impact while maintaining corrosion resistance.
The backing paint itself is a multi-layer system. A primer coat adheres directly to the copper or metal coating, followed by one or two layers of waterproof paint. Together, these layers must remain flexible enough to accommodate the thermal expansion and contraction the mirror experiences across seasonal temperature ranges, while remaining rigid enough to resist chipping from stone strikes. High-quality backing paint is what separates a mirror that lasts five years from one that develops edge corrosion within twelve months, particularly in vehicles exposed to road salt in winter conditions.
Some mirrors, particularly those intended for bathroom or marine environments, also receive a front-surface protective coating — a hard, transparent film that resists scratching and chemical attack. In automotive applications, a similar approach is sometimes used on heated mirrors, where the heating element requires electrical insulation between the conductive layer and the reflective surface.
The mirror housing — the outer shell that contains and protects the glass assembly, adjustment mechanism, and any electronics — is as important to overall mirror durability as the glass and coatings inside it. Housing materials must absorb impacts, resist UV degradation, withstand temperature extremes from -40°C to over 80°C, and maintain dimensional stability so the internal components stay properly aligned.
The majority of modern automotive mirror housings — approximately 80–85% — are made from engineering-grade thermoplastics, primarily polypropylene (PP) and acrylonitrile butadiene styrene (ABS). These materials offer several advantages over metal: they are 40–60% lighter, they do not corrode, they can be injection-molded into complex shapes in a single operation, and they can be painted to match body color with excellent adhesion. ABS is particularly valued for its impact resistance at low temperatures, where brittle fracture is a risk in colder climates.
Metal alloy housings — typically die-cast aluminum or steel — are used in commercial vehicles, heavy trucks, and some high-performance applications where structural strength takes priority over weight. Stainless steel mirrors, while significantly more expensive, are found in industrial and fleet vehicles because they resist the corrosion that eventually degrades painted plastic housings. The internal bracket structure, regardless of the outer housing material, typically uses stamped steel or aluminum to provide the rigid mounting point that keeps the mirror stable at highway speeds.
For powered mirrors, the housing must also accommodate motorized actuators, wiring harnesses, heating elements, and in some cases cameras, indicators, or blind-spot sensors. This integration requirement has pushed housing design toward larger, more complex structures with pre-formed cable routing channels and reinforced mounting bosses — all of which demand materials that can be molded to tight dimensional tolerances.
Mirror materials are not merely a matter of product longevity — they have a direct and measurable effect on driving safety. Every material deficiency in a mirror system creates a corresponding degradation in the driver's ability to perceive what is happening around the vehicle.
Glass flatness is the most critical variable. A mirror substrate with even minor warping — common in low-grade float glass — distorts the reflected image, making vehicles in adjacent lanes appear to be at incorrect distances or angles. The same mechanism that makes carnival mirrors amusing makes a warped side mirror genuinely hazardous at highway speeds. OEM-standard glass is produced to flatness tolerances that keep image distortion below the threshold of perceptible error for a driver at normal road distances.
Reflective coating uniformity matters for the same reason. If the aluminum or silver layer is thinner in some areas than others — a result of inconsistent vacuum deposition processes — reflectivity varies across the mirror surface. Bright spots and dim patches interfere with the driver's ability to accurately judge the size and speed of approaching vehicles. A reflectivity variation of as little as 5–10% across the mirror surface has been shown to affect depth perception in low-light conditions.
Housing integrity is equally important. A housing that cracks or deforms after a minor impact can alter the mirror's alignment, introducing a systematic blind spot the driver may not immediately notice. OEM-quality housings are tested to withstand impacts up to defined thresholds without changing the mirror's angular position — a standard that many low-cost aftermarket parts do not meet. Choosing mirrors built to OEM material standards protects not just the component, but the driver's field of vision. Browse our full range of OEM-matched auto side mirrors to find the right fit for your vehicle.
Every layer of a car mirror — from the tempered glass base to the reflective aluminum coating, the waterproof backing paint, and the impact-resistant ABS housing — is a material decision that shapes how reliably and safely the mirror performs over its service life. Understanding these materials helps drivers and fleet managers make better purchasing decisions, and helps identify when a mirror's performance has degraded to the point where replacement is necessary.
For mirrors that remain optically correct, corrosion-free, and structurally stable across years of real-world use, material quality is the determining factor — not price alone. Regular maintenance also extends the effective life of any mirror assembly; for best practice guidance, see our article on how to clean auto side mirrors and prevent fogging.

[Auto Accessories][email protected]
[Auto Parts][email protected]

+86-0571-26238568

Kangxin Road, Tangqi Town, Linping District, Hangzhou , Zhejiang , China