English
 中文简体
中文简体
 русский
 Español
[Auto Accessories][email protected]
2026-05-14
A rear view mirror problem rarely announces itself at a convenient time. The interior mirror drops off the windshield on a cold morning. The side mirror gets clipped in a parking lot. The ball joint slowly gives up and the mirror sags no matter how many times you push it back into position. Each of these is a different problem with a different fix — and knowing which one you're dealing with is the first step to solving it correctly.
Content
Before reaching for any tools or adhesives, take a minute to identify exactly what failed. The repair approach changes significantly depending on the fault.
Interior mirror fell off the windshield. The metal mounting button has separated from the glass. The mirror assembly itself is intact — it just has nothing to attach to. This is an adhesive failure, and it's the most common rear view mirror problem.
Interior mirror droops or won't hold position. The mirror is still mounted to the windshield, but it sags downward or can't be adjusted without immediately falling back. This is a ball-and-socket joint failure — the socket has worn down and can no longer grip the ball tightly.
Mirror glass is cracked or reflective coating is failing. The mounting is fine but the mirror itself is compromised. Depending on whether the mirror has integrated electronics, this may be a simple glass swap or a full assembly replacement.
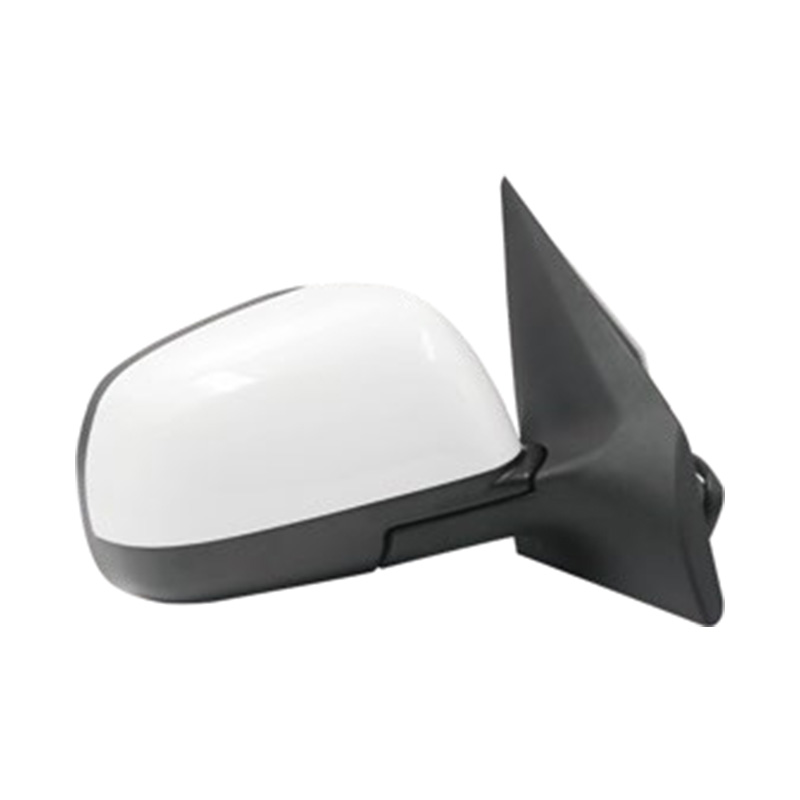
Side mirror is damaged. The exterior wing mirror has been struck, the housing is cracked, the glass is shattered, or the power adjustment motor has failed. Side mirror repairs range from glass-only replacements to full assembly swaps, depending on what broke and what features the mirror contains.
This repair requires a rear view mirror adhesive kit, which is available at most auto parts stores for a few dollars. Do not use standard super glue or epoxy — automotive mirror adhesive is specifically formulated to bond metal to glass and withstand the thermal cycling inside a car cabin, which can swing from below freezing to over 70°C (160°F) in direct sunlight.
Work in temperatures between 10°C and 25°C (50°F–75°F) for the best bond. Extreme cold or heat during application reduces adhesive effectiveness.
Start by marking the position of the mounting button on the outside of the windshield with a small piece of masking tape. This gives you a precise reference point when repositioning, since the correct location is critical — too high or low and the mirror won't sit at the right angle. Use an allen wrench to detach the mirror from the metal mounting button if they're still connected. Then use a razor blade held at a low angle to scrape away all old adhesive residue from both the button and the windshield. Follow with a thorough wipe using the alcohol pad included in the kit, or isopropyl alcohol on a clean cloth.
Apply the activator that comes with the kit to the windshield spot, let it dry per the instructions (usually 60–90 seconds), then apply the adhesive to the metal button only — not directly to the glass. Press the button firmly against the windshield, aligned with your tape marker, and hold it with steady pressure for the time specified in the kit instructions, typically one to two minutes. Tape the button in place and leave it undisturbed for the full cure time — usually at least one hour, sometimes up to 24 hours for full strength — before reattaching the mirror.
Do not drive until the adhesive has fully cured. A partially bonded mirror will fail again under vibration within a few kilometres.
When the mirror is still attached to the windshield but won't hold its adjusted position, the problem is usually a worn socket. The plastic teeth inside the socket that grip the mounting ball have broken or worn smooth, and there's no longer enough clamping force to hold the mirror in place against its own weight.
A commonly suggested fix — stretching a latex glove fingertip over the ball — rarely holds up in practice. The glove material breaks down quickly under the friction of mirror adjustment and offers no lasting improvement.
A more reliable approach is to build up the ball slightly using super glue. With the mirror detached from the ball, apply a thin, even coat of super glue over the entire surface of the ball joint. Let it cure completely, then test the fit by snapping the mirror socket back onto the ball. If it's still too loose, apply a second thin layer and repeat. The goal is to increase the ball's diameter just enough to restore a snug fit inside the socket — not to glue the joint permanently shut. The mirror should still pivot smoothly after the fix, just with noticeably more resistance than a worn joint.
If the socket itself is cracked or multiple layers of super glue don't restore adequate grip, the mirror assembly will need to be replaced rather than repaired.
A cracked interior mirror glass compromises your rear visibility and, depending on jurisdiction, may make a vehicle non-roadworthy for inspection. Whether the glass alone can be replaced or the full assembly must be swapped depends on what features the mirror contains.
A basic manual-dimming interior mirror with no electronics is straightforward to replace as a full unit. Remove the old mirror from the mounting button (usually by sliding or unclipping it), and clip the replacement onto the same button. No adhesive work is needed if the button is already secure.
Mirrors with auto-dimming (electrochromic) glass, integrated HomeLink garage door controls, compass displays, or cameras require more care. Mirrors that are part of an Advanced Driver Assistance System (ADAS) — such as forward collision cameras or lane departure sensors — must be replaced and recalibrated by a professional. Incorrect installation or skipped calibration can cause the system to misread distances and angles, compromising safety features that many drivers rely on without knowing it. If your car was made in the last five to seven years, check whether the interior mirror contains a camera before assuming it's a simple DIY swap.
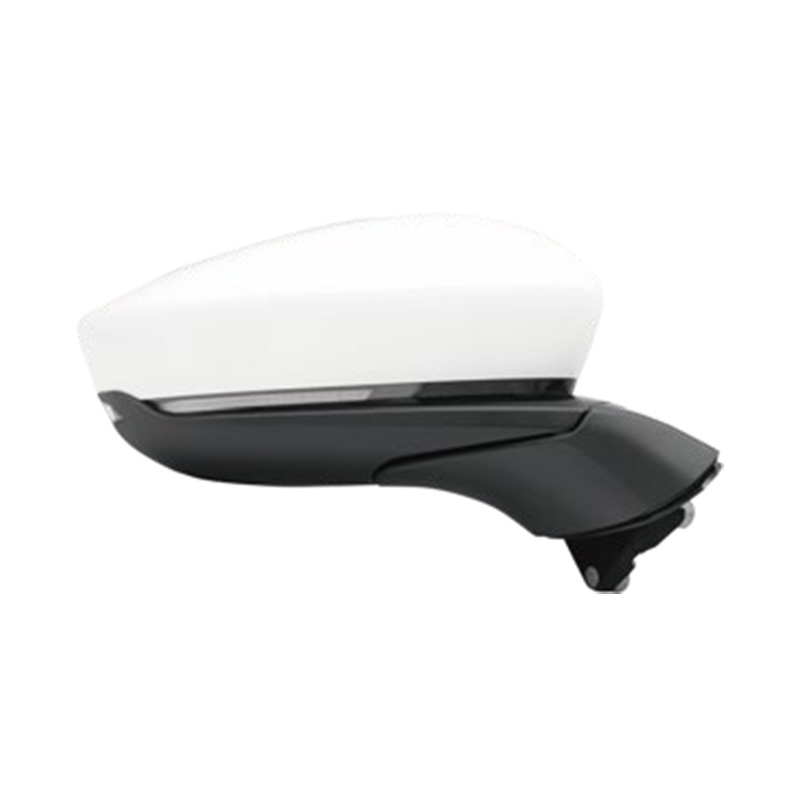
Side mirrors take far more physical abuse than interior mirrors — parking lot scrapes, wing strikes on narrow roads, and storm damage are common. The repair scope depends on what exactly broke.
Glass only. If the housing and motor are undamaged but the glass itself is cracked or shattered, replacement glass inserts are available for many common vehicles. These are held in place by clips or adhesive backing and can be swapped in without removing the full mirror assembly. This is the cheapest and fastest option when the damage is limited to the reflective surface.
Housing cracked but glass intact. Replacement housings (mirror covers) are available separately from the full assembly for most popular models. They clip or screw onto the existing mirror base without disturbing the wiring or motor. This is a good option when an impact has cracked the plastic shell but left the mechanical and electrical components working.
Full assembly replacement. When the power adjustment motor has failed, the mirror has been sheared off at the base, or the heating element is dead, replacing the complete mirror assembly is the right call. Plug-and-play replacement mirrors are available for most major makes and models, and installation typically requires only basic hand tools — removing a door panel trim piece, disconnecting the wiring harness, and unbolting the mirror from the door frame.
For brand-specific replacement side mirror assemblies, browse options by make: Toyota side mirror replacements, Honda side mirror assemblies, and Ford side mirror replacements cover three of the most common platforms. The full range of auto side mirrors by make and model also covers Nissan, Mazda, Hyundai, Kia, Subaru, Audi, Volkswagen, and other major brands for a direct-fit replacement without modification.
Most rear view mirror repairs are genuinely DIY-friendly, but a few situations call for professional involvement. ADAS-integrated mirrors are the clearest example: any mirror that contains a camera, radar sensor, or other safety system component needs dealer or specialist recalibration after replacement. Skipping this step doesn't just mean a slightly off image — it can disable collision warnings, lane departure alerts, and automatic emergency braking, often without triggering a warning light.
Side mirrors with built-in blind spot monitoring sensors also require care. While the mirror glass itself may be replaceable at home, the sensor calibration embedded in these systems is not. If replacing the housing or assembly of a mirror that has a blind spot warning indicator, verify with the vehicle manufacturer whether recalibration is required for your specific model.
For straightforward cases — a fallen interior mirror, a worn ball joint, or a non-electronic side mirror replacement — the tools required are minimal, the parts are inexpensive, and the repair can be done in under an hour. Getting the diagnosis right before buying parts is the single step that makes the difference between a repair that holds and one that needs to be redone a week later.

[Auto Accessories][email protected]
[Auto Parts][email protected]

+86-0571-26238568

Kangxin Road, Tangqi Town, Linping District, Hangzhou , Zhejiang , China