English
 中文简体
中文简体
 русский
 Español
[Auto Accessories][email protected]
2026-09-09
You back into a low post at the exit of a parking garage, and the driver's side wing mirror folds back with a loud crack. The housing is shattered, the glass is loose, and you have no idea how much a repair shop will charge. The hard part is deciding whether to replace just the glass, the cover, or the whole unit. In most cases, a wing mirror replacement is a manageable weekend job if you have the right tools, a correct new part, and a few hours of patience. The steering voice quickly returns: once you know what is damaged, you can avoid paying labor fees and get back on the road with a clear view.
Content
Wing mirror damage rarely falls into just one category. The glass can break from an impact while the housing stays intact, or the housing can crack while the glass remains functional. More often than not, both suffer together. Ordering the wrong part costs time and money, so inspect the mirror under good lighting before you buy.
| Damage | Likely replacement | Skill level |
|---|---|---|
| Glass is cracked or shattered | Mirror glass | Beginner |
| Cover is scratched or cracked | Mirror cover | Beginner |
| Housing broken at the base or folding joint | Complete mirror unit | Intermediate |
| Electrical failure in power adjust or heater | Complete mirror unit or motor | Intermediate |
If the base is broken or the internal mechanism no longer holds the glass firmly, a complete unit is the safest choice. Replacing only the glass on a broken housing can leave it loose and prone to vibration, while a missing cover looks bad and exposes the glass to weather.
Wing mirrors are not interchangeable across trim levels. A base model might have a manual mirror with a simple cable, while a top trim can include power adjust, heating, auto-dimming, folding, puddle lamps, and integrated turn signals. If your original mirror had heated glass and you install a non-heated unit, you lose a feature and may face a wiring mismatch.
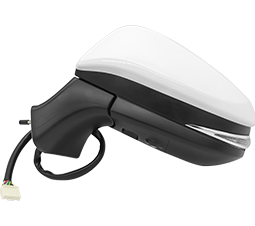 QXP Auto Side Mirror Replacement for Various Car ModelsThis side mirror from QXP is built to OE specifications, ensuring proper fit for many Japanese and German vehicles. It offers a reliable replacement option with features matching factory units.View Product →
When you order a complete unit, always match the connector type, the number of wires, and the mounting points on the door. As a manufacturer of automatic side mirrors, we build qxp-branded units to OE-style specifications, which means the contours and mounting holes match factory panels. This cuts down on the risk of buying a part that needs modifying to fit.
For example, if you drive a Toyota, choosing a model-specific mirror is faster than trying to adapt a universal part. The same applies to other common brands such as Honda, Nissan, or Volkswagen.
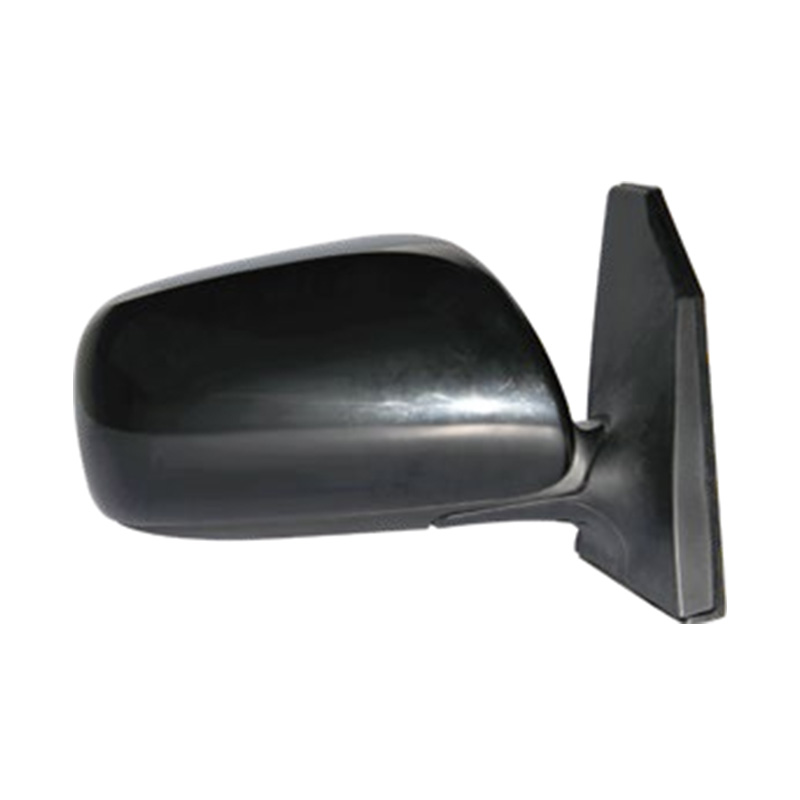 QXP Side Mirrors for Toyota Corolla Model YearsThese QXP side mirrors are designed for specific Toyota Corolla generations, offering direct fit for various trims and regions, simplifying replacement without modifications.View Product →
A direct-fit replacement tends to be easier to install, reduce the chance of water ingress, and provide a cleaner look. Check your trim level and the exact mirror functions before you place an order.
Replacing a complete wing mirror usually requires removing the door trim panel. You will need several basic tools:
Always disconnect the negative battery terminal before working near wiring or the airbag system. This is especially important on vehicles with power-adjusted mirrors because a short circuit can blow a fuse or trigger a fault code. Wait ten minutes after disconnecting the battery if your car has a memory seat or sensor that needs to recalibrate.
The process varies slightly by vehicle, but the general sequence is consistent. Follow these steps to replace a complete wing mirror.
Use the trim lever to pop out the plastic fasteners around the door panel. Look for hidden screws near the door handle, under a small cap, or near the armrest. Gently pull the panel away from the door by starting at the bottom and working upward. Keep the wires connected if they are still attached, and set the panel aside on a soft surface.
Find the connector behind the door panel that runs to the mirror. Depress the release tab and separate the plug. If the mirror has a puddle lamp or a camera, there may be more than one connector. Take a photo before disconnecting anything to avoid mixing up the wires later.
With the door panel off, you will see the mirror mounting plate attached to the door frame. Remove the two or three bolts that hold the mirror in place. Use a 10 mm socket or the recommended Torx bit. Hold the mirror with your other hand so it does not fall once the last bolt is loose.
Position the new mirror over the mounting holes and tighten the bolts by hand first. Do not overtighten them, as this can strip the threads or crack the door frame. Attach the wiring harness and make sure the connector clicks into place. If the new unit has a different connector, stop and verify that you ordered the correct trim level.
Reconnect the battery negative terminal. Test the mirror functions: power adjust up and down, left and right, heat if applicable, folding action, and turn signals. Then reassemble the door panel by pressing the trim clips back in. It is normal for some plastic clips to feel stiff on the first reinstall.
Once the mirror is in place, proper adjustment is as important as the installation itself. A correctly adjusted mirror eliminates blind spots and gives you a full view of your lane. The correct way to adjust auto side mirrors includes setting the glass so the side of your vehicle is barely visible on the inner edge. Do this before you drive, and do not rely on the memory of the old mirror position.
After adjustment, verify that the glass stays in place at highway speed. A loose mirror will vibrate and blur the image, hurting your ability to judge distance. If your replacement unit includes heating elements, turn them on and confirm the glass warms evenly.
Not every wing mirror replacement is a DIY success. If your mirror houses a blind spot camera, a lane departure camera, or a memory function that is linked to the vehicle's software, the simple bolt-in process can turn into a calibration job. Some modern vehicles require a diagnostic tool to reset fault codes after a mirror with sensors is replaced.
Also avoid DIY if the mounting area has significant rust or if the door frame is bent from an accident. In those cases, the new mirror may not sit flush, and air noise or water leaks can develop. A professional shop has the equipment to pull the dent or repair the mounting plate properly.
Finally, if the mirror cover needs to be painted to match your car body color, painting is best left to an experienced sprayer to avoid obvious color mismatch.
The price difference between an imitation mirror and a well-made unit is small compared to the work involved. A low-quality part often uses thin glass, plastic that turns brittle in cold weather, or a motor that stalls after a few months. These failures can be more dangerous than the original damage because they fail while you are driving.
Manufacturers like Hangzhou Golden Sun AutoParts build side mirrors to strict production standards, with clear glass, stable housings, and reliable electrical connections. For instance, a Honda owner can choose a specifically designed qxp mirror that matches the original look and fits the existing hardware without drilling.
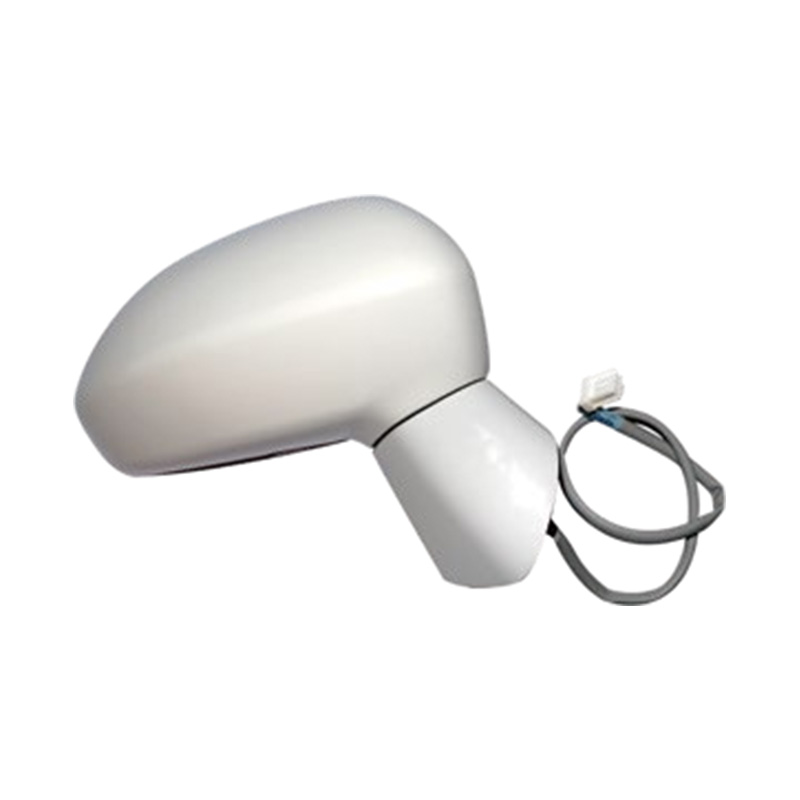 QXP Side Mirrors for Honda Fit and Civic ModelsThese QXP side mirrors are tailored for Honda Fit, Jazz, and Civic models, providing a direct fit that matches original wiring and mounting, ensuring easy installation.View Product →
When you compare parts, focus on fitment details such as plug type and the exact number of wires. A good supplier will list the compatible model years and trim levels so you do not end up with a part that needs extra connectors or resistors.


[Auto Accessories][email protected]
[Auto Parts][email protected]

+86-0571-26238568

Kangxin Road, Tangqi Town, Linping District, Hangzhou , Zhejiang , China