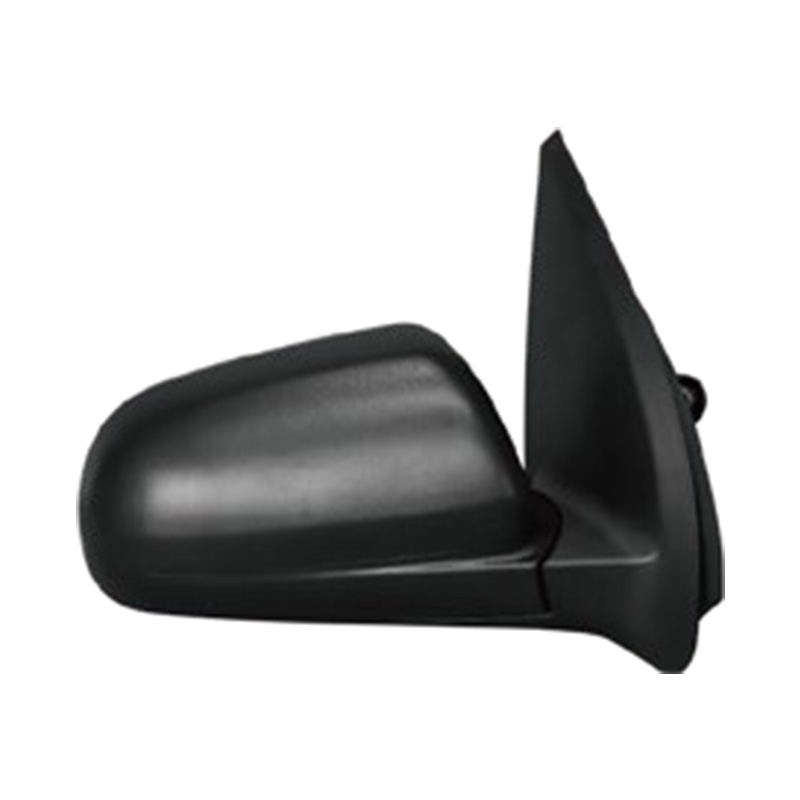
 How to Fix a Rear View Mirror: Step-by-Step Guide

Mar 09, 2026
A rear view mirror that has fallen off, won't stay in position, or has a loose mount is one of the most common and fixable car problems. In the majority of cases, reattaching a fallen mirror takes about 30–45 minutes and costs less than $10 in adhesive — no mechanic required. The fix you need depends on exactly what failed: the adhesive button on the windshield, the mirror's mounting bracket, the ball-and-socket pivot joint, or the mirror glass itself.
This guide covers every common rear view mirror failure, the correct repair approach for each, and the specific materials and steps needed to do the job properly the first time.
Before buying any materials or starting a repair, identify exactly what has failed. The fix for each scenario is different, and using the wrong approach wastes time and money.
| Symptom | Likely Cause | Repair Type | Difficulty |
|---|---|---|---|
| Mirror fell off windshield completely | Adhesive button failure | Re-glue button to glass | Easy |
| Mirror droops or won't hold angle | Worn ball-and-socket joint | Tighten or replace pivot | Easy to moderate |
| Bracket is present but mirror won't clip on | Broken mounting clip or arm | Replace mirror assembly | Moderate |
| Mirror glass cracked or delaminated | Physical damage or UV breakdown | Replace mirror glass only | Easy |
This is the most common repair. The mirror attaches to the windshield via a small metal button that is glued directly to the glass. Over time — especially in vehicles that experience extreme temperature swings — the adhesive bond weakens and the button separates from the windshield, taking the entire mirror with it. Standard super glue will not work here; you need a two-part rearview mirror adhesive specifically formulated to bond metal to glass under vibration and heat.
Temperature matters for curing. The best results occur when the windshield is between 60–80°F (15–27°C). In cold weather, park in a garage or use a heat gun on low to gently warm the glass before application. In very hot weather, park in shade and allow the glass to cool — adhesive applied to glass above 90°F often cures too quickly to bond properly.
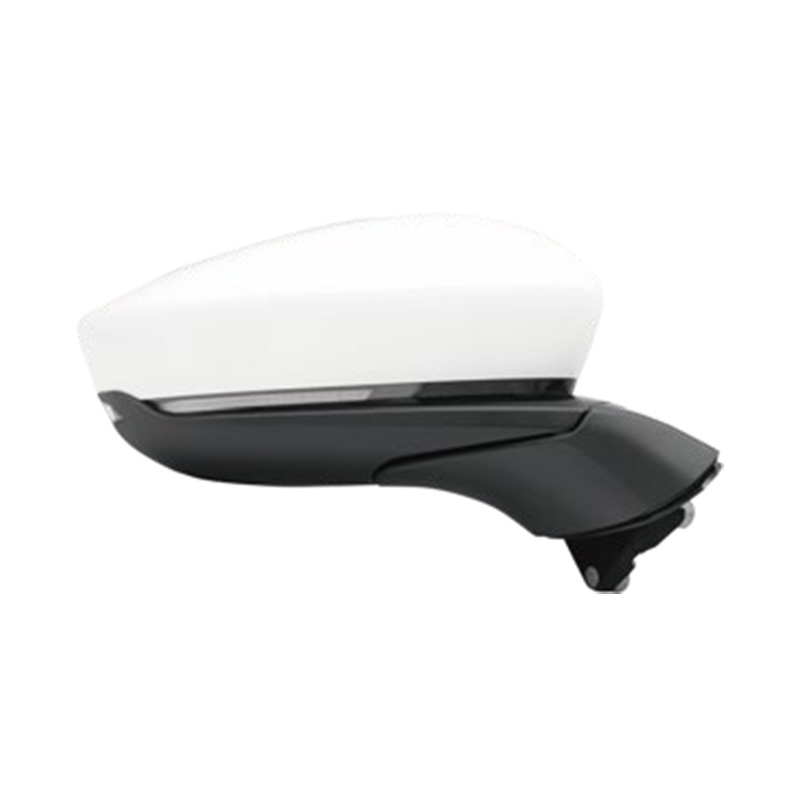
If the mirror is still attached to the windshield but droops, vibrates excessively, or will not hold its adjusted angle, the ball-and-socket pivot joint inside the mirror arm has worn out. This joint allows you to tilt and rotate the mirror — over years of adjustment, the socket can loosen to the point where it no longer grips the ball securely.
Many mirror arms have a small Phillips or flathead screw on the side or underside of the pivot housing. Tightening this screw compresses the socket around the ball, increasing friction and restoring the mirror's ability to hold position. Turn the screw clockwise in quarter-turn increments until the mirror holds its position without excessive resistance when adjusting. Over-tightening can crack the plastic housing — stop as soon as the mirror holds firmly.
Some mirror arms use a non-adjustable press-fit socket. When these loosen, a practical field fix is to wrap the ball joint with one or two layers of plumber's PTFE (thread seal) tape before reassembling the socket. The tape adds just enough thickness to restore friction without requiring any special tools. Disassemble the arm, wrap the ball, and snap the socket back together.
If the pivot is cracked, the socket is visibly broken, or shimming does not restore adequate tension, replacing the full mirror unit is more reliable than continued attempts at repair. Universal replacement interior mirror assemblies are available for $15–$40 and clip directly onto the existing windshield button, making installation a 2-minute job once the button is properly adhered.
If the mirror arm and mount are intact but the glass is cracked, heavily scratched, or the reflective backing has delaminated (appearing as dark spots or a silvery peel), you can replace the glass alone without touching the windshield mount. Replacement mirror glass inserts are sold for most vehicles and cost $8–$25 depending on whether the mirror is standard, auto-dimming, or has a built-in display.
Always confirm the replacement glass is cut for your specific vehicle's mirror housing — dimensions vary between makes and models, and a glass that is even a few millimeters oversized will not seat correctly.
Auto-dimming mirrors — found on most vehicles made after 2010 in the mid-to-upper trim levels — add a layer of complexity because they incorporate electrochromic gel between two glass layers, wiring harnesses, and sometimes integrated cameras, compasses, or displays. The mechanical reattachment process is identical to a standard mirror, but there are additional considerations:
If the auto-dimming function has failed and the mirror is otherwise intact, a replacement auto-dimming glass assembly for common vehicles typically costs $60–$150 from aftermarket suppliers — significantly less than a dealer-sourced unit.
A rear view mirror that falls off again within days or weeks of repair almost always failed for one of these reasons:
Most rear view mirror repairs are straightforward DIY jobs, but a few situations warrant professional attention:
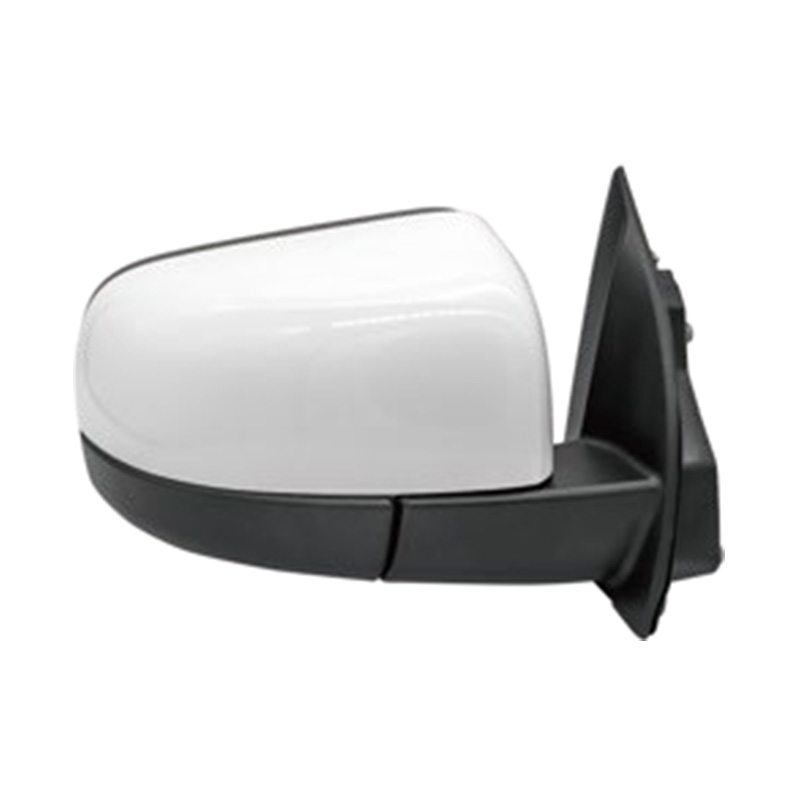 Side View Mirror Position: How to Adjust for Safe Driving
Mar 04, 2026
The correct side view mirror position points outward far enough that your own vehicle is barely visible — or not visible at all — at the inner edge of the mirror. This is the Society of Automotive Engineers (SAE) recommended setting, validated by research showing it reduces blind spot coverage by up to 90% compared to the traditional inward-angled position most drivers use. Most people angle their side mirrors too far inward, showing a large portion of their own car's flank — a redundant view that adds no safety information while leaving the adjacent lanes underrepresented.
The conventional wisdom that you should see about a quarter of your own car in the side mirror comes from an era when mirrors were small and drivers needed a reference point for depth perception. Modern mirrors are larger, and the BGE (Blind Spot Glare Elimination) method developed by the SAE demonstrates that positioning mirrors to cover the adjacent lane — rather than your own vehicle — provides substantially more useful visual information with no loss of spatial awareness once drivers adapt to the setting.
Proper mirror adjustment takes less than two minutes and should be done every time a different driver uses the vehicle, after any seat position change, or whenever the mirrors are moved accidentally. The adjustment sequence matters — always set the seat and steering column first, then adjust mirrors to that seated position.
Vertical positioning is equally important and often neglected. The horizon line — where the road surface meets the background — should fall approximately in the middle of the mirror vertically. The upper half of the mirror should show the area behind and beside the vehicle at traffic height; the lower half should show the road surface. A mirror angled too high shows only sky and distant background; too low shows only road and misses vehicles in adjacent lanes at normal ride height.
For the right mirror specifically, many drivers angle it slightly lower than the left — far enough down to see the curb or lane marking when reversing or parking. Some vehicles have a function that automatically tilts the right mirror downward when reverse gear is engaged; if this is available, the normal driving position for the right mirror can be set at the standard horizon-centered height without compromise.
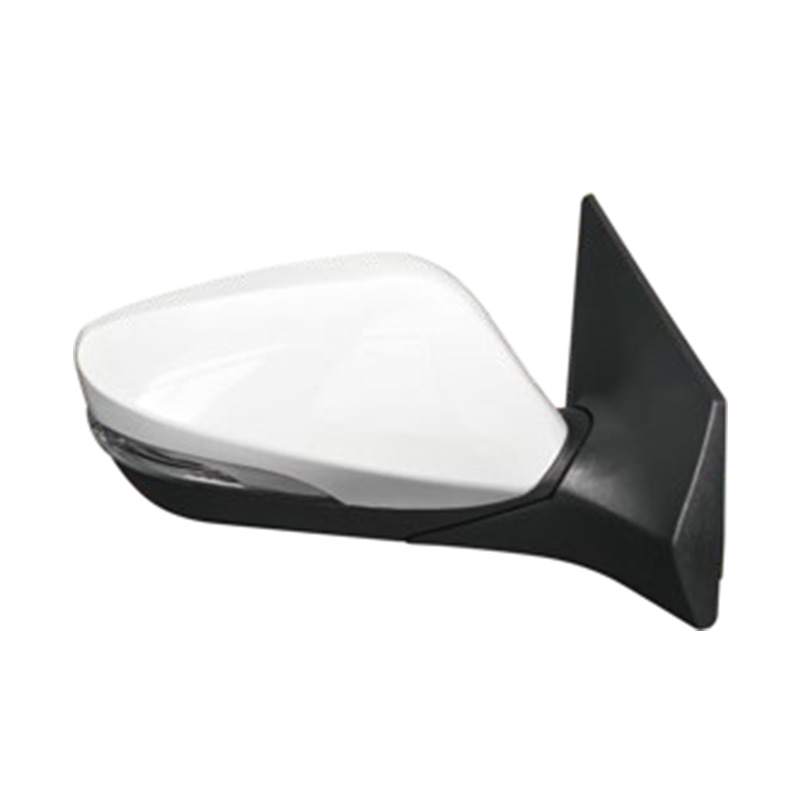
A blind spot is any area around the vehicle that is not visible in any mirror and cannot be seen without physically turning to look. The size and location of blind spots are directly determined by mirror position. The commonly cited statistic that approximately 840,000 blind spot-related accidents occur annually in the United States (NHTSA data) underscores why mirror position is a genuine safety matter, not merely a preference.
In the traditional inward-angled position — where the driver can see a significant portion of their own vehicle in both side mirrors — the side mirrors overlap significantly with the rearview mirror's field of view. The area directly behind the vehicle is covered multiple times, while the zones in the adjacent lanes beside the rear quarters of the vehicle are covered by nothing. These uncovered zones are the classic blind spots.
A vehicle traveling in the adjacent lane will typically disappear from the rearview mirror before it appears in an inward-angled side mirror, creating a window of invisibility that can last 1–2 seconds at highway speeds — enough time for the vehicle to be directly alongside before the driver is aware of it.
With mirrors adjusted outward using the BGE method, the side mirrors pick up coverage precisely where the rearview mirror ends. As a vehicle overtaking from behind moves out of the rearview mirror's field, it immediately appears in the side mirror. As it moves forward past the side mirror's field, it becomes visible in the driver's peripheral vision. The result is a nearly continuous handoff of visual coverage from rearview mirror to side mirror to peripheral vision with minimal gap.
The SAE study that established this method found that with correctly positioned mirrors, a vehicle in an adjacent lane remains visible continuously from the moment it pulls alongside from behind until it is far enough forward to be seen directly — effectively eliminating the traditional blind spot for most passenger vehicles in most traffic scenarios.
The difference between the two main mirror positioning approaches is significant in practice. The table below summarizes the key differences to help drivers understand what each method provides and gives up.
| Aspect | Traditional Position (Car Visible) | BGE / Outward Position (Car Not Visible) |
|---|---|---|
| Blind spot coverage | Large blind spot beside rear quarter | Minimal to no traditional blind spot |
| Overlap with rearview mirror | Significant overlap (redundant coverage) | Minimal overlap (maximum total coverage) |
| View of own vehicle | 25–40% of mirror shows own car | 0–5% of mirror shows own car |
| Adjacent lane visibility | Limited; only vehicles well behind visible | Full adjacent lane visible from beside rear to well forward |
| Adaptation required | Familiar to most drivers | 1–2 weeks to feel natural for experienced drivers |
| Useful for parking / reversing | Good spatial reference for car position | Requires more use of cameras or head check for tight maneuvering |
| Recommended by | Traditional driving instruction | SAE, Consumer Reports, many advanced driving programs |
Drivers who switch from the traditional position to the BGE outward setting almost universally report an initial period of disorientation — the mirrors look "wrong" because they no longer show the familiar reference of the car's own bodywork. This feeling typically passes within one to two weeks of regular driving, after which the outward position becomes equally intuitive while providing substantially better blind spot coverage.
During the adaptation period, the most important adjustment is changing the habit of checking for blind spots. With traditional mirror positioning, a shoulder check is always required before changing lanes because the mirror does not show the adjacent lane adequately. With correctly positioned BGE mirrors, a vehicle appearing in the mirror as you signal and check provides confirmation before the shoulder check, and the shoulder check confirms what the mirror has already shown. The head check does not become unnecessary — but it becomes a confirmation rather than the primary source of information.
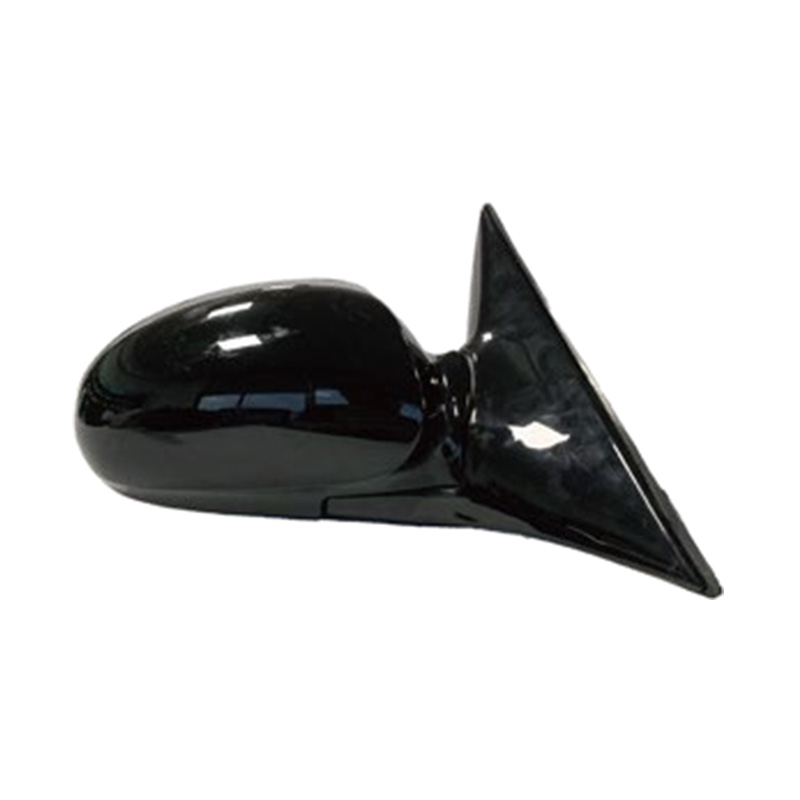
The principles of correct mirror positioning apply across all vehicle types, but the specific adjustments differ based on vehicle height, width, and intended use.
Taller vehicles with higher seating positions have a naturally better rearward sightline than sedans, but their greater width means the adjacent lane is further from the driver's eye position. This makes the outward mirror adjustment even more critical for SUVs and trucks than for lower vehicles. The vertical adjustment is also more important — the horizon line should still bisect the mirror vertically, which at a higher seating position means tilting the mirror slightly downward relative to the truck's body to ensure the road surface at adjacent lane height is visible rather than just the upper portion of the scene.
When towing, the mirrors must cover both the adjacent lane and the trailer sides. Many trucks and SUVs have extended tow mirrors that fold out further than standard mirrors — these should always be deployed when towing, as standard mirrors typically cannot see past a trailer of normal width. With tow mirrors extended, the same BGE outward positioning principle applies: angle them to show the adjacent lane beside the trailer, not the trailer surface itself. The trailer sides should be just barely visible at the inner mirror edge as a reference, with the majority of the mirror showing the lane beside the trailer.
Full-size vans without rear windows rely entirely on side mirrors for rearward visibility, making correct positioning especially critical. Many vans have two mirrors on each side — a flat upper mirror for distance and a convex lower mirror for close-range coverage. The flat mirror should be set using the same outward BGE principle as a standard passenger vehicle. The convex mirror below it should be angled to show the area immediately beside and behind the van — the zone where cyclists, pedestrians, and low vehicles are most likely to be invisible to the primary flat mirror.
Motorcycle mirrors are smaller and positioned differently from car mirrors, but the same principle applies: angle them outward to maximize adjacent lane coverage rather than showing the rider's own arms or body. The mirrors should show the lane to the rear and side with minimal view of the motorcycle itself. Because motorcycle mirrors vibrate at speed and are mounted on handlebars that change angle with steering, checking mirror position after acceleration to highway speed — rather than only at rest — ensures the adjustment is correct under actual riding conditions.
Even optimally positioned mirrors have physical limits. Certain zones around any vehicle — particularly the near-side front quarter and the area immediately behind large vehicles — cannot be covered by standard mirrors regardless of adjustment. The following measures address coverage gaps that mirror position alone cannot solve.
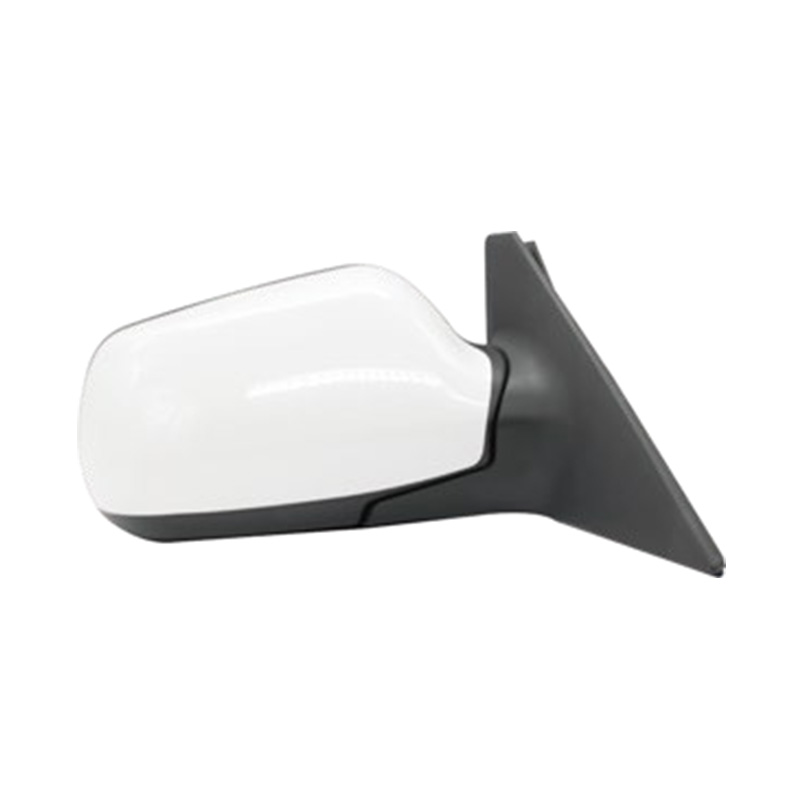 Replacing a Rear View Mirror: A Complete How-To Guide
Feb 25, 2026
Yes — replacing a rear view mirror is one of the more straightforward DIY car repairs. In most cases, the job takes between 15 and 45 minutes, costs $10–$50 in parts if you do it yourself, and requires no special mechanical skill. The main variable is whether your mirror attaches to a metal button glued to the windshield or uses a different mounting system — and whether that button has come loose along with the mirror.
The exception is mirrors with built-in electronics — auto-dimming, compass displays, lane departure cameras, or HomeLink garage door controls. These require wiring work and sometimes dealer-level calibration, which pushes the job closer to professional territory. For a standard non-electronic mirror, though, this is a confident first-timer's repair.
Before buying parts or starting work, it helps to know which mounting system your car uses. Most modern vehicles use one of three attachment methods:
A small metal button is bonded directly to the inside of the windshield glass with a specialized adhesive. The mirror's mounting bracket slides or twists onto this button and is secured by a set screw. This is the system found on the vast majority of passenger cars made after the 1980s. When the mirror falls off, it's usually because the adhesive bond between the button and the glass has failed — a common problem in hot climates or on older vehicles.
Some older vehicles and certain truck platforms mount the mirror to a bracket that is screwed directly into the headliner or roof frame, rather than glued to the glass. This system is more secure but less common in modern cars.
Some vehicles use a plastic clip or snap-fit connector that allows the mirror to be removed without tools for quick replacement. This is common on economy vehicles and makes mirror swaps exceptionally simple.
Gathering the right materials before starting saves time and prevents the frustration of a half-finished job. Here's what the typical button-mount replacement requires:
If your mirror has wiring for auto-dimming, a compass, or camera functions, you'll also need basic electrical connectors or the appropriate vehicle-specific wiring harness adapter.
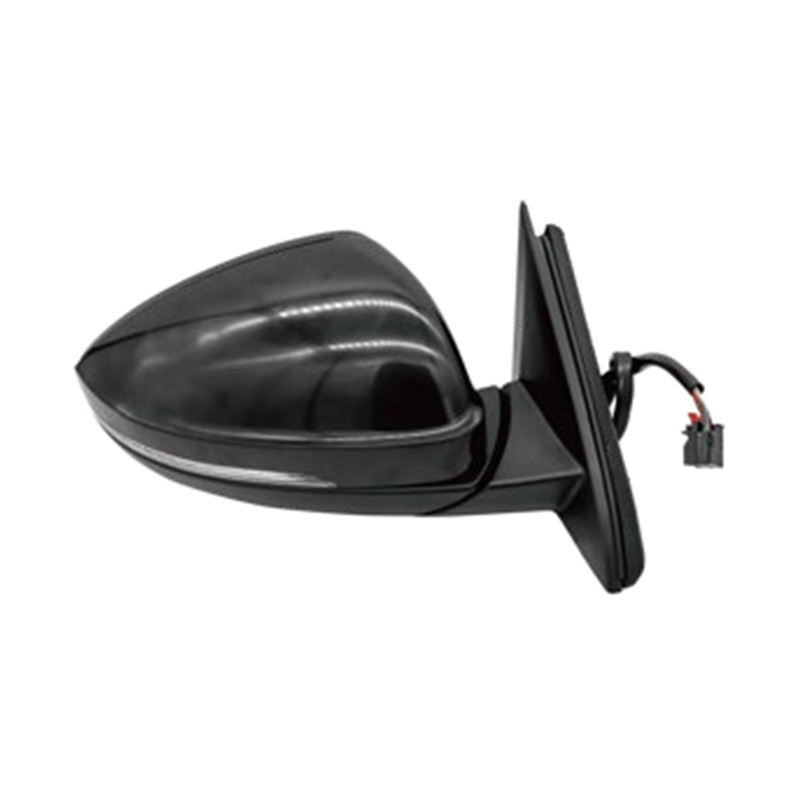
This process covers the most common scenario: the mirror has fallen off or needs to be replaced, and the metal button either came off with it or is still on the glass.
If the mirror is still attached to the windshield, loosen the set screw at the base of the bracket (usually a small Allen or flathead screw) and slide the mirror off the button. If the button is still on the glass, use a razor blade held at a low angle to carefully scrape it off. Work slowly to avoid scratching the glass. Remove any remaining adhesive residue with isopropyl alcohol.
Use masking tape on the outside of the windshield to mark the exact position where the button was located. Accurate placement matters — a button glued even an inch off-center will affect mirror angle and visibility. The standard position is centered horizontally and approximately 1–3 inches below the top edge of the glass, but check your owner's manual if unsure.
Clean the bonding area thoroughly with isopropyl alcohol and let it dry completely. Most mirror adhesive kits include a surface activator (a small glass prep ampule) — apply this to the glass surface and allow it to flash off for 60 seconds. This step is critical: skipping it is the number one reason mirror buttons fail again within weeks.
Apply the included adhesive to the flat face of the metal button — a small, even bead is sufficient. Press the button firmly onto the prepared glass surface and hold it in place for 60–90 seconds. Do not move or adjust it after pressing. Allow the adhesive to cure for the time specified by the kit manufacturer — typically 15–30 minutes at room temperature before attaching the mirror, and up to 24 hours before subjecting it to significant vibration or load.
Slide the mirror bracket onto the cured button and tighten the set screw — firm but not overtightened, as excessive force can stress the bond or crack the button. Reconnect any wiring harnesses if applicable. Sit in the driver's seat and adjust the mirror angle so the full rear window is visible with minimal head movement.
Not all rear view mirrors are interchangeable. Using the wrong mirror can mean a loose fit, missing features, or wiring incompatibility. Here's how the main options compare:
| Mirror Type | Typical Cost | Wiring Required | Best For |
|---|---|---|---|
| Standard (no electronics) | $15–$40 | No | Simple, budget-friendly replacement |
| Auto-dimming | $60–$150 | Yes (2-wire) | Reducing glare from headlights at night |
| Auto-dimming with compass | $80–$200 | Yes (multi-wire) | Replacing OEM mirrors with these features |
| Backup camera / display mirror | $80–$300 | Yes (camera + power) | Adding rear camera visibility to older vehicles |
| OEM replacement | $50–$400+ | Depends on model | Exact factory match, warranty retention |
When in doubt, use your vehicle's VIN number to search for exact-fit mirrors on sites like RockAuto, Amazon, or your dealership's parts department. This eliminates guesswork around bracket compatibility and button size.
A poorly done rear view mirror installation typically fails within days or weeks. These are the most common reasons it happens:
DIY replacement works well for most situations, but there are cases where professional help is the smarter call:
For a standard non-electronic mirror on a mainstream vehicle, a professional shop will typically charge $50–$100 in labor on top of parts — making DIY replacement genuinely worthwhile if you're comfortable with basic car maintenance.
 What Are Auto Side Mirrors Made Of? Materials & Construction
Feb 19, 2026
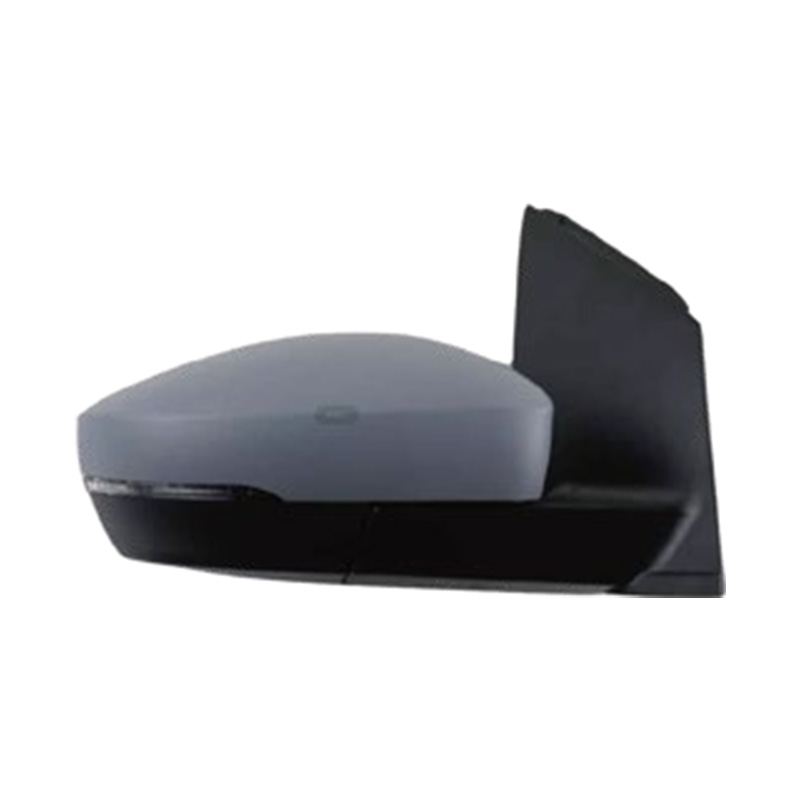
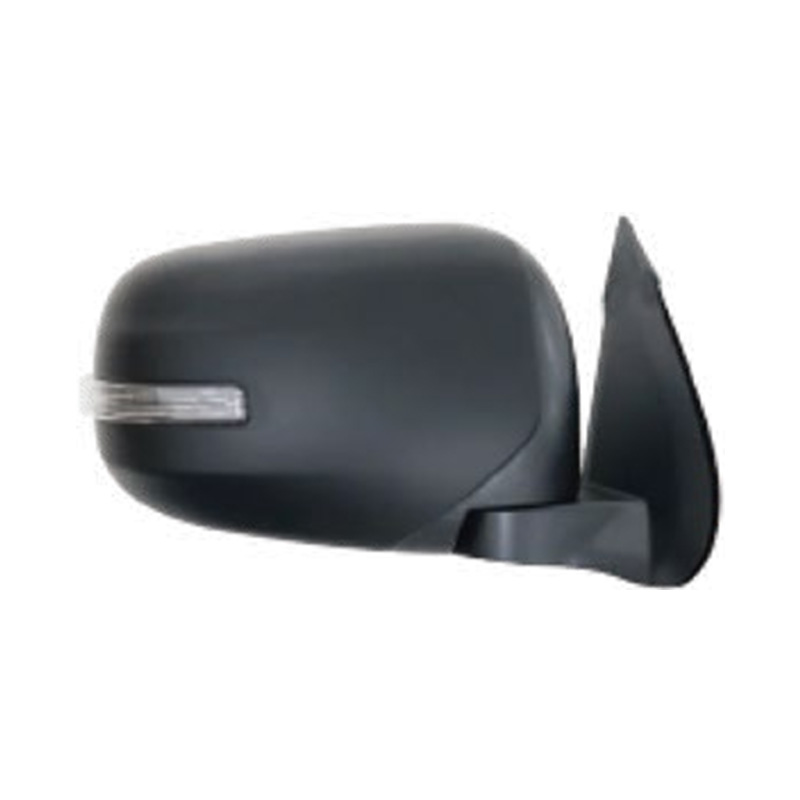
Auto side mirrors are constructed from several distinct materials working together as an integrated system. The primary components include specialized glass for the reflective surface, impact-resistant plastic polymers for the housing, aluminum or steel for internal brackets, and various electronic components for powered and heated mirrors. Each material serves specific functions related to durability, safety, weight reduction, and optical performance.
The reflective glass itself represents the most critical component, typically consisting of soda-lime glass measuring 2-4mm thick with aluminum, silver, or chromium coating applied to create the reflective surface. Modern mirrors increasingly incorporate multi-layer coatings including anti-glare films, hydrophobic treatments, and heating elements integrated directly into the glass structure. The housing materials have evolved from basic painted metals in older vehicles to advanced engineering thermoplastics that reduce weight by 40-60% while maintaining impact resistance and weatherability.
The reflective element that drivers rely on involves sophisticated materials science far beyond simple polished metal or basic glass mirrors.
Soda-lime glass accounts for approximately 90% of automotive mirror glass due to its optimal balance of clarity, durability, and manufacturing cost. This glass composition contains roughly 70% silica (silicon dioxide), 15% sodium oxide, and 10% calcium oxide with small amounts of other elements for specific properties. The glass undergoes tempering or chemical strengthening processes that increase impact resistance by 400-500% compared to standard annealed glass, crucial for surviving road debris impacts and minor collisions.
Some premium and performance vehicles utilize borosilicate glass for side mirrors, offering superior thermal shock resistance important in extreme climates. Borosilicate glass withstands temperature differentials up to 330°F without cracking, compared to 200°F for standard soda-lime glass. This becomes particularly valuable for heated mirrors that rapidly warm cold glass surfaces in winter conditions.
The reflective surface uses vacuum-deposited metal coatings applied to the rear surface of the glass. Aluminum coating provides 85-90% reflectivity and represents the most common automotive mirror coating due to excellent cost-to-performance ratio. The aluminum layer typically measures 50-100 nanometers thick, applied through physical vapor deposition in vacuum chambers at temperatures around 2000°F.
Premium mirrors increasingly use silver or chromium coatings offering 95-98% reflectivity for superior clarity and brightness. Silver-coated mirrors provide notably better visibility in low-light conditions but cost 30-50% more than aluminum-coated equivalents. The metal coating receives protective layers of copper and paint to prevent oxidation and corrosion from moisture exposure, as untreated aluminum or silver would degrade within months when exposed to humidity and temperature cycling.
Modern mirrors incorporate additional glass treatments for enhanced functionality:
The protective housing that encloses the mirror mechanism and glass must withstand extreme environmental conditions while maintaining structural integrity and aesthetic appearance.
Polypropylene (PP) and acrylonitrile butadiene styrene (ABS) constitute the primary housing materials for 80-85% of modern side mirrors. These engineering thermoplastics offer exceptional impact resistance, UV stability, and chemical resistance while weighing 50-60% less than equivalent metal housings. Polypropylene's flexibility provides advantage in minor collision situations, allowing the housing to deform and recover without cracking.
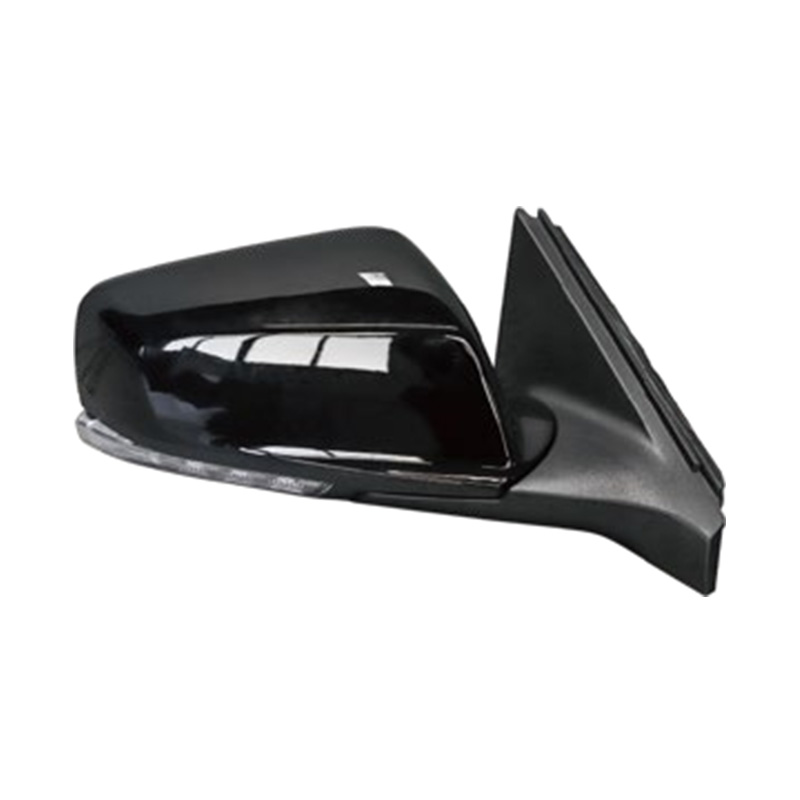
ABS plastic delivers superior surface finish quality and paint adhesion, making it preferred for visible housing covers where appearance matters. Glass-fiber reinforced variations increase tensile strength by 200-300%, allowing thinner walls that reduce material usage by 15-20% while maintaining structural requirements. The injection molding process for these plastics allows complex geometries incorporating mounting points, wire routing channels, and adjustment mechanisms in single components, reducing assembly complexity and cost.
Luxury and performance vehicles sometimes employ alternative materials for specific benefits. Carbon fiber housings reduce weight by an additional 40-50% compared to reinforced plastics while providing distinctive appearance and superior rigidity. These specialty housings cost 5-10 times more than standard plastic equivalents, limiting use to high-end applications where weight reduction or aesthetics justify the premium.
Some manufacturers utilize polycarbonate (PC) for housing components requiring exceptional impact resistance or optical clarity for integrated turn signal lenses. Polycarbonate offers impact strength 200 times greater than glass and 30 times greater than acrylic, though its higher cost restricts use to specific high-stress components rather than entire housings.
Housing plastics receive various surface treatments to enhance durability and appearance. Automotive-grade paint systems include primer, base coat, and clear coat layers totaling 80-120 micrometers thickness. The clear coat contains UV inhibitors that prevent plastic degradation and color fading, maintaining appearance for 7-10 years under normal conditions. Chrome-look finishes use vacuum metallization applying thin aluminum layers followed by protective clear coats, replicating metal appearance at fraction of the weight and cost.
| Material | Density (g/cm³) | Impact Strength | Primary Use |
|---|---|---|---|
| Polypropylene (PP) | 0.90-0.91 | High flexibility | Economy vehicle housings |
| ABS Plastic | 1.04-1.07 | Excellent rigidity | Mid-range housings |
| Polycarbonate (PC) | 1.20-1.22 | Extreme impact resistance | Signal lenses, high-stress parts |
| Carbon Fiber | 1.50-1.60 | High strength-to-weight | Performance/luxury vehicles |
| Aluminum (for comparison) | 2.70 | Moderate | Legacy housings (pre-1990s) |
Hidden within the housing, various metal and plastic components provide structural support, adjustment mechanisms, and mounting capabilities.
Steel or aluminum brackets connect the mirror assembly to the vehicle door, requiring tensile strength of 800-1200 MPa to withstand aerodynamic loads at highway speeds. These brackets typically use stamped steel with zinc coating or die-cast aluminum alloys, incorporating ball joints or pivot points allowing the mirror to fold inward when struck. The folding mechanism protects both the mirror and pedestrians during low-speed contact, required by safety regulations in many markets.
Power-folding mirrors incorporate electric motors (typically 12-volt DC motors drawing 2-4 amperes) with gear reduction mechanisms providing 50:1 to 100:1 reduction ratios. These motors generate 5-8 Newton-meters of torque, sufficient to fold a mirror assembly weighing 0.5-1.5 kg against wind resistance. The motor housings use glass-filled nylon or similar engineering plastics providing dimensional stability and electrical insulation.
Manual adjustment mirrors employ ball-and-socket joints manufactured from acetal (polyoxymethylene/POM) plastic offering low friction and high wear resistance. The ball joint allows approximately 20-25 degrees of adjustment in both horizontal and vertical planes while maintaining position under vibration through precisely controlled friction torque of 0.3-0.8 Newton-meters. Cable-operated manual adjustment uses braided steel cables in plastic housing, similar to bicycle brake cables but sized for lower force requirements.
Power adjustment systems utilize two small electric motors (one for horizontal, one for vertical movement) operating worm gears that drive the mirror positioning mechanism. These motors produce 0.5-1.2 Newton-meters torque at 100-200 RPM, achieving full range mirror adjustment in 3-5 seconds. The gear assemblies use lubricated plastic gears that operate maintenance-free for the vehicle's lifetime, typically rated for 50,000-100,000 adjustment cycles.
The glass mirror element attaches to a backing plate providing structural support and mounting interface. These plates use either stamped steel (0.6-1.0mm thickness) or reinforced ABS plastic, with adhesive tape or clips securing the glass to the plate. Heated mirrors integrate resistance heating elements (consuming 10-15 watts) between the glass and backing plate, typically using printed circuit techniques depositing conductive traces directly onto the glass rear surface or embedding resistance wire in flexible silicone sheets.
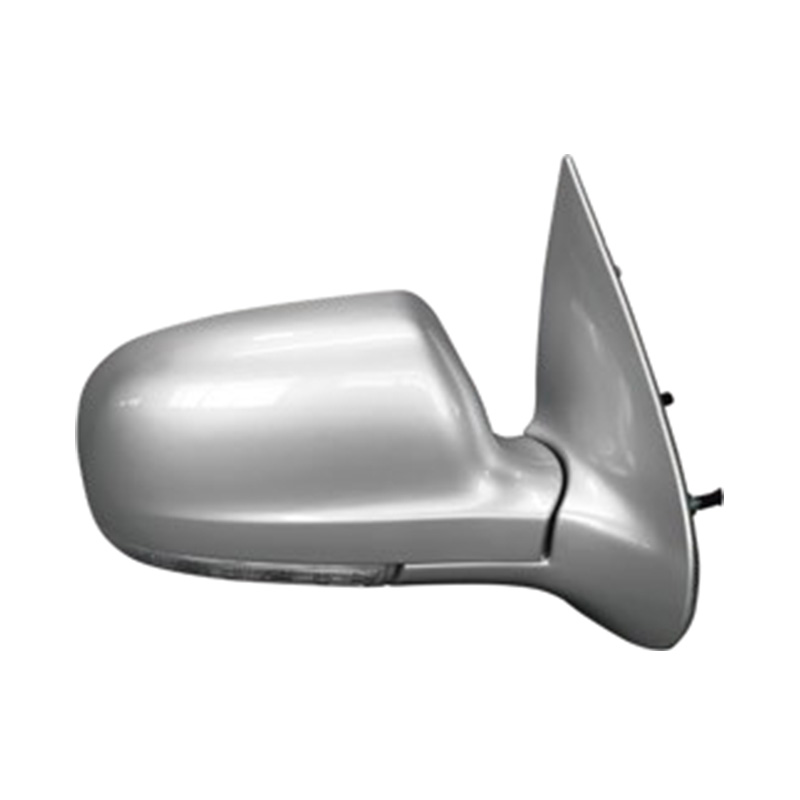
Modern side mirrors incorporate increasingly sophisticated electronics providing features beyond basic reflection.
Mirror defrosting systems use resistance heating consuming 10-20 watts per mirror, generating enough heat to melt ice and evaporate condensation within 3-5 minutes. The heating elements consist of thin metallic traces (typically copper, tungsten, or nichrome alloy) applied to flexible substrates or directly screen-printed onto the glass rear surface. Operating voltage matches the vehicle electrical system (12V for cars, 24V for trucks) with resistance values calculated to produce optimal heating without exceeding glass thermal limits.
Advanced systems incorporate thermostatic control preventing overheating and reducing power consumption once the mirror reaches operating temperature. Temperature sensors use negative temperature coefficient (NTC) thermistors that increase resistance as temperature rises, automatically cycling power on and off to maintain 50-70°F above ambient temperature. This prevents thermal shock to the glass while ensuring continuous ice and fog prevention.
Integrated turn signal indicators use LED (light-emitting diode) technology in 95% of modern applications, replacing earlier incandescent bulbs. LED arrays typically contain 6-12 individual diodes producing 400-800 lumens total output with amber or white light (depending on regulations). The LEDs mount on printed circuit boards within the mirror housing, visible through transparent or translucent polycarbonate lenses forming part of the housing exterior.
LED advantages include 50,000-100,000 hour lifespan (essentially maintenance-free for vehicle life), instant illumination with no warm-up delay, and power consumption of 3-5 watts compared to 21-25 watts for equivalent incandescent bulbs. The reduced heat generation allows using plastic housings and lenses that would degrade under incandescent bulb temperatures exceeding 200°F.
Electrochromic auto-dimming mirrors contain multiple layers of material between two pieces of glass creating a sandwich structure. The active layer uses electrochromic gel or polymer that changes from transparent to dark blue when 1.2-1.5 volts DC is applied, reducing reflectivity from 85% to 5-10% within 3-8 seconds. Forward-facing and rear-facing light sensors detect headlight glare, triggering the dimming response automatically.
The electrochromic layer typically consists of tungsten oxide or similar transition metal oxides suspended in polymer electrolyte between transparent conductive coatings (indium tin oxide). This multi-layer construction adds 2-3mm to mirror thickness and increases manufacturing cost by 300-400% compared to standard mirrors, but eliminates manual dimming switches and provides graduated dimming matching glare intensity rather than simple on/off operation.
Joining the various components requires specialized adhesives and mechanical fasteners engineered for automotive environmental conditions.
Two-part epoxy adhesives bond mirror glass to backing plates, curing to tensile strengths of 20-30 MPa and maintaining bond integrity across temperature ranges from -40°F to 180°F. These adhesives must accommodate thermal expansion differences between glass (coefficient of 9×10⁻⁶ per °C) and plastic or metal backing plates (15-25×10⁻⁶ per °C) without delaminating. Flexible adhesive formulations absorb differential expansion preventing stress concentration that could crack the glass.
Pressure-sensitive adhesive (PSA) tapes increasingly replace liquid adhesives for certain applications, offering instant bonding without curing time. Acrylic foam tapes 0.5-1.5mm thick provide gap-filling capability while maintaining bond strength of 15-25 N/cm² width. These tapes also dampen vibration transmission between components, reducing buzzing or rattling noises.
Housing assembly primarily uses snap-fit joints molded into plastic components, eliminating separate fasteners for cost reduction. Cantilever snap joints designed with 0.5-2mm deflection allow assembly while maintaining 15-30 Newton retention force. For applications requiring disassembly (service or adjustment access), self-tapping screws or threaded inserts provide reusable attachment points.
Mounting to the vehicle door typically employs M6 or M8 bolts securing through reinforced areas of the door structure. These fasteners require 15-25 Newton-meter tightening torque providing secure attachment while allowing controlled breakaway in severe impact to prevent door damage. Thread-locking compounds prevent vibration loosening without requiring lock washers or lock nuts.
Exterior mirrors face harsh conditions including temperature extremes, UV radiation, moisture, road chemicals, and physical impacts requiring comprehensive protection strategies.
EPDM (ethylene propylene diene monomer) rubber gaskets seal housing joints preventing water intrusion into electronic components, with compression set resistance maintaining seal integrity after 10+ years of service. These gaskets use shore A hardness ratings of 50-70, providing sufficient compression to seal gaps while avoiding excessive assembly force that could distort plastic housings.
Silicone sealant applied at critical joints provides secondary moisture barriers, particularly around electrical connections and glass-to-housing interfaces. Automotive-grade silicone maintains flexibility from -60°F to 400°F and adheres to diverse materials including glass, plastic, and metal without requiring primers. The sealant cures through moisture exposure, reaching handling strength in 15-30 minutes and full cure in 24-48 hours.
Metal components receive multi-layer corrosion protection starting with zinc plating (8-12 micrometers thickness) followed by chromate conversion coating and powder coat or e-coat paint. This protection system withstands 1000+ hours in salt spray testing (ASTM B117) without red rust formation, exceeding typical vehicle service life exposure in most climates. Stainless steel fasteners eliminate corrosion concerns but cost 3-5 times more than coated steel equivalents.
Plastic housings incorporate UV stabilizers (typically benzotriazole or hindered amine light stabilizers) at 0.5-2% concentration preventing polymer chain degradation from ultraviolet radiation. Without UV protection, exterior plastics would become brittle and discolored within 2-3 years of sun exposure; stabilized materials maintain properties for 10-15 years. Clear coats on painted surfaces also contain UV absorbers protecting both the coating and underlying base coat from photodegradation.
Emerging technologies introduce new materials and capabilities to automotive side mirror systems.
Digital mirror systems replacing glass mirrors with cameras use weather-sealed camera modules with optical-grade polycarbonate or glass lenses, image sensors (CMOS technology), and digital signal processors packaged in IP67-rated enclosures. These systems eliminate traditional glass mirrors entirely, reducing aerodynamic drag by 3-5% and improving fuel efficiency. The camera lenses require specialized anti-reflective coatings reducing internal reflections and lens flare that would compromise image quality.
Experimental applications incorporate transparent OLED displays overlay information directly on mirror glass, showing blind spot warnings, navigation arrows, or vehicle status information. These displays use organic light-emitting materials deposited on flexible transparent substrates, achieving 70-80% transparency when inactive while providing 500-1000 nits brightness when displaying information. Current limitations include high cost (5-10× conventional mirrors) and durability concerns with organic materials degrading under UV and moisture exposure.
Environmental considerations drive research into bio-based and recycled materials. Polypropylene housings now incorporate 10-25% recycled content without compromising mechanical properties, while experimental bio-based plastics derived from plant oils show promise for future applications. Glass recycling programs recover broken mirror glass for remelting, though the reflective coatings require removal through chemical processing before recycling. Industry targets include achieving 85% recyclability by weight for complete mirror assemblies by 2030.
Understanding materials is incomplete without recognizing how manufacturing processes affect final properties and performance.
Float glass production creates continuous ribbons of molten glass floating on molten tin, achieving perfectly flat surfaces with thickness controlled to ±0.1mm tolerances. After cooling, automated cutting systems separate individual mirror blanks, which undergo edge grinding to prevent sharp edges and reduce stress concentrations. The glass then enters vacuum coating chambers where aluminum or silver deposition occurs, followed by protective coating application and quality inspection using photometric measurement verifying reflectivity meets 85-95% specifications.
Housing production uses injection molding machines with clamping forces of 150-500 tons, injecting molten plastic at 400-500°F into precision molds. Cycle times of 30-90 seconds produce complete housings, with mold cooling systems controlling solidification to prevent warping or sink marks. Multi-cavity molds allow simultaneous production of 2-8 housings per cycle, achieving production rates of 100-300 units per hour per machine. Automated inspection systems verify dimensional accuracy within ±0.2mm tolerances and detect cosmetic defects including flash, short shots, or surface blemishes.
Automated assembly lines combine components using robotic adhesive application, automated screw driving, and vision systems verifying correct component placement. Completed assemblies undergo functional testing including power adjustment operation, heating element current draw, turn signal illumination, and vibration testing simulating 100,000 miles of road exposure. Environmental testing subjects random samples to temperature cycling (-40°F to 180°F), humidity exposure (95% RH at 140°F for 1000 hours), and salt spray exposure validating corrosion protection before production approval.
 How to Replace Rear View Mirror: Complete Step-by-Step Guide
Feb 09, 2026
Replacing a rear view mirror is a straightforward task that most vehicle owners can complete in 15-30 minutes with basic tools. The process involves removing the old mirror from its windshield mount, cleaning the mounting surface, and attaching the new mirror using either the existing adhesive mount or a replacement mounting kit. Success depends on identifying your mirror's attachment type, which falls into three main categories: adhesive button mounts, screw-on brackets, or slide-lock mechanisms.
Modern vehicles increasingly feature mirrors with integrated electronics including auto-dimming functions, compass displays, temperature readouts, and HomeLink garage door controls. These electronic mirrors require careful disconnection of wiring harnesses during removal and proper reconnection during installation to maintain functionality. The replacement procedure remains similar to standard mirrors, with the additional step of managing electrical connections safely to avoid damaging sensitive components.
Gathering the correct tools before starting ensures smooth completion without interruptions. Most mirror replacements require items already available in typical household toolkits, though specialized adhesive kits may need purchasing.
Mirror mounting adhesive kits cost $8-$20 and include the bonding compound plus activator or primer required for proper adhesion. Popular brands include Loctite, Permatex, and 3M, each offering two-part epoxy systems designed specifically for automotive glass bonding. These adhesives cure to full strength in 10-30 minutes at temperatures above 70°F, though colder conditions may extend curing time to several hours.
When replacing the entire mounting button rather than reusing the existing one, purchase a complete mirror mount kit matching your vehicle's original equipment. OEM replacement mounts range from $15-$45 depending on vehicle make and model, while universal aftermarket mounts cost $10-$25. Ensure the replacement mirror matches your mounting button size, which typically measures 1.5 to 2.5 inches in diameter for standard applications.
Understanding your specific mounting mechanism prevents damage during removal and guides the proper replacement technique. Approximately 75% of modern vehicles use button-style adhesive mounts, while 20% employ mechanical bracket systems and 5% utilize proprietary designs.
The most common design features a circular or rectangular button bonded to the windshield with high-strength adhesive. The mirror attaches to this button through various mechanisms including set screws, spring clips, or rotating locks. Button mounts allow adjustment of mirror angle while maintaining secure attachment through tension or mechanical fasteners. These systems work particularly well with electronic mirrors because the button can accommodate wiring pass-through from the windshield-mounted electronics to the mirror housing.
Older vehicles and some commercial applications use metal brackets that bolt to the windshield frame or header above the windshield. These mechanical systems provide extremely secure mounting but limit adjustment range compared to adhesive button designs. Replacement requires accessing mounting bolts hidden behind interior trim panels or headliner material, adding complexity to the replacement process.
Many modern vehicles incorporate quick-release mechanisms allowing mirror removal without tools for security or cleaning convenience. These systems typically feature a button or lever that releases spring-loaded clips, permitting the mirror to slide upward or rotate off the mount. Replacement mirrors for these systems must precisely match the original design, as slight dimensional variations prevent proper engagement of the locking mechanism.
| Mount Type | Removal Method | Difficulty Level | Typical Time |
|---|---|---|---|
| Set screw button | Loosen screw, slide mirror off | Easy | 5-10 minutes |
| Spring clip button | Pry or twist to release clips | Easy | 3-8 minutes |
| Rotating lock button | Rotate counterclockwise to unlock | Easy | 2-5 minutes |
| Bracket system | Remove trim, unbolt bracket | Moderate | 20-40 minutes |
| Quick-release slide | Press release button, slide up | Very Easy | 1-3 minutes |
Safe removal prevents windshield damage and preserves the mounting button if reusing it. Rushing this step causes 60% of DIY mirror replacement failures, typically resulting in broken windshields or damaged mounting surfaces.
Before manipulating the mirror, disconnect the vehicle's battery negative terminal to prevent electrical shorts. Electronic mirror wiring harnesses typically connect through a plug located in the mirror stem or at the mounting button, requiring gentle wiggling rather than forceful pulling to separate. Note the connector orientation before disconnection to ensure correct reconnection. Some high-end vehicles require entering a service mode through the infotainment system before disconnecting power to avoid triggering fault codes.
Locate the small set screw on the mirror mounting bracket, usually positioned on the bottom or side of the mount. These screws require Allen wrenches (typically 1.5mm to 3mm) or small Phillips/Torx drivers, turned counterclockwise 2-3 full rotations to release tension. Avoid completely removing the screw, as this often allows it to fall inside the mirror housing. Once loosened, slide or lift the mirror straight up off the mounting button. If resistance occurs, the screw needs additional loosening rather than forceful pulling.
Spring clip mounts require either upward pressure while rotating the mirror, or insertion of a flathead screwdriver into a release slot. Apply firm upward force of approximately 5-10 pounds while rotating clockwise or counterclockwise (varies by manufacturer) until the clips disengage. Listen for an audible click indicating release. Using a trim removal tool instead of a screwdriver prevents scratching the windshield or damaging plastic components.
Mirrors stuck due to corrosion or overtightening require patience rather than force. Applying penetrating oil (WD-40 or PB Blaster) around the mount base and waiting 10-15 minutes loosens corrosion bonds. For extremely stubborn mounts, gentle heating with a hair dryer at medium setting for 2-3 minutes expands metal components slightly, often allowing removal. Never use excessive force that could crack the windshield; if the mirror absolutely won't release, professional removal prevents costly glass replacement.

Proper surface preparation determines adhesive bond strength and mirror longevity. Inadequate cleaning causes 80% of premature mirror failures, with mirrors detaching within weeks or months instead of lasting years.
If replacing the mounting button, completely remove old adhesive from the windshield using a razor blade at a shallow angle to avoid scratching the glass. Hold the blade at 30-45 degrees and use short, controlled strokes applying moderate pressure to scrape away adhesive residue. Work slowly to prevent gouging the glass or leaving scratches that weaken the windshield structure. Stubborn adhesive responds to adhesive remover chemicals, though these require 5-10 minute dwell time and thorough cleaning afterward to prevent contaminating new adhesive.
After removing old adhesive, clean the mounting area with 90% or higher isopropyl alcohol using a clean microfiber cloth. Wipe the surface in one direction rather than circular motions to avoid redistributing contaminants, and use a fresh section of cloth for each pass. Allow the alcohol to evaporate completely (typically 1-2 minutes) before proceeding. Avoid touching the cleaned surface with bare hands, as skin oils compromise adhesion. Some adhesive kits include pre-moistened prep pads that combine cleaning and primer application in one step.
Windshield temperature should range between 50-100°F for optimal adhesive curing, with 70-85°F providing ideal conditions. Cold windshields prevent proper adhesive flow and bonding, while excessive heat causes premature curing before achieving full contact. In cold weather, park in heated garages or use a hair dryer to warm the glass to appropriate temperature. In extreme heat, work in shade or during cooler parts of the day to prevent adhesive from setting before proper positioning.
Correct installation ensures secure mounting and proper mirror positioning for optimal rear visibility. Taking time to position the mount accurately prevents having to restart the process after adhesive cures in the wrong location.
Two-part adhesive kits require mixing the epoxy resin and hardener according to package instructions, typically in equal proportions. Apply adhesive to both the mounting button and windshield surface, using enough to create complete coverage without excess that squeezes out during attachment. Most kits recommend a layer approximately 1-2mm thick. Some modern adhesives come pre-applied to replacement buttons, requiring only activator spray on the windshield before installation.
Mark the mounting location before applying adhesive using tape or a grease pencil, aligning with the original position or factory markings on the windshield. Press the button firmly against the windshield with 10-15 pounds of pressure, hold for 30-60 seconds, then secure with masking tape from the button to the dashboard to maintain pressure during curing. Ensure the button sits perfectly perpendicular to the windshield without tilting, as angled mounts cause mirror adjustment difficulties. Wipe away any adhesive that squeezes out immediately using alcohol before it cures.
Most adhesives achieve handling strength in 15-30 minutes but require 24 hours to reach full curing and maximum bond strength. Avoid attaching the mirror or driving the vehicle during this period, as vibration and stress can compromise the bond. Temperature affects curing time significantly; adhesives may cure in 10 minutes at 90°F but require 4-6 hours at 50°F. Humidity above 70% can extend curing times by 20-40%. Consult specific product instructions for exact timing based on environmental conditions.
After adhesive fully cures, attach the mirror by reversing the removal process. For set screw mounts, slide the mirror bracket onto the button, align properly, and tighten the set screw with moderate torque. Over-tightening set screws can crack plastic components; snug resistance indicates sufficient tightness without requiring excessive force. Spring clip systems require aligning the mirror bracket with the mount and pressing firmly until clips engage with an audible click. Test security by gently pulling downward on the mirror; properly installed mirrors resist 15-20 pounds of downward force without releasing.
Electronic mirrors require careful wiring reconnection to restore auto-dimming, displays, and integrated features. Incorrect connections can damage sensitive electronics or create short circuits that blow fuses and disable other vehicle systems.
Route wiring through the mirror stem or mounting bracket according to the original configuration. Connectors typically feature keying that prevents backwards installation, but forcing misaligned connectors damages pins and sockets. Align connector housings carefully and press together firmly until achieving a positive click indicating full engagement. Verify no pins remain bent or exposed after connection. Some mirrors use multiple connectors for different functions; label these during removal to ensure correct reconnection.
Reconnect the battery and start the vehicle to test all mirror functions before completing installation. Verify auto-dimming operation by shining a flashlight at the mirror from behind, compass accuracy if equipped, temperature display correctness, and HomeLink programming retention. Some vehicles require recalibration of compass bearings after mirror replacement, following procedures in the owner's manual. Non-functioning features suggest loose connections or damaged wiring requiring inspection and reseating of connectors.
Learning from typical errors prevents frustration and ensures successful replacement on the first attempt.
Standard super glue or construction adhesives fail under thermal cycling and vibration stress that automotive applications encounter, causing mirror detachment within days or weeks. Only use adhesives specifically formulated for automotive glass bonding, which incorporate flexible compounds that accommodate temperature changes from -40°F to 180°F without losing bond strength. Generic adhesives also lack the activators needed for bonding to modern windshield coatings including rain-sensing technology and infrared reflection layers.
Skipping thorough cleaning or using low-concentration alcohol (70% or less) leaves contaminants that prevent chemical bonding. Adhesive bonds require molecularly clean surfaces; even invisible oils from fingerprints reduce bond strength by 40-60%. Water-based cleaners leave residues that interfere with adhesive curing. Always use 90%+ isopropyl alcohol or adhesive manufacturer's supplied prep solutions, allowing complete evaporation before adhesive application.
Attaching the mirror before adhesive fully cures or driving during the curing period subjects the bond to stress before achieving full strength. Premature loading causes micro-separations in the adhesive layer that progressively worsen with vibration, leading to failure within 500-2000 miles of driving. Even adhesives claiming 15-minute cure times benefit from 24-hour full curing before subjecting to vehicle operation and mirror weight. Plan replacement timing to allow overnight curing for maximum reliability.
Mounting the button too high, low, or offset from the original position creates blind spots or blocks driver vision. Factory mirror positions undergo extensive visibility optimization and regulatory compliance testing; deviating by more than 1-2 inches compromises safety. Use the original mounting location indicated by adhesive residue outline or consult the vehicle service manual for exact positioning specifications. Some windshields include ceramic frit patterns or dots marking optimal placement.
Addressing problems during or after installation prevents repeated failures and ensures long-term reliability.
Immediate or early failure indicates contaminated surfaces, incorrect adhesive, insufficient curing time, or extreme temperatures during installation. Remove the button completely, clean both surfaces with fresh alcohol, and restart the installation process with new adhesive. Verify windshield temperature falls within the adhesive's recommended range. If repeated failures occur, the windshield may have specialty coatings requiring professional installation or specific adhesive formulations designed for coated glass.
Non-functioning electronics suggest loose connections, incorrect connector orientation, or incompatible replacement mirror. Disconnect and reconnect all wiring harnesses, ensuring positive engagement clicks and no exposed pins. Check vehicle fuses related to mirror operation, as shorts during installation can blow protective fuses. Verify the replacement mirror matches the original part number if OEM, or confirms compatibility if aftermarket. Some vehicles use different mirror versions with identical appearance but incompatible electronics.
Excessive vibration indicates loose mounting hardware, improperly tightened set screws, or incompletely engaged spring clips. Remove and reinstall the mirror, ensuring set screws achieve proper tension or spring clips fully engage with audible confirmation. Some vibration is normal in larger mirrors or vehicles with rough idle, but the rear view should remain clearly visible at highway speeds. If vibration persists with secure mounting, the replacement mirror may have poor quality control or incorrect weight distribution requiring exchange for a different unit.
Certain situations warrant professional installation despite the DIY-friendly nature of mirror replacement. Glass shops and auto upholstery specialists have specialized tools, controlled environment facilities, and experience with difficult installations that justify their $50-$150 service fees.
Modern windshields with rain-sensing technology, heads-up display compatibility, or solar heat rejection coatings require specialized adhesives and surface preparation. These coatings contain metallic or chemical layers that interfere with standard adhesive bonding, requiring professional-grade primers and activators. Attempting DIY installation on coated glass often results in repeated failures or coating damage. Professionals stock coating-specific adhesives and have application experience ensuring first-time success.
High-end vehicles with camera-integrated mirrors, digital displays, or advanced driver assistance systems require specialized programming and calibration after replacement. These systems need dealer-level diagnostic tools to recalibrate cameras, update software, and verify proper system integration. Incorrect installation can disable safety features including lane departure warnings, automatic emergency braking, and adaptive cruise control. Professional installation includes necessary programming and certification that systems function correctly.
If mirror replacement fails twice despite following proper procedures, underlying issues require professional diagnosis. Problems may include windshield replacement with incorrect glass specification, structural damage affecting mounting area rigidity, or thermal stress cracks compromising adhesive bonding. Professionals can identify and address root causes that aren't apparent to DIY installers, preventing endless replacement cycles. The cost of repeated failed attempts often exceeds professional installation fees when factoring in wasted materials and time.
 Auto Side Mirror: Types, Maintenance, and Replacement Guide
Feb 05, 2026
Auto side mirrors are a critical safety component, providing drivers with essential visibility of surrounding traffic and obstacles. Properly functioning mirrors reduce blind spots, assist in lane changes, and improve overall driving safety. Investing in high-quality mirrors and maintaining them regularly ensures reliability and compliance with traffic regulations.
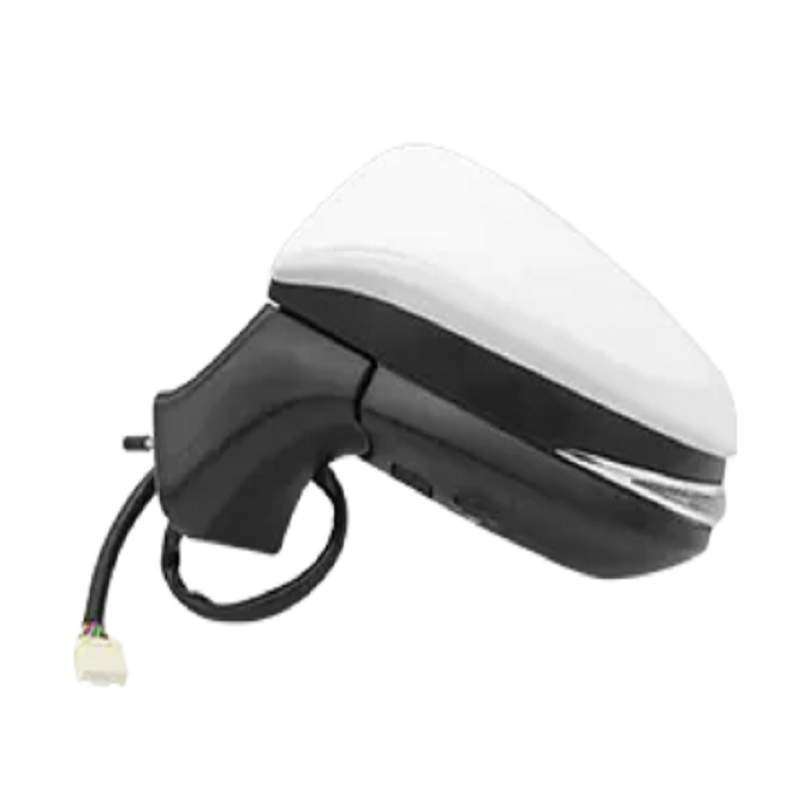
Side mirrors vary in design, functionality, and technology. Choosing the right type depends on vehicle type, usage, and driver preference.
Manual mirrors require physical adjustment from the driver. They are less expensive and simple to maintain, making them common in budget vehicles.
Electric mirrors use motorized mechanisms for easy adjustment. Drivers can control the mirror angle from inside the vehicle, offering convenience and precision. Many models include heating elements to prevent fogging or ice accumulation.
Auto-folding mirrors fold inward automatically when the car is parked. This feature protects the mirrors from accidental damage and is especially useful in tight parking spaces.
These mirrors have an additional convex lens or built-in wide-angle section to reduce blind spots. They improve safety during lane changes, particularly on highways.
The durability and effectiveness of side mirrors depend on their materials and construction.
Automotive mirrors use tempered or coated glass to resist shattering and glare. Some mirrors include anti-reflective coatings or heated glass to enhance visibility in adverse conditions.
Housings are typically made from ABS plastic or metal alloy. High-quality housings provide impact resistance and protect internal mechanisms from moisture, dust, and debris.
Secure mounting ensures stability while driving. Most modern vehicles use a combination of brackets and screws, sometimes integrated with electronic connectors for powered mirrors.
Regular maintenance improves mirror longevity, performance, and driver safety.
Use soft microfiber cloths and mild glass cleaners to remove dirt and grime. Avoid abrasive materials or harsh chemicals that can scratch or damage mirror surfaces.
Check electric adjustment motors, folding mechanisms, and heating elements regularly. Ensure wiring is intact and free of corrosion for reliable functionality.
When parking in tight areas, fold mirrors (if possible) to prevent damage. Applying protective coatings or films can reduce minor scratches and UV damage.
Replacing or upgrading auto side mirrors can enhance safety, aesthetics, and functionality.
Match the replacement mirror with the car model and year. Ensure compatibility with manual or electric adjustment, heating elements, or integrated indicators.
Follow manufacturer instructions carefully. For powered mirrors, disconnect the battery before handling electrical connections. Proper torque on mounting screws ensures stability.
Many drivers upgrade to heated mirrors, LED turn signals, or auto-dimming glass. These features improve visibility, safety, and driving comfort in various weather conditions.
| Mirror Type | Adjustment | Extra Features | Best Use |
|---|---|---|---|
| Manual | Manual | None | Budget vehicles, basic use |
| Electric | Motorized | Heated glass, memory settings | Daily commuting, convenience |
| Auto-Folding | Motorized/Manual | Protective folding | Tight parking spaces |
| Blind Spot | Manual/Electric | Convex section, wide-angle | Highway driving, safety enhancement |
Auto side mirrors are indispensable for safe driving, providing visibility, reducing blind spots, and enhancing overall vehicle safety. Selecting the right type, maintaining proper function, and considering upgrades such as heating, auto-folding, or blind spot enhancement can significantly improve driving experience and accident prevention. Regular inspection and timely replacement ensure that mirrors remain reliable and effective for years.
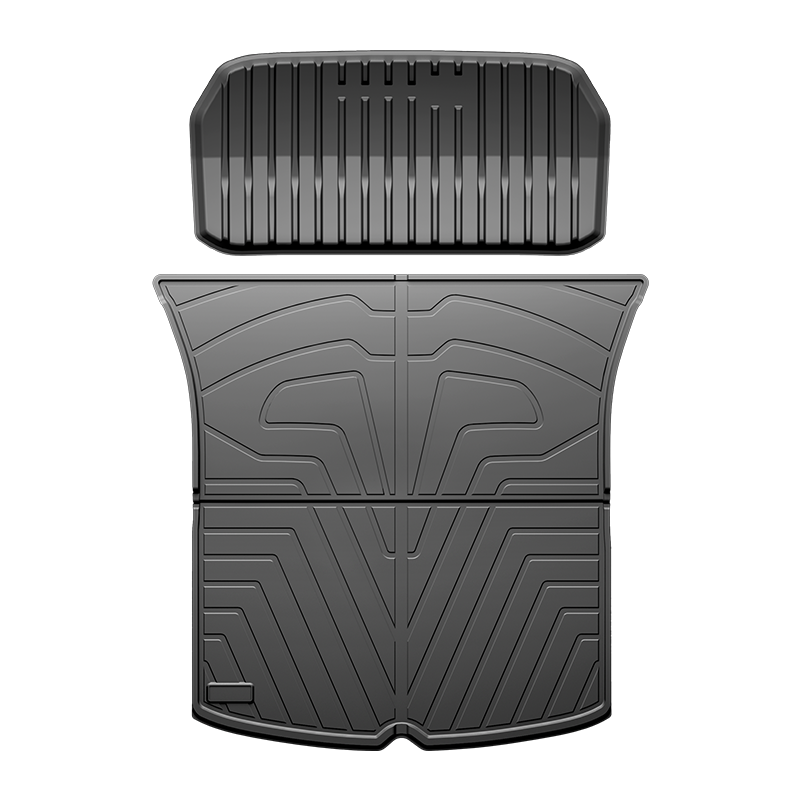 Can AI Auto Accessories Revolutionize Modern Vehicle Convenience and Safety?
Jan 30, 2026
AI auto accessories represent a significant leap in vehicle technology, combining artificial intelligence with everyday car enhancements. These smart devices are designed to improve safety, streamline operations, and provide drivers with advanced convenience features. From adaptive cruise controls to AI-powered parking assistants, these innovations are transforming how we interact with vehicles.
As cars become more connected, AI auto accessories help integrate data from sensors, cameras, and onboard systems to optimize performance, reduce human error, and create a seamless driving experience. The adoption of these technologies is no longer limited to luxury vehicles; even standard models can now benefit from AI enhancements.
One of the primary advantages of AI auto accessories is their ability to enhance vehicle safety. AI-driven systems can detect potential hazards faster than human reflexes, alerting drivers to obstacles, pedestrians, or sudden changes in traffic conditions. Features such as lane-keeping assist, automatic emergency braking, and collision avoidance rely heavily on AI algorithms to ensure timely intervention.
These AI systems not only respond to immediate threats but also learn from driving patterns and environmental conditions. Over time, this continuous learning improves predictive capabilities, enabling vehicles to anticipate risks and optimize driving behavior.
AI auto accessories simplify everyday driving tasks, reducing cognitive load and improving user experience. Voice-activated controls, AI navigation systems, and predictive maintenance alerts allow drivers to focus on the road while enjoying enhanced comfort and connectivity.
Integration with mobile apps and cloud platforms allows seamless monitoring of vehicle health, scheduling maintenance, and even remote control of certain functions. These systems empower drivers to manage their vehicles efficiently and anticipate needs before issues arise.
AI auto accessories contribute to enhanced vehicle efficiency by optimizing energy use, engine performance, and driving patterns. Intelligent systems can adjust acceleration, braking, and power distribution based on traffic conditions and driver behavior, reducing fuel consumption and wear on vehicle components.
Fleet operators and individual drivers alike benefit from AI monitoring that tracks efficiency metrics, identifies inefficient driving habits, and provides actionable insights. Over time, these adjustments lead to measurable improvements in both cost savings and environmental impact.
Despite their benefits, AI auto accessories require careful consideration. Integration with vehicle electronics, software updates, and cybersecurity risks are important factors for consumers and manufacturers. Ensuring compatibility with existing systems and regulatory compliance is essential for safe adoption.
Furthermore, user education is crucial. Drivers must understand the capabilities and limitations of AI accessories to avoid overreliance. Balancing automation with human oversight ensures maximum safety and efficiency.
The future of AI auto accessories is promising, with advancements in machine learning, sensor technology, and connectivity. As vehicles become smarter, AI-driven enhancements will continue to expand, enabling autonomous features, predictive analytics, and fully integrated smart vehicle ecosystems.
Consumers can expect more personalized driving experiences, improved safety protocols, and increased vehicle longevity. Early adoption of AI auto accessories positions both manufacturers and drivers at the forefront of modern automotive innovation.
AI auto accessories are transforming the automotive landscape by enhancing safety, convenience, and performance. Their integration empowers drivers, reduces risk, and delivers smarter, more efficient vehicles. Investing in AI-driven technologies ensures vehicles remain modern, responsive, and aligned with the evolving demands of mobility.
By embracing AI auto accessories, drivers can experience a new level of comfort and security while manufacturers benefit from innovative features that drive industry progress. This combination of safety, convenience, and intelligence marks a turning point in automotive technology.

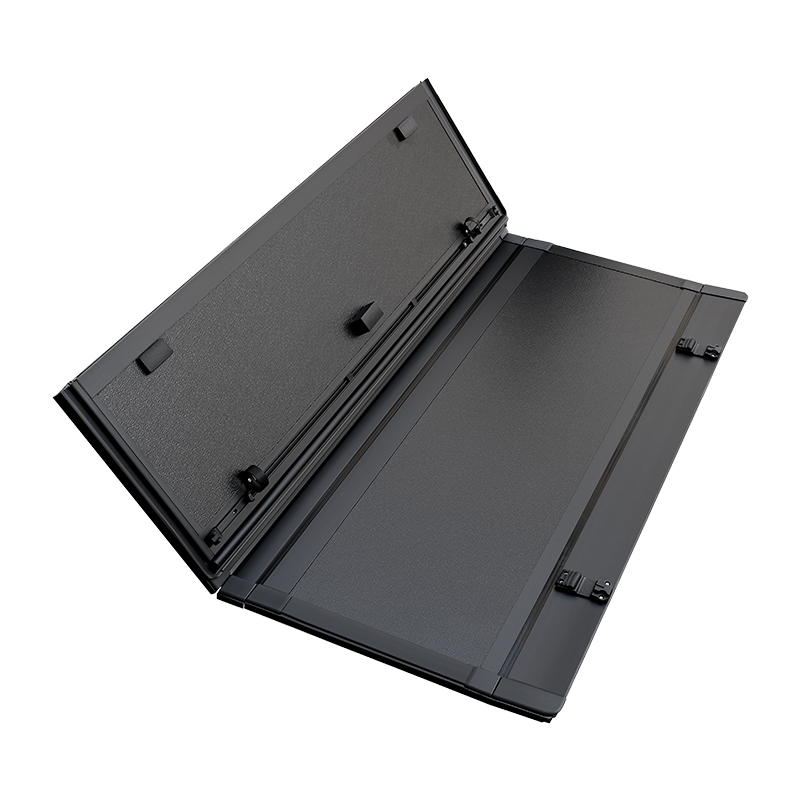 How Do Kinfor Truck Accessories Meet the Demands of Long-Haul Trucking?
Jan 23, 2026
Long-haul trucking presents unique challenges, from extended driving hours to demanding road conditions and tight delivery schedules. Truck operators and fleet managers increasingly rely on high-quality accessories to enhance vehicle performance, safety, and driver comfort. Kinfor truck accessories have emerged as a trusted solution, offering a wide range of products designed specifically for the needs of long-haul drivers and commercial fleets.
By integrating innovative features into trucks, Kinfor accessories help reduce driver fatigue, prevent maintenance issues, and improve overall operational efficiency. Their focus on durable materials and practical design ensures that accessories perform reliably under the stresses of daily long-distance driving.
Driver comfort is a critical factor in long-haul trucking. Extended periods behind the wheel can lead to fatigue, decreased attention, and potential safety risks. Kinfor truck accessories such as ergonomic seat cushions, lumbar supports, and cabin organizers provide a more comfortable and organized driving environment, which contributes to alertness and wellbeing.
Additional comfort accessories, including climate control enhancements, sunshades, and noise-reducing cabin elements, help maintain optimal conditions inside the truck, allowing drivers to focus on the road even during long and challenging routes.
Safety is a primary concern for long-haul operations. Kinfor truck accessories enhance both active and passive safety systems. Products such as high-visibility mirrors, LED lighting kits, and sensor-based assistance devices help drivers detect hazards early, reducing the likelihood of accidents on highways and challenging terrain.
In addition, durable protective gear, including mud flaps, reinforced bumpers, and wheel guards, safeguards the truck from damage caused by road debris or extreme weather conditions, extending vehicle lifespan and reducing maintenance costs.
Efficiency is key to profitability in long-haul trucking. Kinfor accessories contribute to streamlined operations by improving cargo management, fuel efficiency, and vehicle handling. Roof racks, cargo tie-downs, and aerodynamic enhancements reduce drag, optimizing fuel consumption over long distances.
Integrated storage solutions and easy-access tool compartments allow drivers to maintain organized cargo and equipment, reducing downtime during loading and unloading. The combination of practical design and durable construction ensures that these accessories remain functional over extended periods.
Long-haul trucks face constant exposure to vibration, extreme temperatures, and road debris. Kinfor truck accessories are engineered using high-quality materials and precise manufacturing processes to withstand these conditions. Components such as reinforced floor mats, heavy-duty bumpers, and protective guards ensure that trucks remain operational and in optimal condition over extended service periods.
Durability reduces the frequency of replacements and maintenance, lowering overall operating costs for fleet managers. By combining strength and reliability, Kinfor accessories support the demands of trucks that cover thousands of miles regularly.
Every trucking operation has unique requirements, depending on cargo type, route conditions, and driver preferences. Kinfor offers customizable accessories that allow fleet managers to tailor trucks to specific operational demands. From adjustable lighting systems to modular storage solutions, the ability to customize enhances both comfort and functionality.
Customization also supports compliance with regional safety regulations and industry standards, ensuring that trucks meet legal requirements while optimizing driver experience and cargo management.
| Feature | Standard Accessories | Kinfor Premium Accessories |
| Durability | Moderate | High-strength materials |
| Comfort | Basic | Ergonomic and adjustable |
| Efficiency Impact | Limited | Optimized for productivity |
Sustainable trucking relies on minimizing waste and maximizing fuel efficiency. Kinfor accessories, from aerodynamic enhancements to durable cargo systems, help reduce environmental impact by improving fuel economy and decreasing wear-related replacements. Long-lasting, high-quality components also reduce material waste and support greener operational practices.
Kinfor truck accessories combine durability, comfort, safety, and efficiency, making them essential for long-haul trucking operations. Their thoughtful design, high-quality materials, and customizable options allow fleet managers and drivers to optimize performance, reduce maintenance issues, and enhance operational reliability.
In the demanding environment of long-distance trucking, investing in reliable accessories is not optional—it is a strategic choice that impacts driver wellbeing, vehicle longevity, and overall productivity. Kinfor accessories meet these demands, supporting modern trucking operations with practical, high-performance solutions.

 How Can Kinfor Accessories Be Integrated with Smart Truck Systems?
Jan 16, 2026
Kinfor truck accessories encompass a wide range of aftermarket solutions designed to enhance truck performance, safety, and driver convenience. From lighting systems and cargo management solutions to protective guards and digital monitoring devices, Kinfor accessories are engineered for both commercial and personal trucks.
With the rise of smart truck systems that integrate telematics, GPS tracking, advanced driver-assistance systems (ADAS), and fleet management software, Kinfor accessories are increasingly being designed to interface seamlessly with these digital technologies, enabling optimized performance and greater operational efficiency.
Modern smart trucks rely on telematics to monitor vehicle performance, driver behavior, and maintenance schedules. Kinfor accessories, such as tire pressure monitoring systems (TPMS), cargo sensors, and auxiliary lighting, can be integrated with telematics platforms to provide real-time data to fleet managers and drivers.
For instance, TPMS sensors installed through Kinfor kits can transmit tire pressure and temperature data directly to the truck’s onboard system, alerting drivers to potential issues before they become critical. Similarly, digital cargo sensors can monitor weight distribution and load stability, feeding information into smart fleet software for enhanced safety.
Advanced Driver Assistance Systems (ADAS) utilize cameras, radar, and sensors to support braking, lane-keeping, and collision avoidance. Kinfor accessories, such as custom-mounted cameras, radar shields, and enhanced mirrors, can be calibrated to work with ADAS, ensuring that the additional equipment does not interfere with sensor functionality.
Proper integration ensures that ADAS features like adaptive cruise control, automatic emergency braking, and blind-spot detection continue to function optimally, even when additional aftermarket components are installed. This allows drivers to maintain safety standards while customizing their vehicles.
Lighting is a critical component of smart truck systems, particularly for night driving and adverse weather conditions. Kinfor LED light bars, signal lights, and auxiliary lamps can be connected to a truck’s smart lighting control modules, allowing automated activation, dimming, or synchronized signaling with other systems.
Integration with smart truck systems improves visibility, reduces driver fatigue, and enhances communication with other vehicles. For fleet operators, connected lighting systems can also log usage data, helping optimize maintenance schedules and energy consumption.
Kinfor offers cargo racks, bed extenders, and load sensors that can be integrated with smart truck systems. Digital load sensors provide real-time monitoring of cargo weight and distribution, alerting drivers and fleet managers if adjustments are required.
Connected cargo management accessories improve operational efficiency by preventing overloading, optimizing fuel consumption, and ensuring compliance with transportation regulations. In commercial fleets, integration reduces risks of cargo damage and supports route planning based on vehicle load.
Kinfor accessories can enhance performance monitoring when integrated with telematics systems. Fuel efficiency sensors, engine diagnostics modules, and tire monitoring devices feed critical information to smart dashboards and fleet management platforms.
Real-time data from Kinfor-installed accessories allows operators to detect potential issues early, schedule predictive maintenance, and reduce downtime. This integration improves overall fleet efficiency while extending vehicle lifespan and reducing operational costs.
Many Kinfor accessories now feature wireless connectivity options, including Bluetooth and Wi-Fi modules. These allow sensors, cameras, and lighting devices to communicate with mobile apps, tablets, and onboard smart displays.
Through wireless integration, drivers can monitor tire pressure, lighting status, or cargo weight from a central interface. Fleet managers can also remotely access vehicle data, receive alerts, and manage multiple trucks efficiently, creating a seamless connection between hardware and software.
Integrating Kinfor accessories with smart truck systems requires careful attention to maintenance and safety protocols. All sensors, wiring, and mounts should be regularly inspected to ensure proper functionality and prevent interference with the truck’s primary systems.
Training drivers to understand data outputs from integrated accessories, such as load alerts or tire warnings, helps prevent accidents and ensures that the benefits of smart integration are fully realized. Proper installation, calibration, and regular software updates are also essential to maintain reliable system performance.
| Accessory | Integration Capability | Operational Benefits |
| TPMS Sensors | Teaches telematics systems tire data | Enhanced tire safety, reduced downtime |
| LED Light Bars | Smart lighting control modules | Improved visibility, automated activation |
| Cargo Sensors | Integrates with load management software | Optimized load distribution, operational safety |
| Wireless Cameras | Smart ADAS and mobile apps | Enhanced blind-spot monitoring, driver convenience |
Integrating Kinfor truck accessories with smart truck systems enhances operational efficiency, safety, and driver convenience. By ensuring proper installation, calibration, and maintenance, these accessories become fully compatible with digital systems, enabling real-time monitoring, predictive maintenance, and optimized performance.
The combination of durable hardware and intelligent software creates a connected ecosystem where trucks operate more efficiently, safely, and sustainably. With continued innovation in Kinfor accessories and smart truck technologies, fleet operators and individual drivers can benefit from greater control, visibility, and operational effectiveness.

What is the function of an automatic side mirror?
Jan 06, 2026
Automatic side mirrors, also known as power side mirrors or auto-folding mirrors, are advanced components of modern vehicles that enhance safety and convenience. Unlike manual mirrors, these mirrors can adjust, fold, and react to driving conditions automatically, reducing driver effort and minimizing blind spots.
The primary functions of an automatic side mirror go beyond simple rearward visibility. They include:
Automatic side mirrors can adjust their angle based on driver settings or vehicle memory profiles. This feature allows multiple drivers to use the same car without manually reconfiguring the mirrors. Some advanced systems even adjust the mirror angle based on vehicle speed, ensuring optimal rearward visibility while reducing blind spots.
Power folding mirrors automatically fold inward when the vehicle is parked or when triggered remotely. This reduces the risk of damage from passing vehicles or pedestrians. In congested urban areas, this feature can prevent costly repairs caused by collisions with stationary objects.
Many automatic mirrors include integrated heating elements that remove frost, ice, and fog. Heated mirrors improve visibility in cold or humid conditions, reducing the need for drivers to manually clear obstructions and improving overall driving safety.
Modern automatic side mirrors are increasingly integrated with electronic safety systems to prevent accidents and enhance driver awareness.
Sensors installed within automatic side mirrors can detect vehicles in adjacent lanes. When a car enters the blind spot, the mirror provides visual or audible alerts, allowing the driver to make safer lane changes.
Some automatic mirrors feature integrated turn signal lights, improving vehicle visibility to other drivers. These signals reduce the likelihood of collisions when turning or changing lanes, particularly in low-visibility conditions.
Memory recall allows mirrors to return to preset positions automatically when different drivers use the car. This feature ensures each driver has optimal visibility immediately, reducing time spent adjusting mirrors manually.
Automatic side mirrors provide practical advantages that improve both safety and convenience for drivers.
Automatic adjustment, folding, and heating functions save drivers time. In busy environments or extreme weather conditions, these features allow for quick preparation before driving without manual intervention.
By reducing physical damage risks through power folding and alert systems, automatic mirrors help maintain vehicle aesthetics and functionality. This lowers repair costs and preserves resale value over time.
Automatic side mirrors contribute to safer driving by minimizing blind spots, improving visibility in adverse weather, and integrating with safety sensors. These features collectively reduce the likelihood of accidents during lane changes, parking, and urban driving.
Automatic side mirrors rely on several mechanical and electronic components to function effectively.
High-precision motors and actuators adjust the mirror angle and folding position. These components are engineered for durability and smooth operation, even under frequent use.
Proximity sensors, temperature sensors, and blind spot detectors provide real-time data to the mirror’s control unit. These sensors enable functions like collision avoidance alerts, automatic heating, and smart folding.
Integrated electronic control modules manage all automated functions of the mirror. They process inputs from sensors, driver settings, and vehicle systems to optimize performance and ensure safety.
The table below highlights key differences between manual and automatic side mirrors, emphasizing why automatic mirrors are increasingly standard in modern vehicles:
| Feature | Manual Mirror | Automatic Mirror |
|---|---|---|
| Adjustment | Manual | Automatic, memory recall |
| Folding | Manual | Power folding |
| Heating | Optional or not available | Integrated heating for frost removal |
| Safety Integration | Limited | Blind spot detection, turn signal integration |
| Convenience | Low | High |
Automatic side mirrors are more than just a convenience feature; they significantly enhance vehicle safety, driver comfort, and operational efficiency. Through automatic adjustment, power folding, heating, and integration with safety systems, these mirrors address blind spots, reduce accidents, and save driver effort. As automotive technology continues to evolve, automatic side mirrors will remain a key element in vehicle design and safety standards.
Are Kinfor Truck Accessories Compatible with Telematics and Fleet Management Systems?
Jan 04, 2026
Kinfor truck accessories are designed to enhance vehicle functionality, safety, and efficiency. In modern logistics and fleet operations, integrating these accessories with telematics and fleet management systems has become increasingly important. Compatibility ensures that fleet managers can monitor truck performance, driver behavior, and maintenance needs in real time while optimizing operational efficiency across large fleets.
Kinfor offers a wide range of truck accessories, including safety enhancements, cargo management solutions, driver comfort features, and electronic monitoring devices. Accessories such as tire pressure monitoring systems, GPS trackers, dashboard cameras, and advanced lighting systems are commonly used in modern fleets. These components are engineered to be compatible with various truck models while providing reliable performance under heavy-duty conditions.
The adoption of Kinfor accessories in large fleets allows for consistent standardization, easier maintenance, and improved driver satisfaction. However, their integration with digital fleet management platforms requires careful consideration of communication protocols, power requirements, and software interoperability.
Telematics systems enable fleet operators to collect, analyze, and act upon real-time data from vehicles. Key functionalities include GPS tracking, fuel consumption monitoring, engine diagnostics, driver behavior analysis, and predictive maintenance alerts. Fleet management systems often combine telematics data with scheduling, routing, and reporting tools, allowing operators to make data-driven decisions.
For truck accessories to integrate effectively, they must be compatible with standard telematics protocols such as CAN bus, OBD-II, J1939, and wireless connectivity options like Bluetooth or cellular networks. Ensuring seamless communication between Kinfor devices and fleet platforms is critical to avoid data gaps and ensure accurate reporting.
Many Kinfor accessories are designed with digital connectivity in mind. For example, GPS tracking modules can feed location and speed data directly into fleet management dashboards, while tire pressure monitoring systems alert managers to abnormal conditions in real time. Dashboard cameras and electronic logging devices can also interface with telematics software to enhance visibility and compliance.
Manufacturers provide firmware updates and API support to ensure that these devices remain compatible with popular fleet management systems. Proper installation, calibration, and configuration are necessary to ensure accurate data flow and reduce errors caused by signal interference or mismatched protocols.
Integrating Kinfor accessories with fleet management systems offers multiple benefits. First, it enhances safety by providing early warnings about mechanical issues, tire pressure anomalies, or lighting failures. Second, it improves operational efficiency by allowing real-time route optimization and vehicle monitoring. Third, it supports predictive maintenance strategies, reducing downtime and repair costs.
Additionally, integration enables detailed driver performance analysis. Telemetry data from Kinfor-installed devices can identify harsh braking, excessive idling, or speeding, allowing fleet managers to implement training programs and reward safe driving practices.
Despite the benefits, integrating truck accessories with telematics platforms presents challenges. Different vehicles and accessory models may use varying communication standards, which can cause compatibility issues. Software updates or hardware mismatches can disrupt data transmission, affecting monitoring accuracy.
To address these challenges, manufacturers and fleet operators work closely to standardize interfaces, employ middleware solutions, and provide training for installation and troubleshooting. Regular firmware updates, API documentation, and support services are crucial to maintaining long-term compatibility and reliable system performance.
| Feature | Without Integration | With Kinfor Integration |
| Real-Time Monitoring | Limited or manual checks | Immediate alerts from accessories |
| Safety Alerts | Reactive only | Proactive notifications for issues |
| Operational Efficiency | Dependent on manual logs | Optimized routing and fuel management |
| Maintenance | Scheduled by time only | Predictive and condition-based maintenance |
| Driver Performance | Limited oversight | Data-driven performance evaluation |
Kinfor truck accessories are increasingly compatible with telematics and fleet management systems, providing fleet operators with actionable data, improved safety, and enhanced efficiency. Through careful design, standardized communication protocols, and ongoing support, these accessories integrate seamlessly into modern fleet operations. Proper integration ensures that fleet managers can monitor vehicle health, optimize performance, and make informed decisions to reduce costs, increase productivity, and enhance driver and cargo safety.
 How Do Car Floor Mats Improve Driving Comfort and Safety?
Dec 24, 2025
Car floor mats are often viewed as simple interior accessories, but their impact on driving comfort and safety is far more significant than many drivers realize. Positioned directly beneath the driver and passengers, floor mats interact constantly with footwear, pedals, and cabin surfaces. Their design, material, and fit can influence posture, foot stability, cabin cleanliness, and overall driving confidence.
In modern vehicles, where comfort and safety standards continue to rise, car floor mats are engineered to serve functional purposes beyond aesthetics. From reducing driver fatigue to preventing pedal interference, they play a quiet yet essential role in everyday driving conditions.
Comfort during driving is closely tied to how naturally and securely a driver can position their feet. High-quality car floor mats are designed to provide a stable, cushioned surface that reduces strain during long periods behind the wheel.
Many premium car floor mats incorporate layered materials such as rubber backing combined with textile or foam layers. These layers absorb vibrations from the road, reducing the amount of shock transferred through the vehicle floor to the driver’s legs and feet. Over time, this cushioning effect can noticeably reduce fatigue, especially during long-distance or stop-and-go driving.
A well-fitted mat contours to the vehicle’s footwell, allowing drivers to rest their feet naturally without slipping. This consistent positioning supports better posture and reduces unnecessary muscle tension, contributing to a more relaxed driving experience.
Safety begins with control, and car floor mats directly affect how securely a driver can operate the pedals. Poorly designed or ill-fitting mats can slide, bunch up, or interfere with pedal movement, creating serious safety risks.
Modern car floor mats often feature anti-slip backing materials or factory-compatible anchoring points. These systems keep the mat firmly in place, preventing unexpected movement underfoot. Stable mats ensure consistent pedal engagement and reduce the risk of delayed braking or acceleration.
A clean driving environment contributes directly to comfort and indirectly to safety. Dirt, water, mud, and debris brought in on shoes can accumulate on the vehicle floor, creating slippery surfaces and unpleasant odors. Car floor mats act as the first line of defense against these elements.
All-weather car floor mats are designed with raised edges and textured surfaces that trap liquids and debris. By containing moisture, these mats prevent water from spreading across the cabin floor, reducing slip hazards and protecting underlying carpet materials.
Removable mats simplify interior maintenance. Instead of deep-cleaning fixed carpets, drivers can quickly remove and wash mats, keeping the cabin fresh and hygienic. A cleaner interior enhances comfort and reduces distractions caused by odors or clutter.
Worn or damaged vehicle flooring can negatively affect both comfort and resale value. Car floor mats shield original carpets from abrasion, stains, and long-term wear caused by constant foot traffic.
| Protection Feature | Comfort and Safety Benefit |
| Wear Resistance | Maintains even floor surface |
| Stain Prevention | Keeps cabin visually clean |
| Moisture Barrier | Prevents odor and mold buildup |
By preserving the original flooring, mats help maintain a consistent and comfortable footwell surface throughout the vehicle’s lifespan.
Different car floor mat materials offer varying levels of comfort and safety. Choosing the right material depends on driving habits, climate, and personal preferences.
Rubber mats excel in wet or muddy conditions. Their textured surfaces enhance grip, while their waterproof nature keeps the footwell dry. These mats are particularly effective in regions with frequent rain or snow.
Carpeted mats provide a softer feel underfoot and contribute to a quieter, more refined cabin environment. Hybrid designs combine carpet comfort with rubber backing, offering a balance between luxury and practicality.
Discomfort and instability can subtly distract drivers over time. Slipping feet, uneven surfaces, or damp flooring can draw attention away from the road. Car floor mats help eliminate these minor but cumulative distractions.
By providing a stable, comfortable base for foot movement, mats allow drivers to focus fully on steering, traffic conditions, and situational awareness. This improved focus contributes directly to safer driving outcomes.
Custom-fit car floor mats are designed to match specific vehicle models, ensuring full coverage without excess material. This precise fit enhances both comfort and safety by eliminating loose edges or folds.
Custom-fit mats are particularly valuable for drivers who prioritize predictable pedal operation and a refined interior driving environment.
Car floor mats may appear to be a minor detail, but their contribution to driving comfort and safety is substantial. From improving foot stability and pedal control to maintaining cleanliness and reducing fatigue, they influence the driving experience in practical and measurable ways.
As vehicles become more refined and drivers spend more time on the road, the role of well-designed car floor mats continues to grow. By choosing the right mats, drivers can enhance both everyday comfort and overall safety, making each journey smoother, cleaner, and more controlled.



+86-0571-26238568

Kangxin Road, Tangqi Town, Linping District, Hangzhou , Zhejiang , China






 English
 中文简体
中文简体
 русский
 Español
